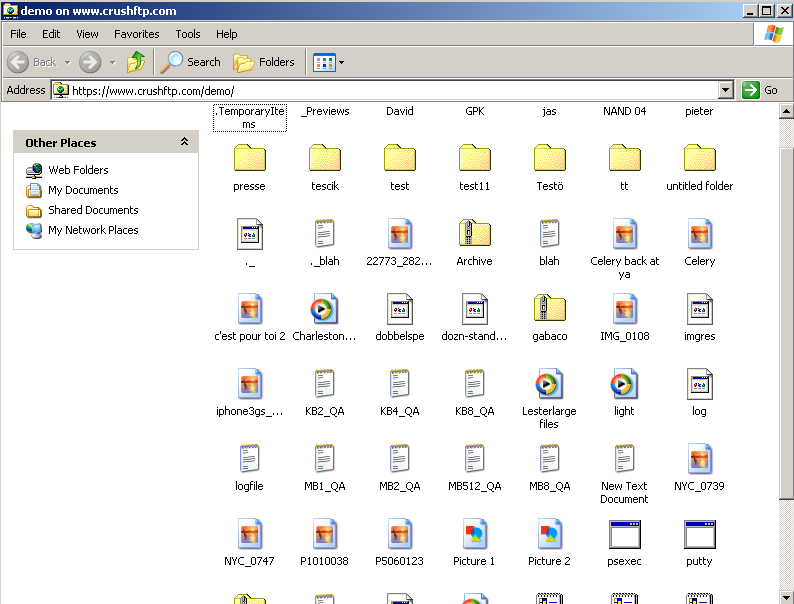
WebDAV#
OS X WebDAV (scroll down for Windows example)
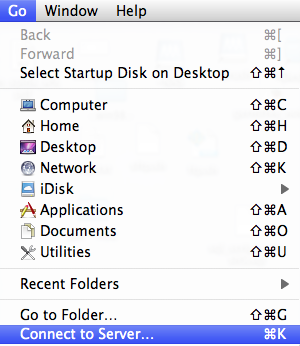
From the Finder's "Go" menu, Select the bottom item "Connect to Server..." or just press CMD-K.
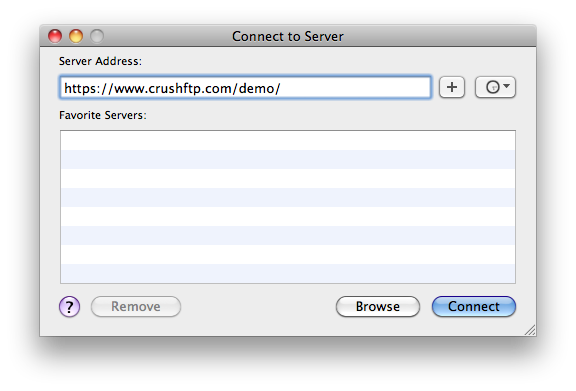
Enter in the URL to the server, and click "Connect".
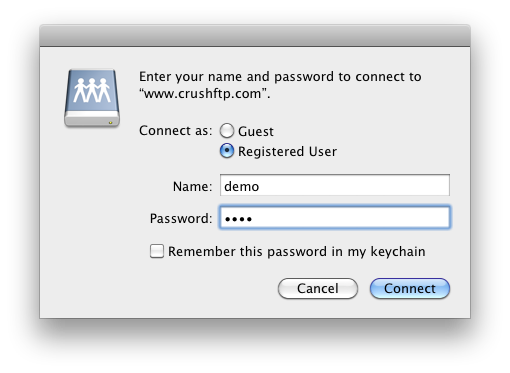
Enter in your credentials for the server. (In this example the username and password is "demo".)
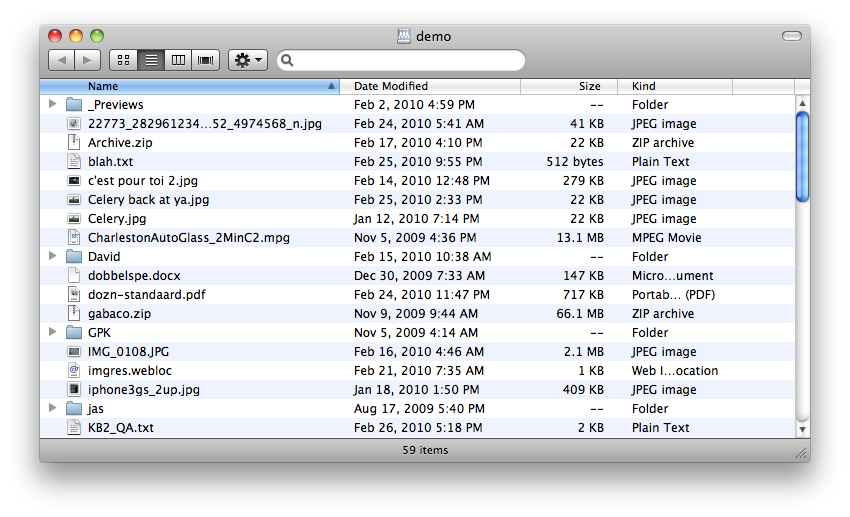
You will then have a directory listings of the WebDAV connection.
Windows WebDAV
(Windows 7 and Vista may need to be adjusted slightly if you want to do WebDAV to a non trusted SSL certificate, or not using SSL at all. http://support.microsoft.com/kb/2123563 or http://support.microsoft.com/kb/841215)
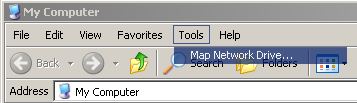
From the "Tools" menu of an explorer window, select "Map Network Drive..."
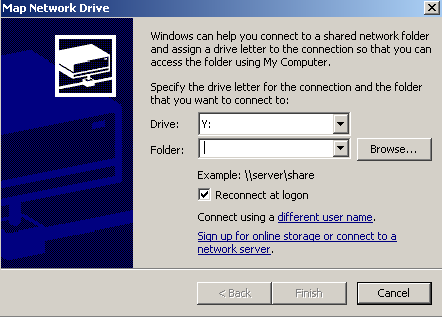
Next, select the bottom blue underlined link for connecting to a network server.
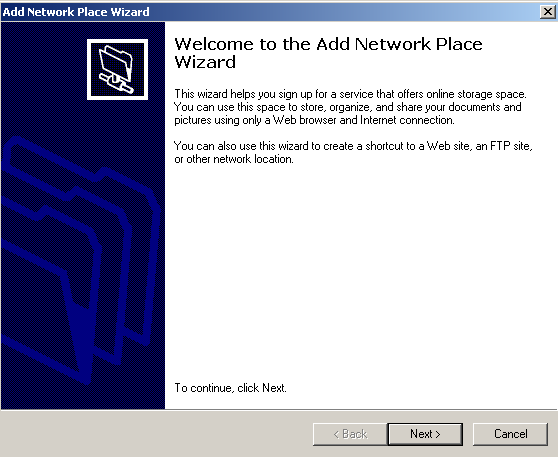
A wizard window will open up. Click "Next".
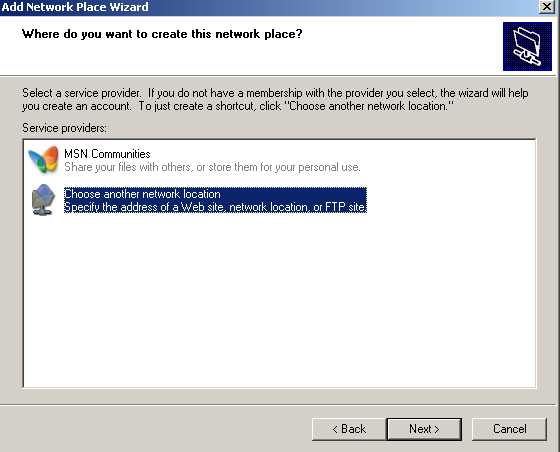
Select the choose another network location.
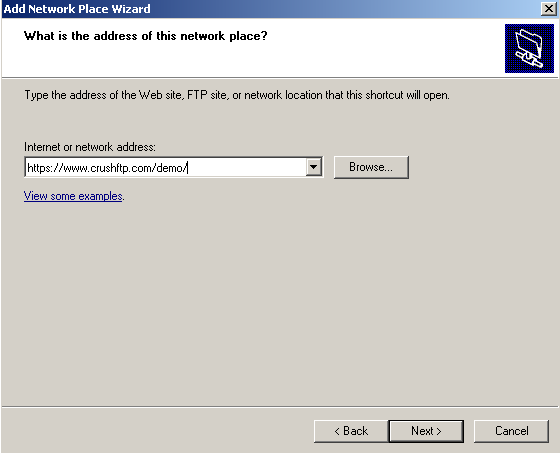
Type in the URL for the WebDAV server.
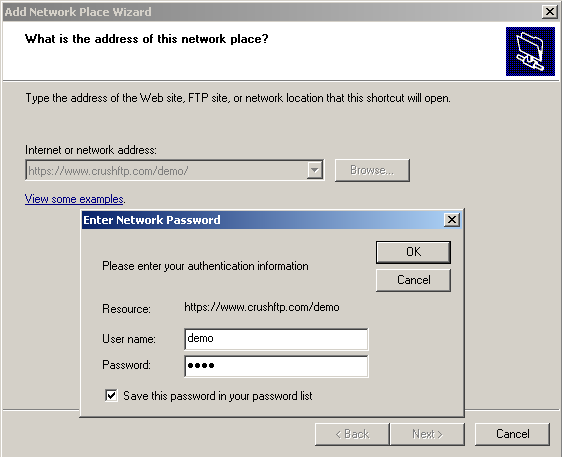
Click "Next". You will then be prompted for login credentials. Enter them. (This example uses demo for the username and password.)
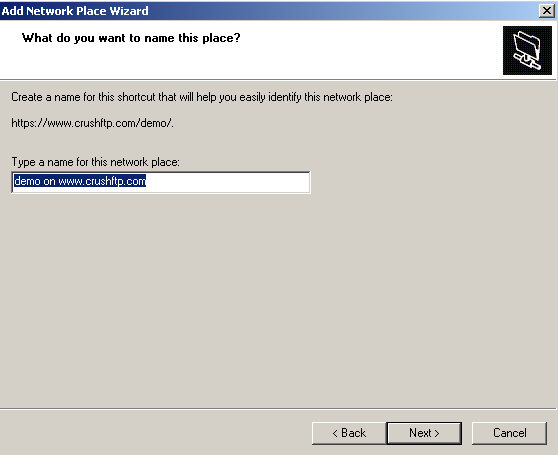
You will now be asked to name this new connection. Enter a meaningful name, or use the default one Windows gives you.
The directory listings for the WebDAV connection should now appear. You may have to login again one more time.