One-click upload and notify a contact about it#
This example is not exclusively a CrushTask scenario but it is using the same among others.
This scenario allows the admin to provide a link on the login page for the visitor to click on, upload a file and select a contact person from the list (maybe who invited the visitor to this site) to be notified about the upload. The user doesn't need to enter credentials. Each upload will have an automatically created subfolder in a specific folder, using the HomeDirectory feature triggered by an Event. CrushFTP will automatically send an email to the selected contact, using a webinterface Form and another notification Event.
The prerequisite of the email notification is a working SMTP relay on Preferences -> General Settings -> SMTP section.
1. Custom Form.#
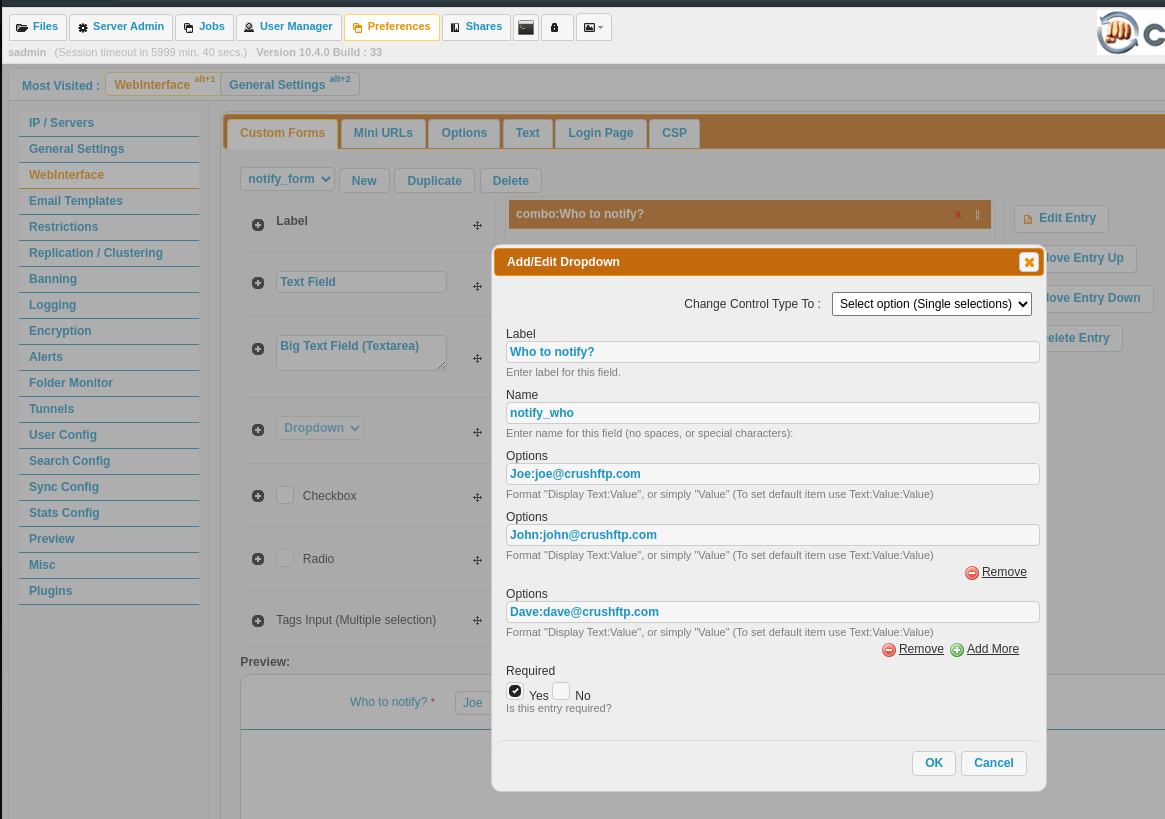
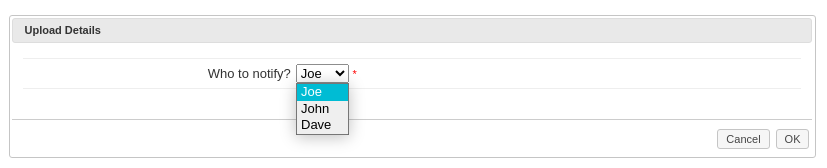
This custom form is similar to the one used in Self Registration. On Preferences, Webinterface, Custom Forms page create a new form, ours is called notify_form. Add (drag it or use the + sign in front) a single Dropdown to the right side and customize it as follows: Label: arbitrary, we used Who to notify?Name: notify_who . This cannot have a space in it and will be used later at the notification event as a variable.
Options: add email addresses as different options here. The first part before the : is the alias, and the second part is the value. This syntax is not obligatory, you can simply enter the email address in the field and that will be displayed and used.
Required: Yes
Save the form.
2. User#
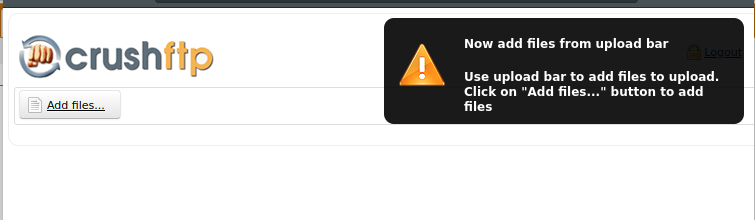
We need to create a user in User Manager. For simplicity's sake, both Username and Password will be upload. This is important later when building the link for the visitors.2.1 Upload-only interface.#
In User Manager, Quick Jump go to Webinterface. Enable the Available Customizations section by putting a checkmark in front of the section. Filter to Upload Only on the left side and double-click on the Upload Only Window option. Set its value to True. Save the user.2.2 Applying the form for the user#
Scroll down in the user's Webinterface section to the Forms, enable this with the checkmark in front of it, and select the notify_form. Save the user.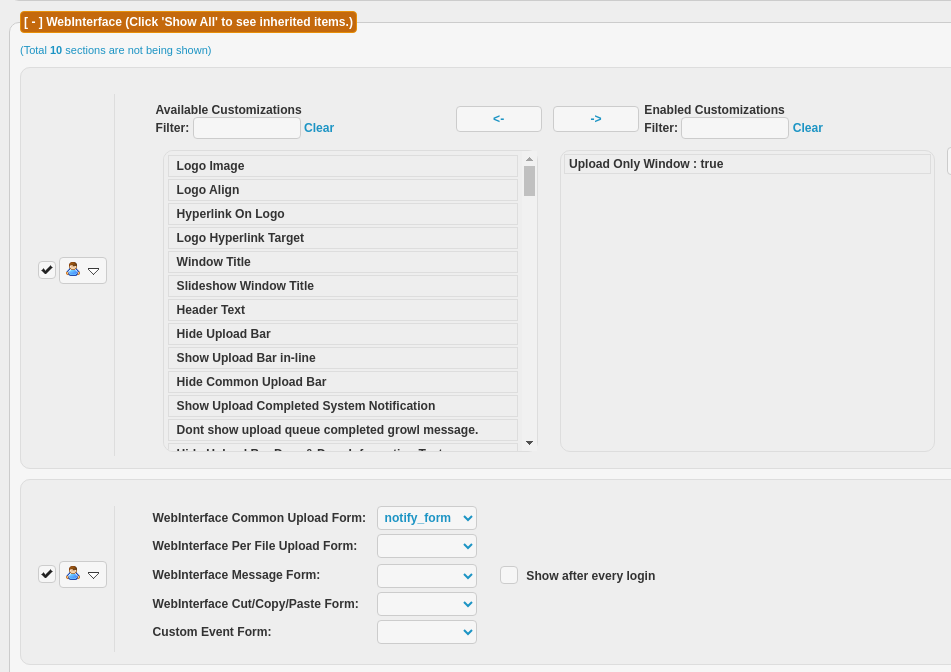
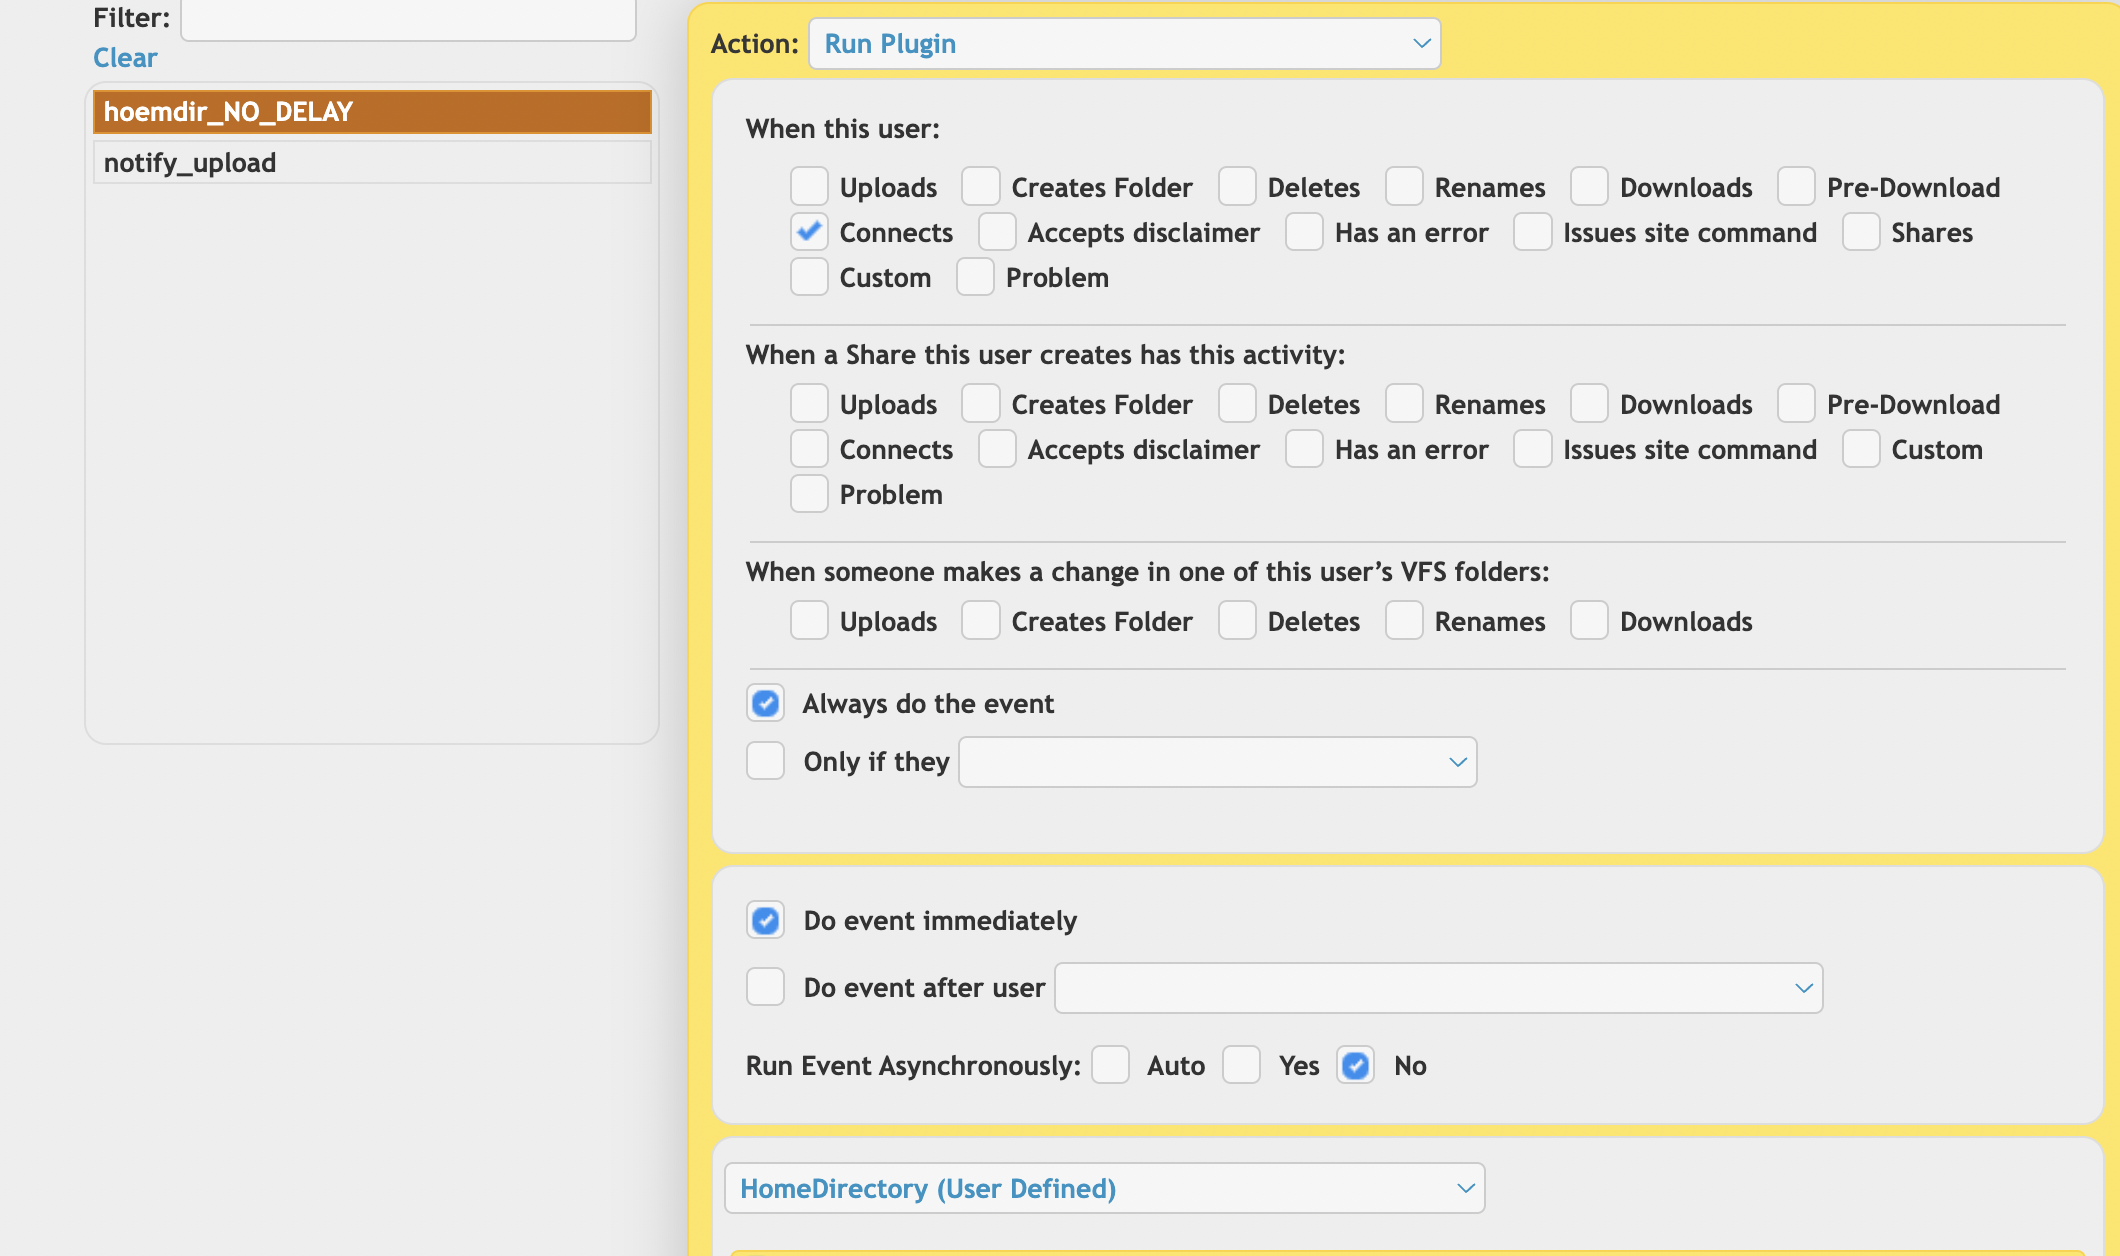
2.3. HomeDirectory Event.#
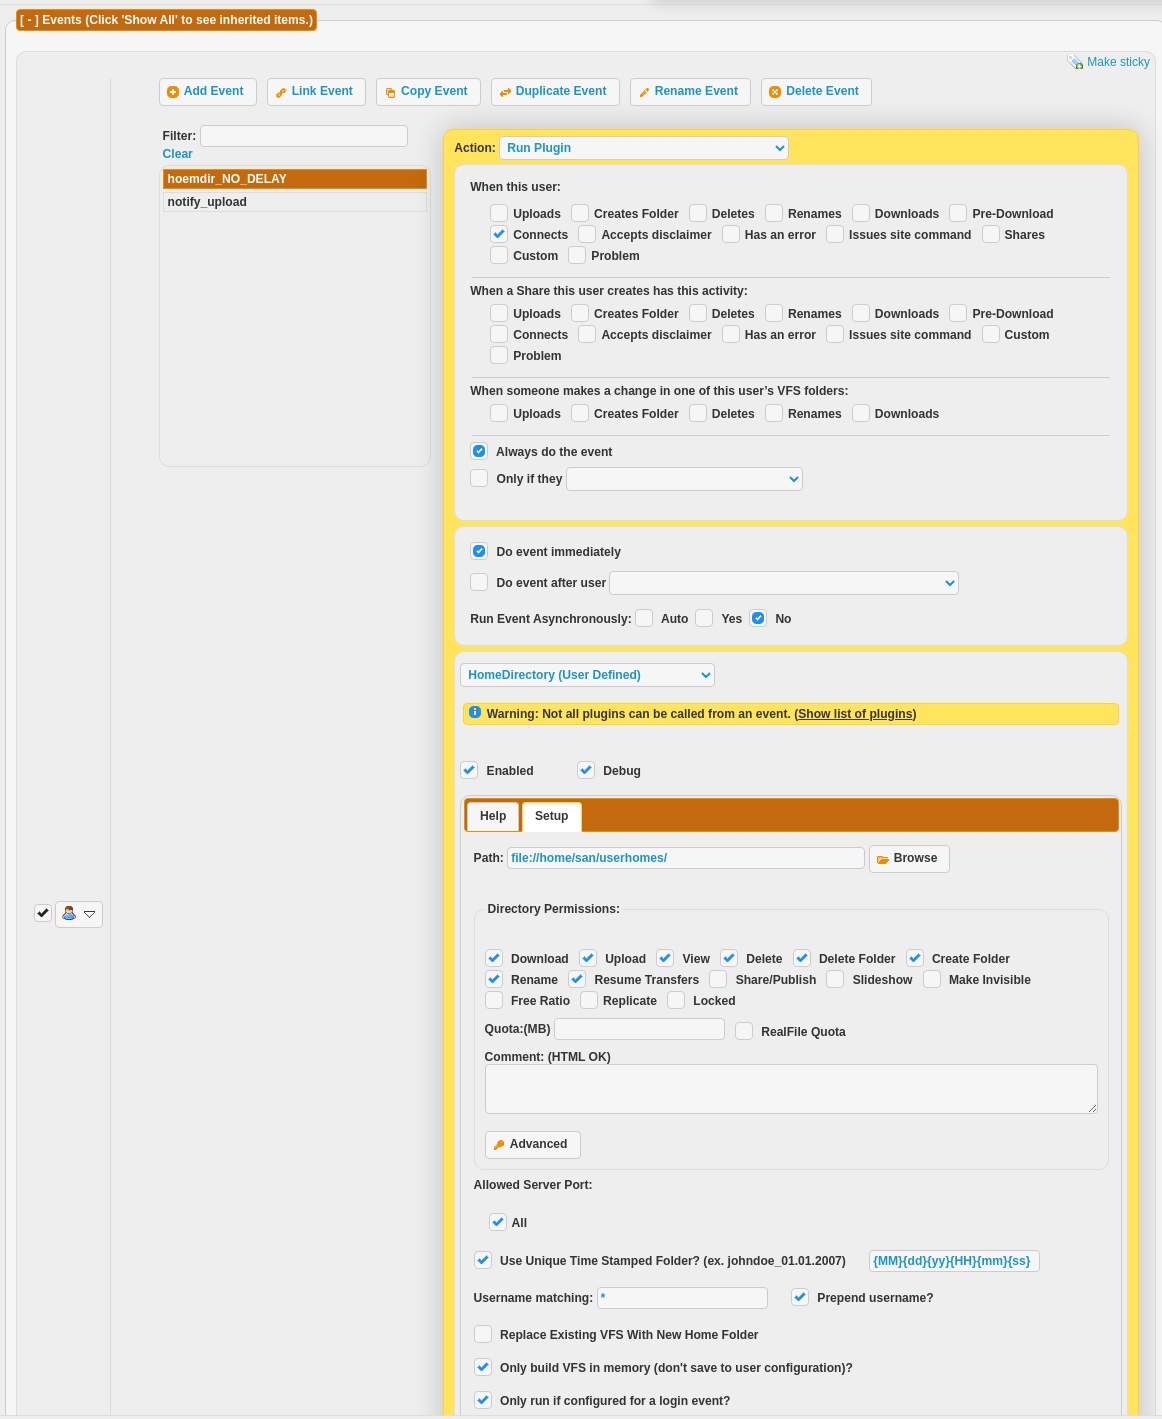
We need to create an event for this user. In Quick Jump go to Events. Create a new event (we called ours homedir_NO_DELAY)as follows:Action type: Run Plugin
The event is triggered when the use Connects
"Always do the event" -enabled
"Do event immediately" - enabled.
In the Plugin selector, we select the HomeDirectory (User Defined) plugin.
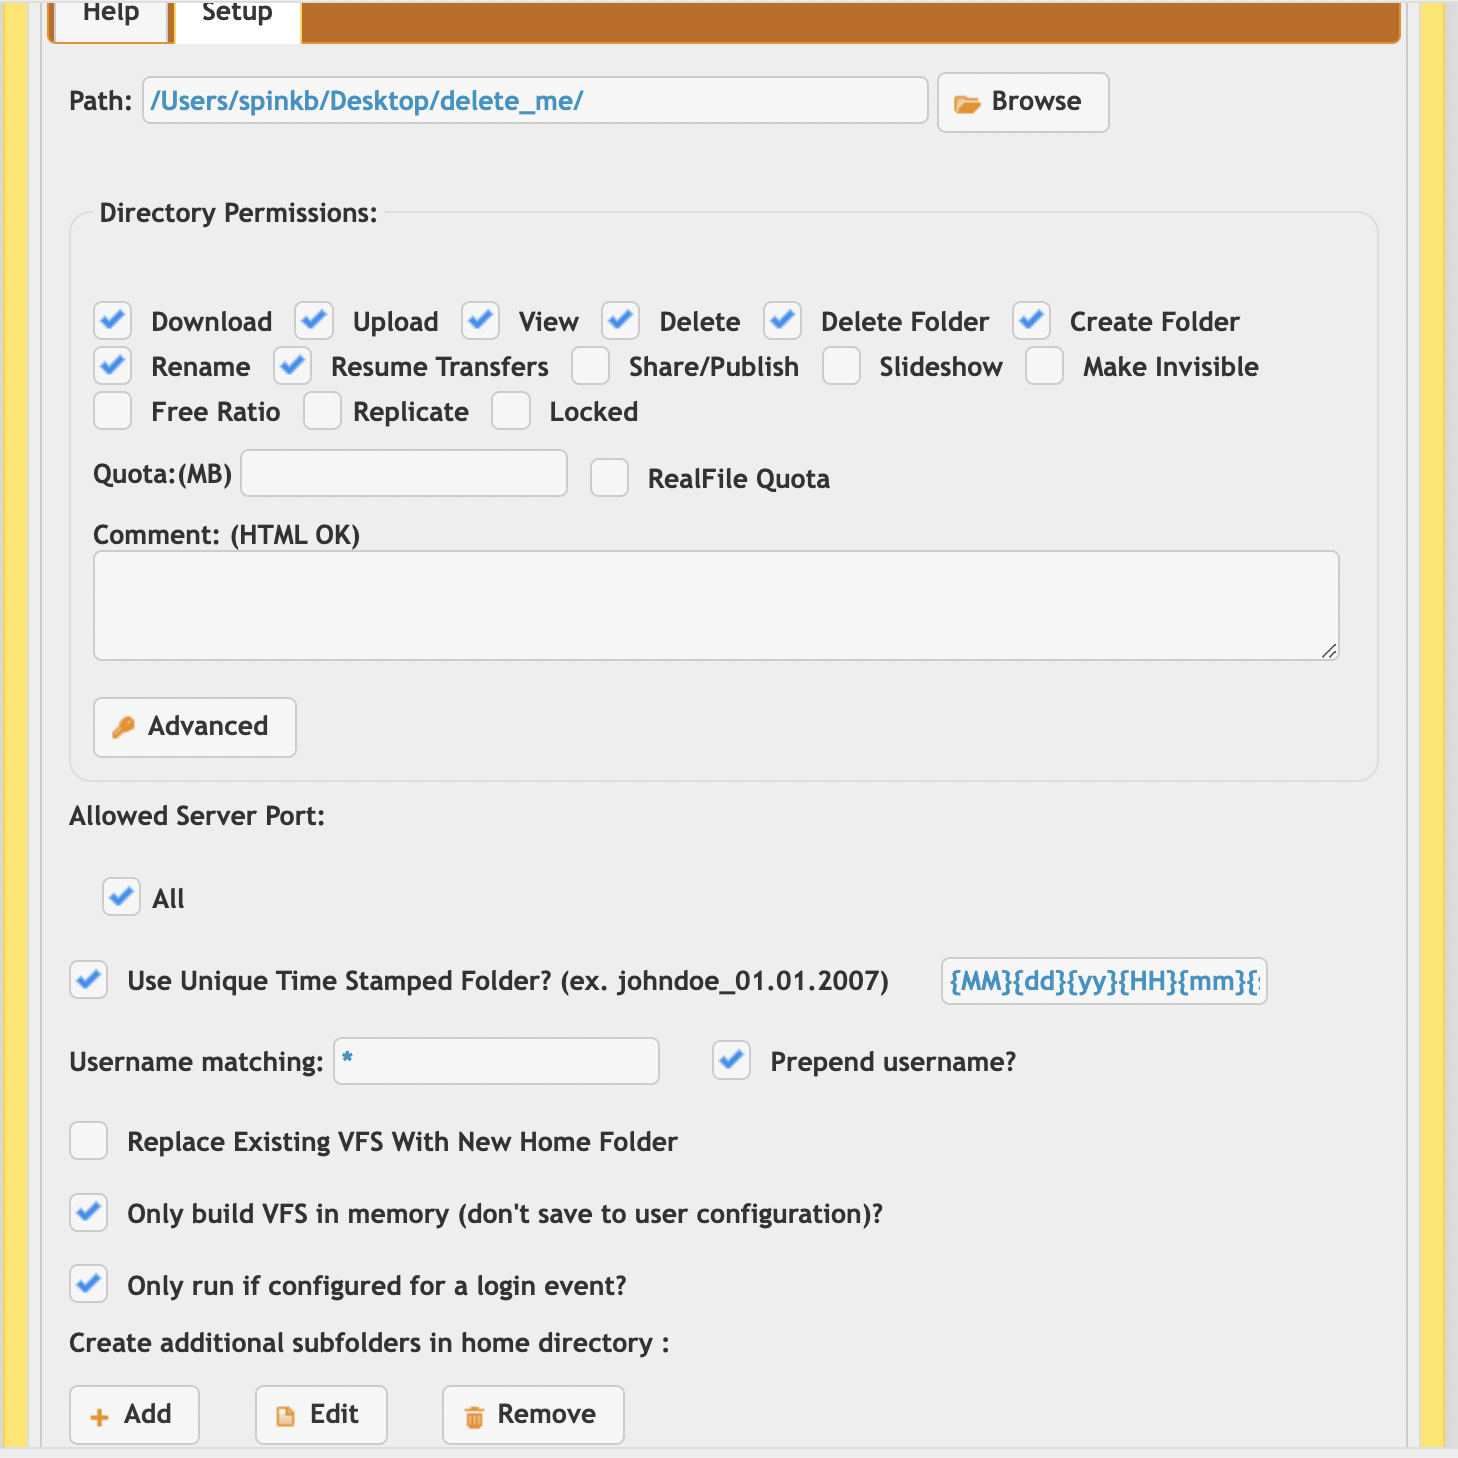
At the plugin config, the Path field needs to define a directory that will be the root of the upload folders.
Set up the Directory Permissions as you wish, Upload, and Resume Transfers are essential, but you might want to enable the Create Folder too. These types of "anonymous" users won't see each other's data.
Allowed Server Port: All
Use Unique Time Stamped Folder option enabled, variable sequence:
{MM}{dd}{yy}{HH}{mm}{ss}
Username matching: *
Only build VFS in memory - enabled
Only run if configured for a login event - enabled
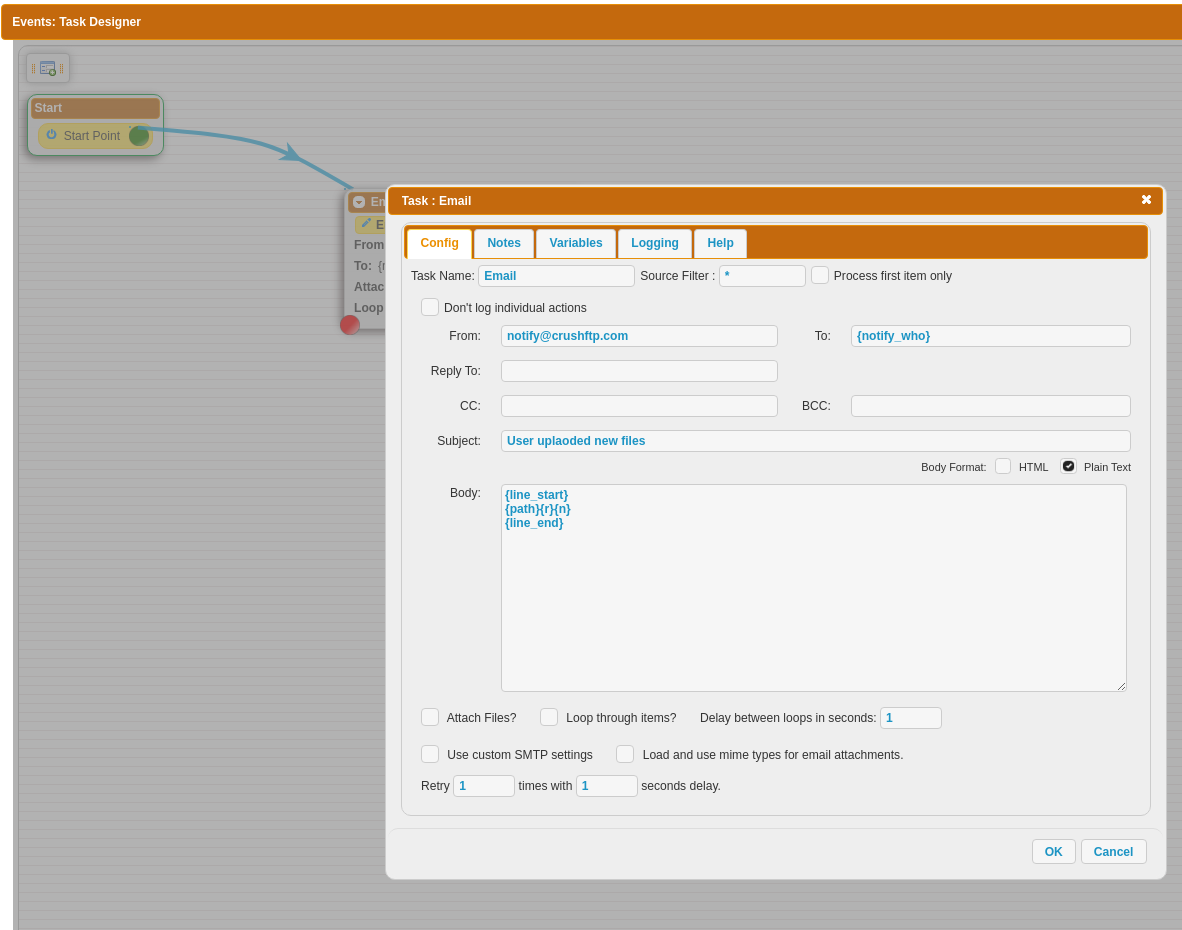
2.4 Email notification event#
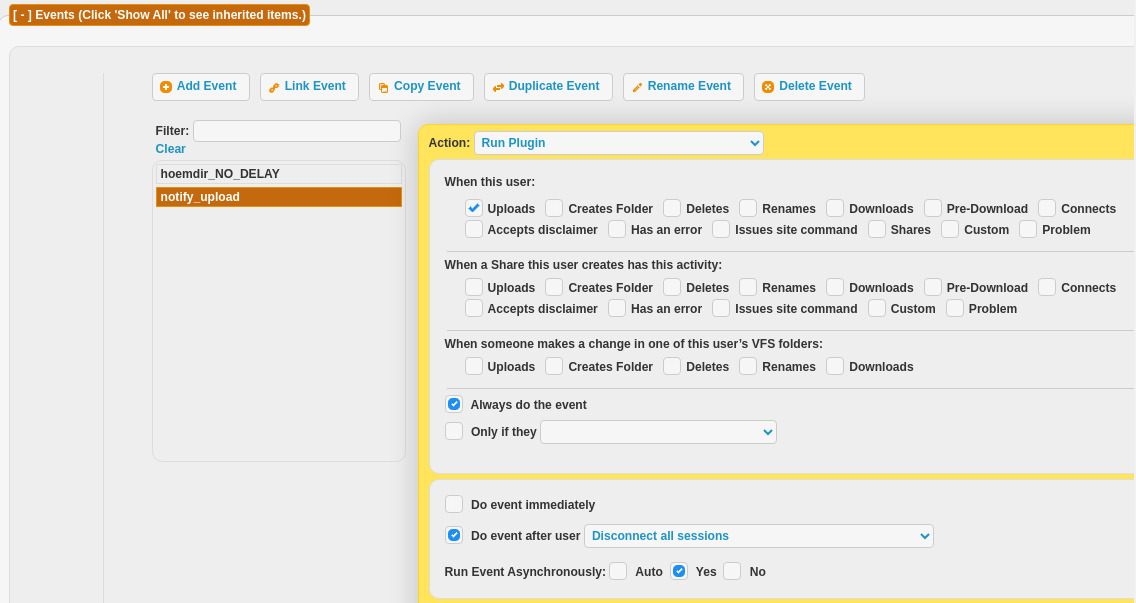
Similarly to the previous event, we need to create a new one for sending the email notification to the selected contact person. Configure the event the following way:Action: Run Plugin
When this user: Uploads
Always do the event
Do event after user: Disconnects all sessions
CrushTask (User Defined)
Then create an Email task. The recipient field (To: ) will use the Name from the form as a variable: {notify_who}
In the email body can use these variables:
{line_start}
{path}{r}{n}
{line_end}
This variable sequence enlists all uploaded file paths in new lines.
3. Hyperlink to the Login page#
On Preferences -> Webinterface -> Login page, Header or Footer field, insert a hyperlink containing the domain name or IP of the server and the credentials for the upload user like this: https://yourserver.com/?u=upload&p=upload Switch to the HTML editor if you want to customize the link text like this: <a href="https://yourserver.com/?u=upload&p=upload">UPLOAD ONLY</a>

A possible result:
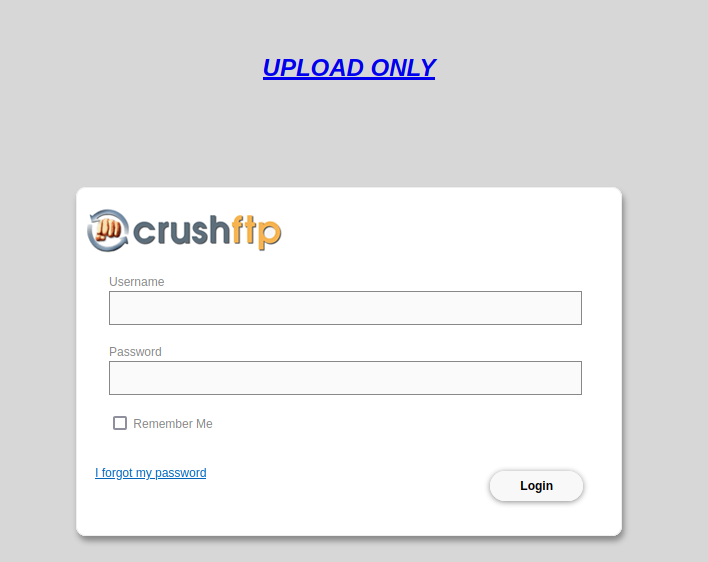
Naturally, you can customize the link's appearance forward, this is just a simple draft.
Add new attachment
List of attachments
| Kind | Attachment Name | Size | Version | Date Modified | Author | Change note |
|---|---|---|---|---|---|---|
png |
form.png | 113.7 kB | 2 | 12-Jul-2023 16:12 | Sandor | |
png |
homedir.png | 138.1 kB | 1 | 12-Jul-2023 16:12 | Sandor | |
png |
homedir1.png | 849.2 kB | 1 | 12-Jul-2023 15:54 | Sandor | |
png |
homedir2.png | 795.2 kB | 1 | 12-Jul-2023 15:54 | Sandor | |
png |
link1.png | 8.6 kB | 1 | 12-Jul-2023 15:54 | Sandor | |
png |
link2.png | 3.7 kB | 1 | 12-Jul-2023 15:54 | Sandor | |
png |
notify1.png | 64.0 kB | 2 | 12-Jul-2023 16:13 | Sandor | |
png |
notify2.png | 71.6 kB | 2 | 12-Jul-2023 16:13 | Sandor | |
png |
result.png | 25.0 kB | 1 | 12-Jul-2023 16:21 | Sandor | |
png |
result2.png | 23.0 kB | 1 | 12-Jul-2023 16:21 | Sandor | |
png |
result3.png | 9.3 kB | 1 | 13-Jul-2023 00:03 | Sandor | |
png |
webinterface_customizations.pn... | 62.6 kB | 2 | 12-Jul-2023 16:13 | Sandor |

- WebInterface
- Server Admin
- User Manager
- Client Apps
- CrushBalance Load Balancer
- High Availability
- Self Registration
- Preferences
- Email Templates
- Restrictions
- Replication
- Banning
- Logging
- Encryption
- Alerts
- Folder Monitor
- Tunnels
- Syncs
- User Config
- Search Config
- Preview
- Misc
- Plugins
- FAQ
- API
- Linux Install
- Virtual Linux Server
- Server Variables
- Google Authenticator and Microsoft Authenticator