| At line 1 changed one line |
| Here are example commands for generating your own Certificate Authority, and signing your own keys to distribute to end users. |
| !!!Generic method using openSSL command line tools |
| At line 3 changed 2 lines |
| {{{ |
| openssl req -newkey rsa:512 -nodes -out ca.csr -keyout ca.key |
| Here are example commands for generating your own Certificate Authority, and signing your own keys to distribute to end users. This tool may help as its graphical instead of command line: http://xca.sourceforge.net/ |
| At line 5 added 17 lines |
| {{{ |
| openssl req -newkey rsa:4096 -nodes -out ca.csr -keyout ca.key |
| }}} |
| Fill in the questions. Use relevant data, but this information is only for you. |
| {{{ |
| Country Name (2 letter code) [AU]:US |
| State or Province Name (full name) [Some-State]:Texas |
| Locality Name (eg, city) []:Dallas |
| Organization Name (eg, company) [Internet Widgits Pty Ltd]:CrushFTP |
| Organizational Unit Name (eg, section) []:Development |
| Common Name (eg, YOUR name) []:www.domain.com |
| Email Address []:ben@crushftp.com |
| A challenge password []: |
| An optional company name []: |
| }}} |
| Now we get our private key for signing. |
| {{{ |
| At line 8 changed 8 lines |
| keytool -genkey -alias crushftp -keyalg RSA -keysize 512 -keystore crush.keystore -storepass password |
|
| keytool -certreq -keyalg RSA -alias crushftp -file crushftp.csr -keystore crush.keystore -storepass password |
| openssl x509 -CA ca.pem -CAkey ca.key -CAserial ca.srl -req -in crushftp.csr -out crushftp.crt -days 365 |
| keytool -import -alias crushftp_ca -keystore crush.keystore -trustcacerts -file ca.pem -storepass password |
|
| keytool -import -alias crushftp -keystore crush.keystore -file crushftp.crt -storepass password |
|
| }}} |
| And finally, we import the public key for our signing into our trust store so we can validate all signed keys user's submit. This files name "crush.keystore_trust" is specific. It must be in the same folder as the real keystore file for the server port, and must have the exact same name and password, except its name ends with "_trust". So in this case we expect to have a keystore named "crush.keystore". |
| {{{ |
| At line 28 added 8 lines |
| }}} |
| ----\\ |
| \\ |
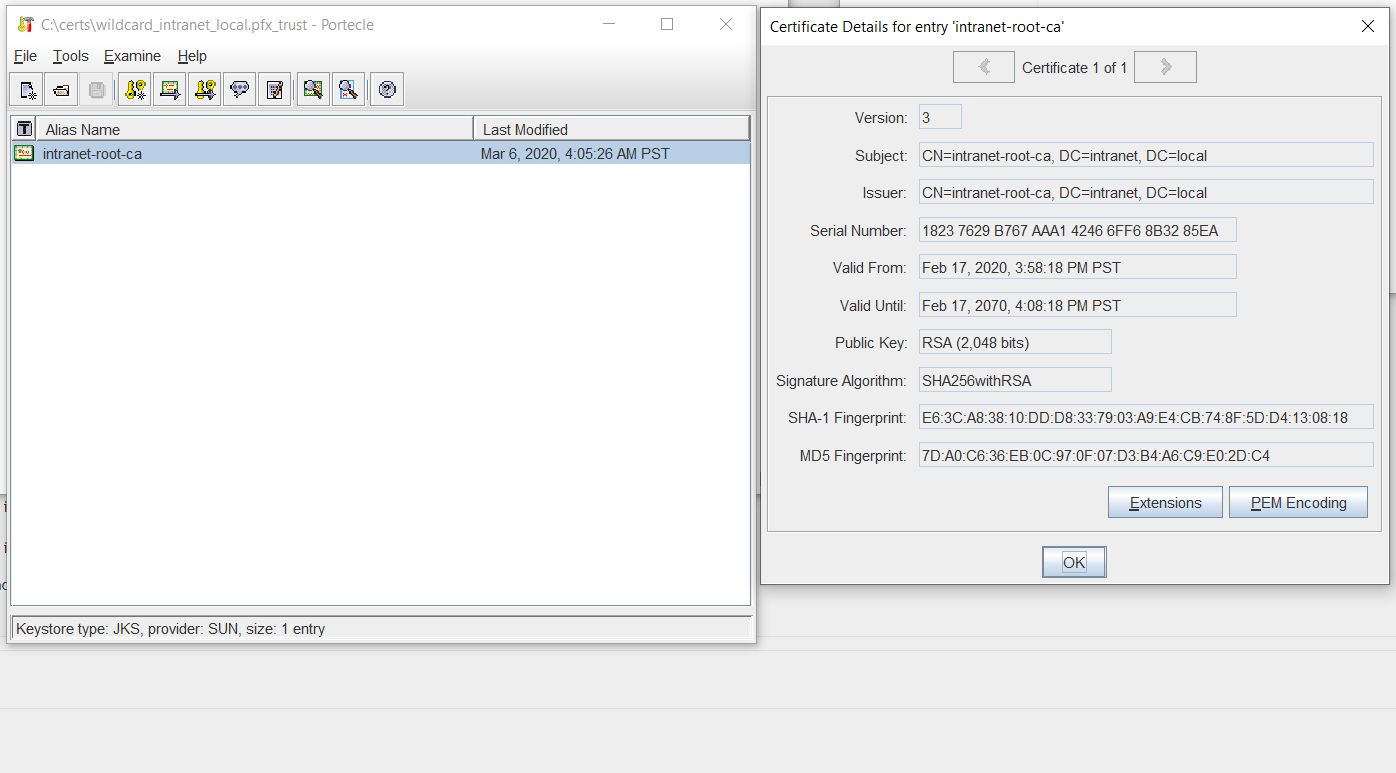
| Server side truststore listed with Portecle |
| [{Image src='Clipboard03.jpg' width='80%' height='60%' align='left|center|right' style='..' class='..' }]\\ |
| \\ |
| ----\\ |
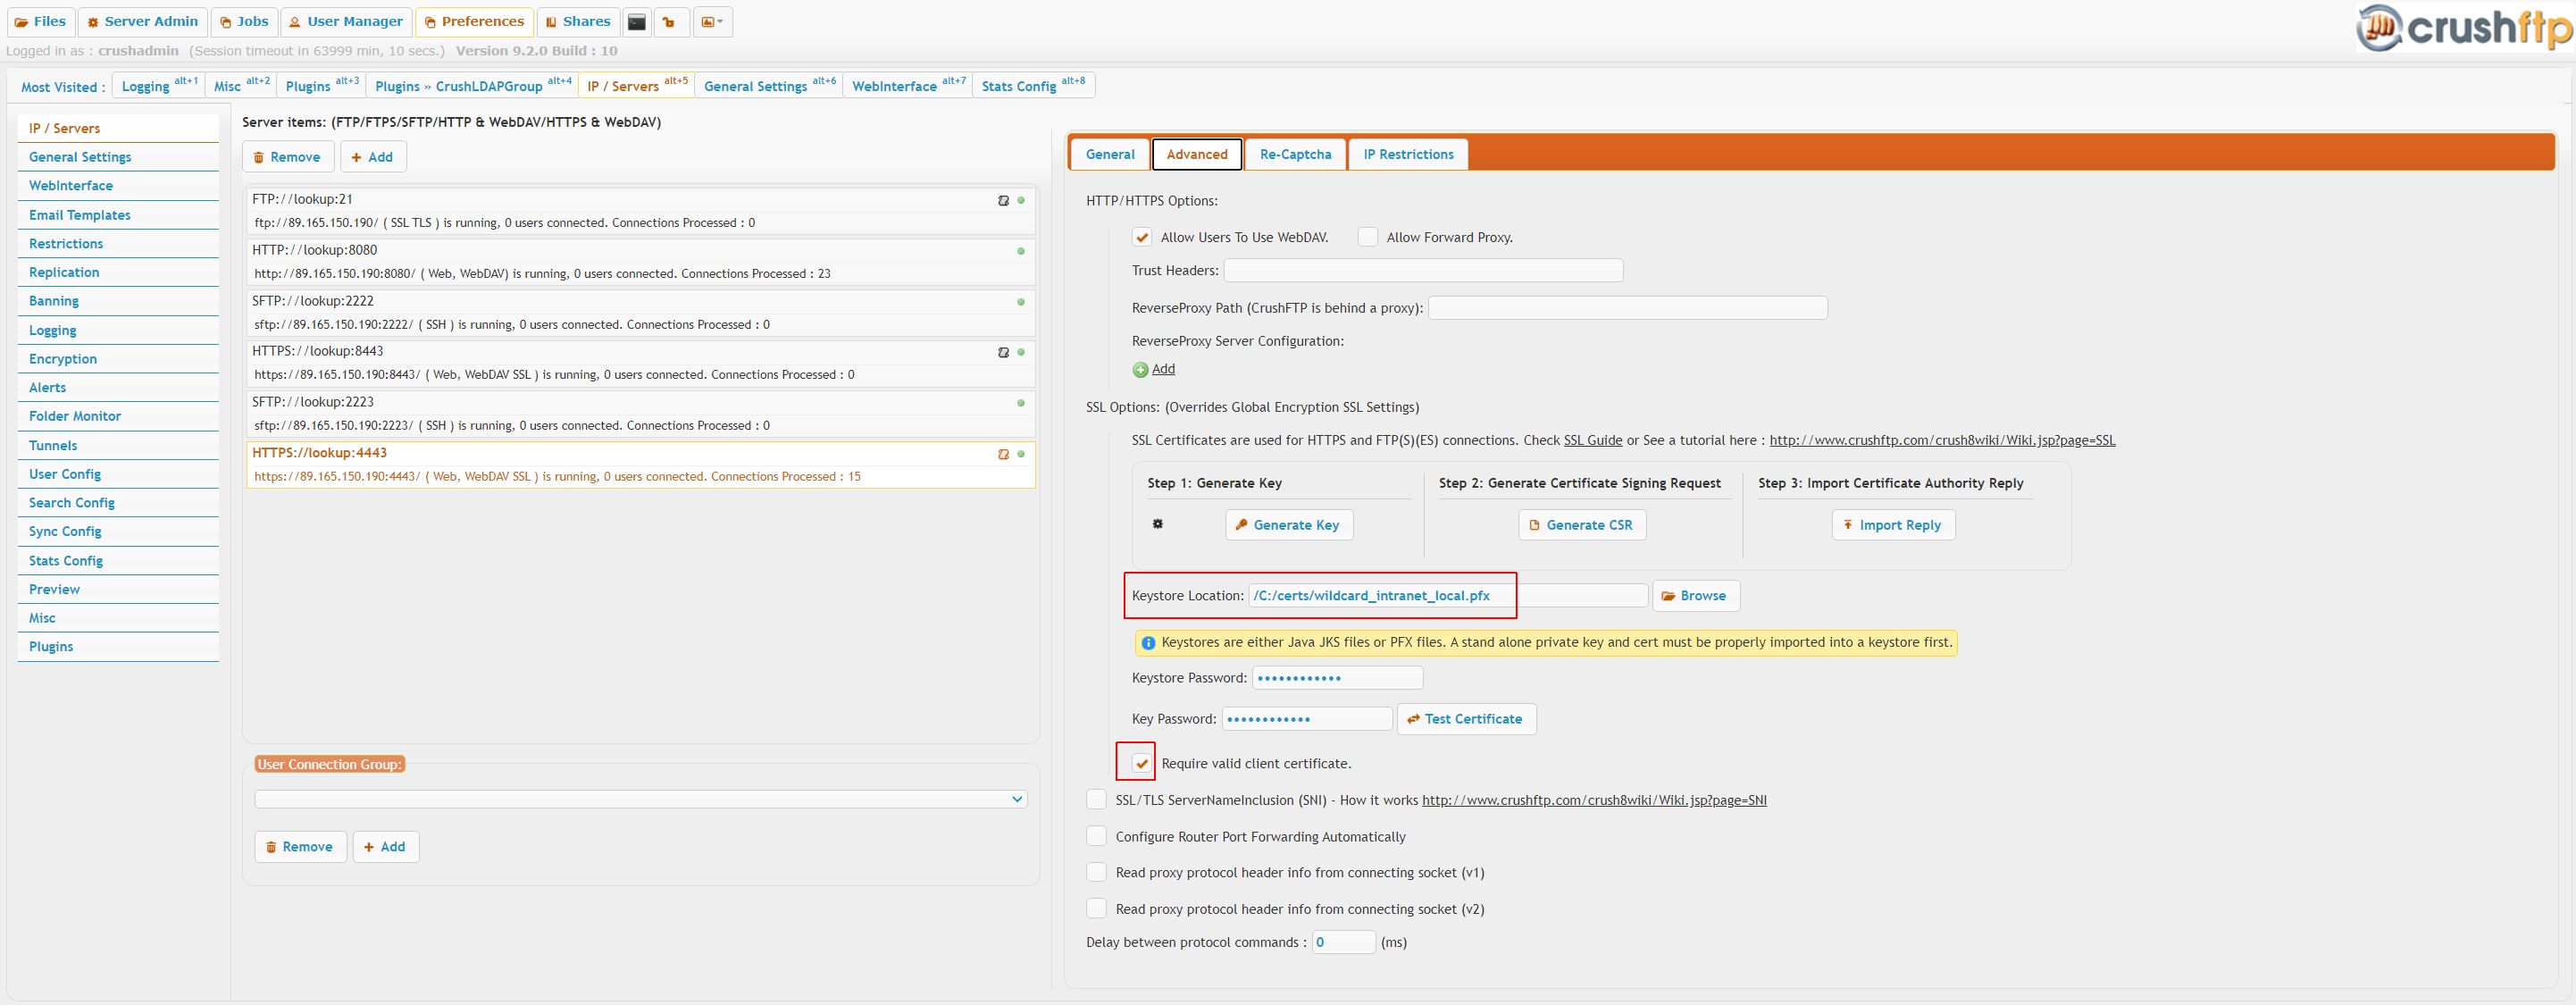
| Config visuals, the port settings for client cert auth\\ |
| At line 18 changed one line |
| openssl req -newkey rsa:512 -nodes -out myuser.req -keyout myuser.key |
| [{Image src='Clipboard01.jpg' width='80%' height='60%' align='left|center|right' style='..' class='..' }]\\ |
| \\ |
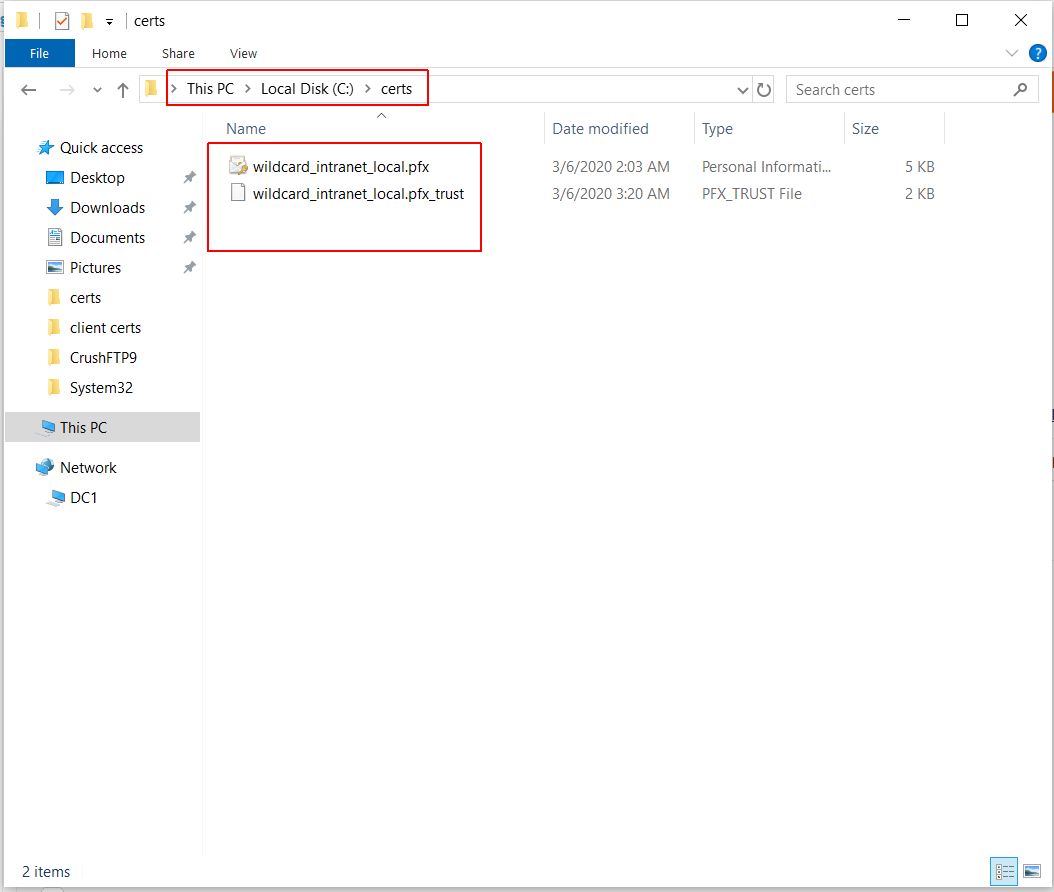
| Server side cert store and trust store in same directory |
| [{Image src='Clipboard02.jpg' width='80%' height='60%' align='left|center|right' style='..' class='..' }] |
| At line 20 changed 2 lines |
| openssl x509 -CA ca.pem -CAkey ca.key -CAserial ca.srl -req -in myuser.req -out myuser.pem -days 365 |
| openssl pkcs12 -export -clcerts -in myuser.pem -inkey myuser.key -out myuser.p12 -name "myuser_certificate" |
| Now from here on, we just generate new signed certs for your clients. The key part is to set their username to be "NOLOGIN_myuser" if you want to force them to still enter a user/pass. Otherwise if you set their common name to a valid username, they will be able to login without a user/pass. |
| {{{ |
| openssl req -newkey rsa:4096 -nodes -out myuser.req -keyout myuser.key |
| At line 23 changed 2 lines |
|
| Now from here on, I just generate new signed certs for my clients: (making sure I give them valid common names that match usernames in CrushFTP.) |
| Fill in the information on this client's key you are building. Note that the Common Name must be the username of the client, or "NOLOGIN_" and anything else. |
| At line 26 changed 2 lines |
| openssl req -newkey rsa:512 -nodes -out myuser.req -keyout myuser.key |
|
| Country Name (2 letter code) [AU]:US |
| State or Province Name (full name) [Some-State]:Texas |
| Locality Name (eg, city) []:Ft. Worth |
| Organization Name (eg, company) [Internet Widgits Pty Ltd]:CrushFTP |
| Organizational Unit Name (eg, section) []:Development |
| Common Name (eg, YOUR name) []:myuser |
| Email Address []:ben@crushftp.com |
| A challenge password []: |
| An optional company name []: |
| }}} |
| Now we build the "myuser.p12" file that we need. This is what we will distribute to the end user for them to add to their browser to allow them access. |
| {{{ |
| At line 63 added 25 lines |
|
|
| !!!Using Microsoft AD Certification Services |
|
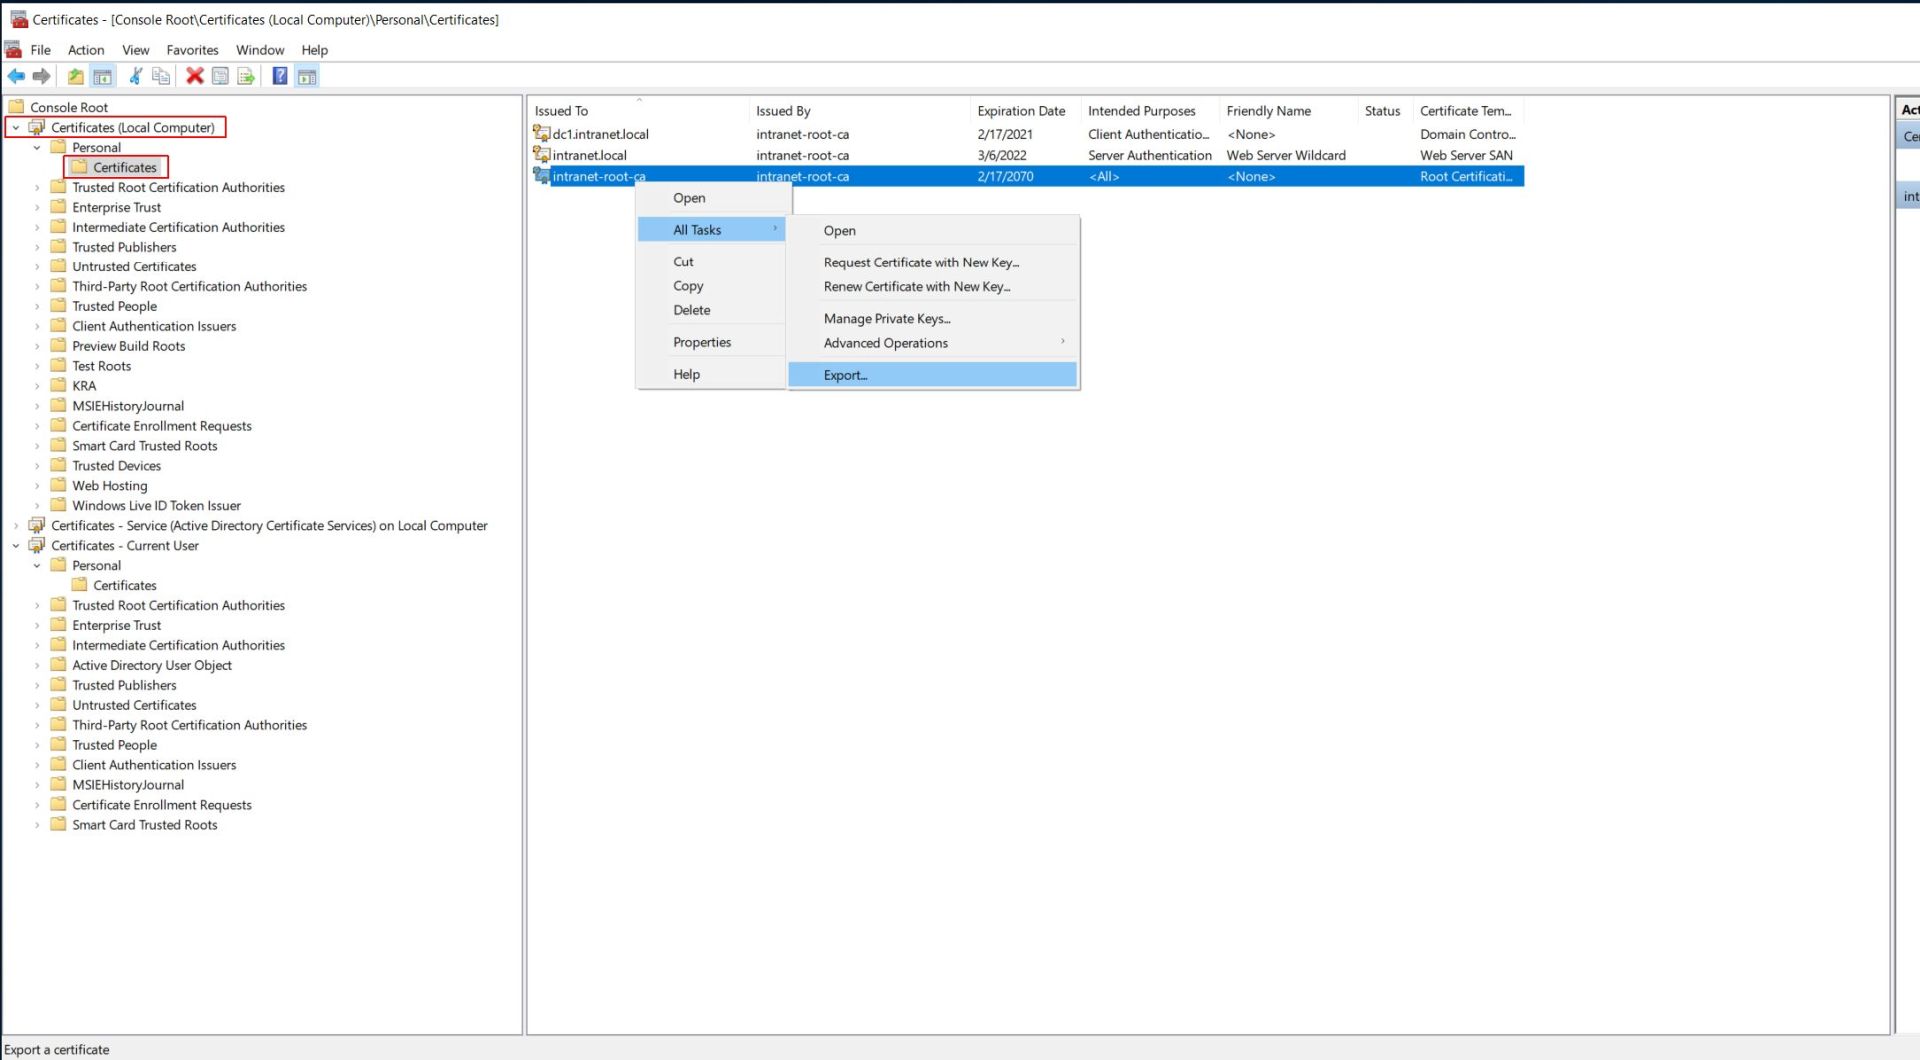
| First create the trust store, by exporting the CA's public cert, in p12/pfx format, or if the server's security settings don't allow that, export as PEM encoded .cer then create a .pfx file with Portecle, import the cert as trusted. Make sure the password is exactly the same as the main SSL keystore's and the file is named identically with the _trust suffix appended. |
|
| [{Image src='Clipboard11.jpg' width='80%' height='80%' align='left|center|right' style='..' class='..' }] |
|
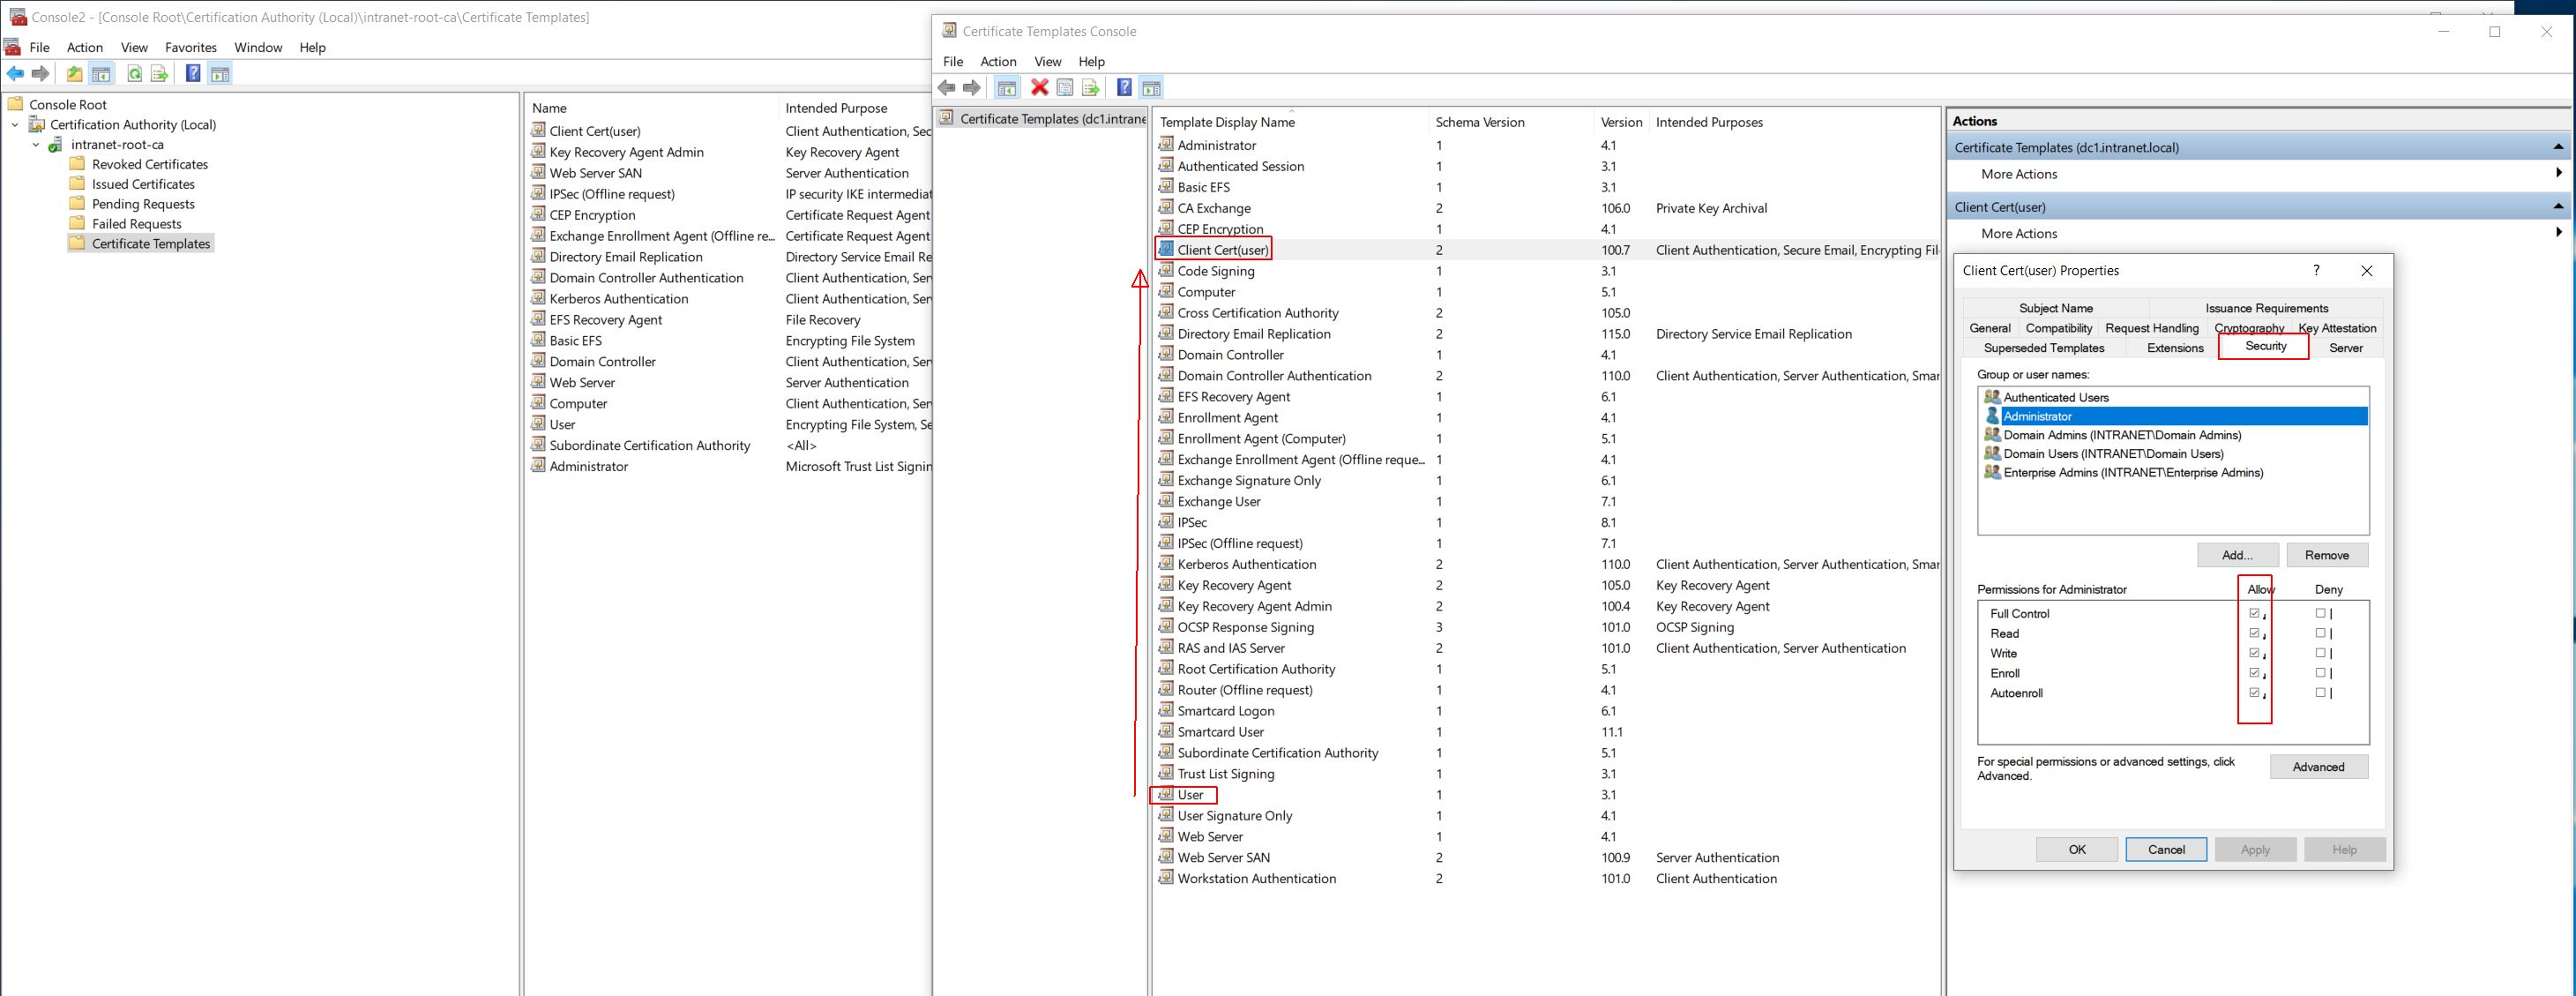
| Before create the client cert, need to make sure to have a generic client cert template that can be enrolled by the admin. For that, duplicate the default User certificate template, set the permissions for the current admin, etc. |
|
| [{Image src='Clipboard04.jpg' width='80%' height='60%' align='left|center|right' style='..' class='..' }] |
|
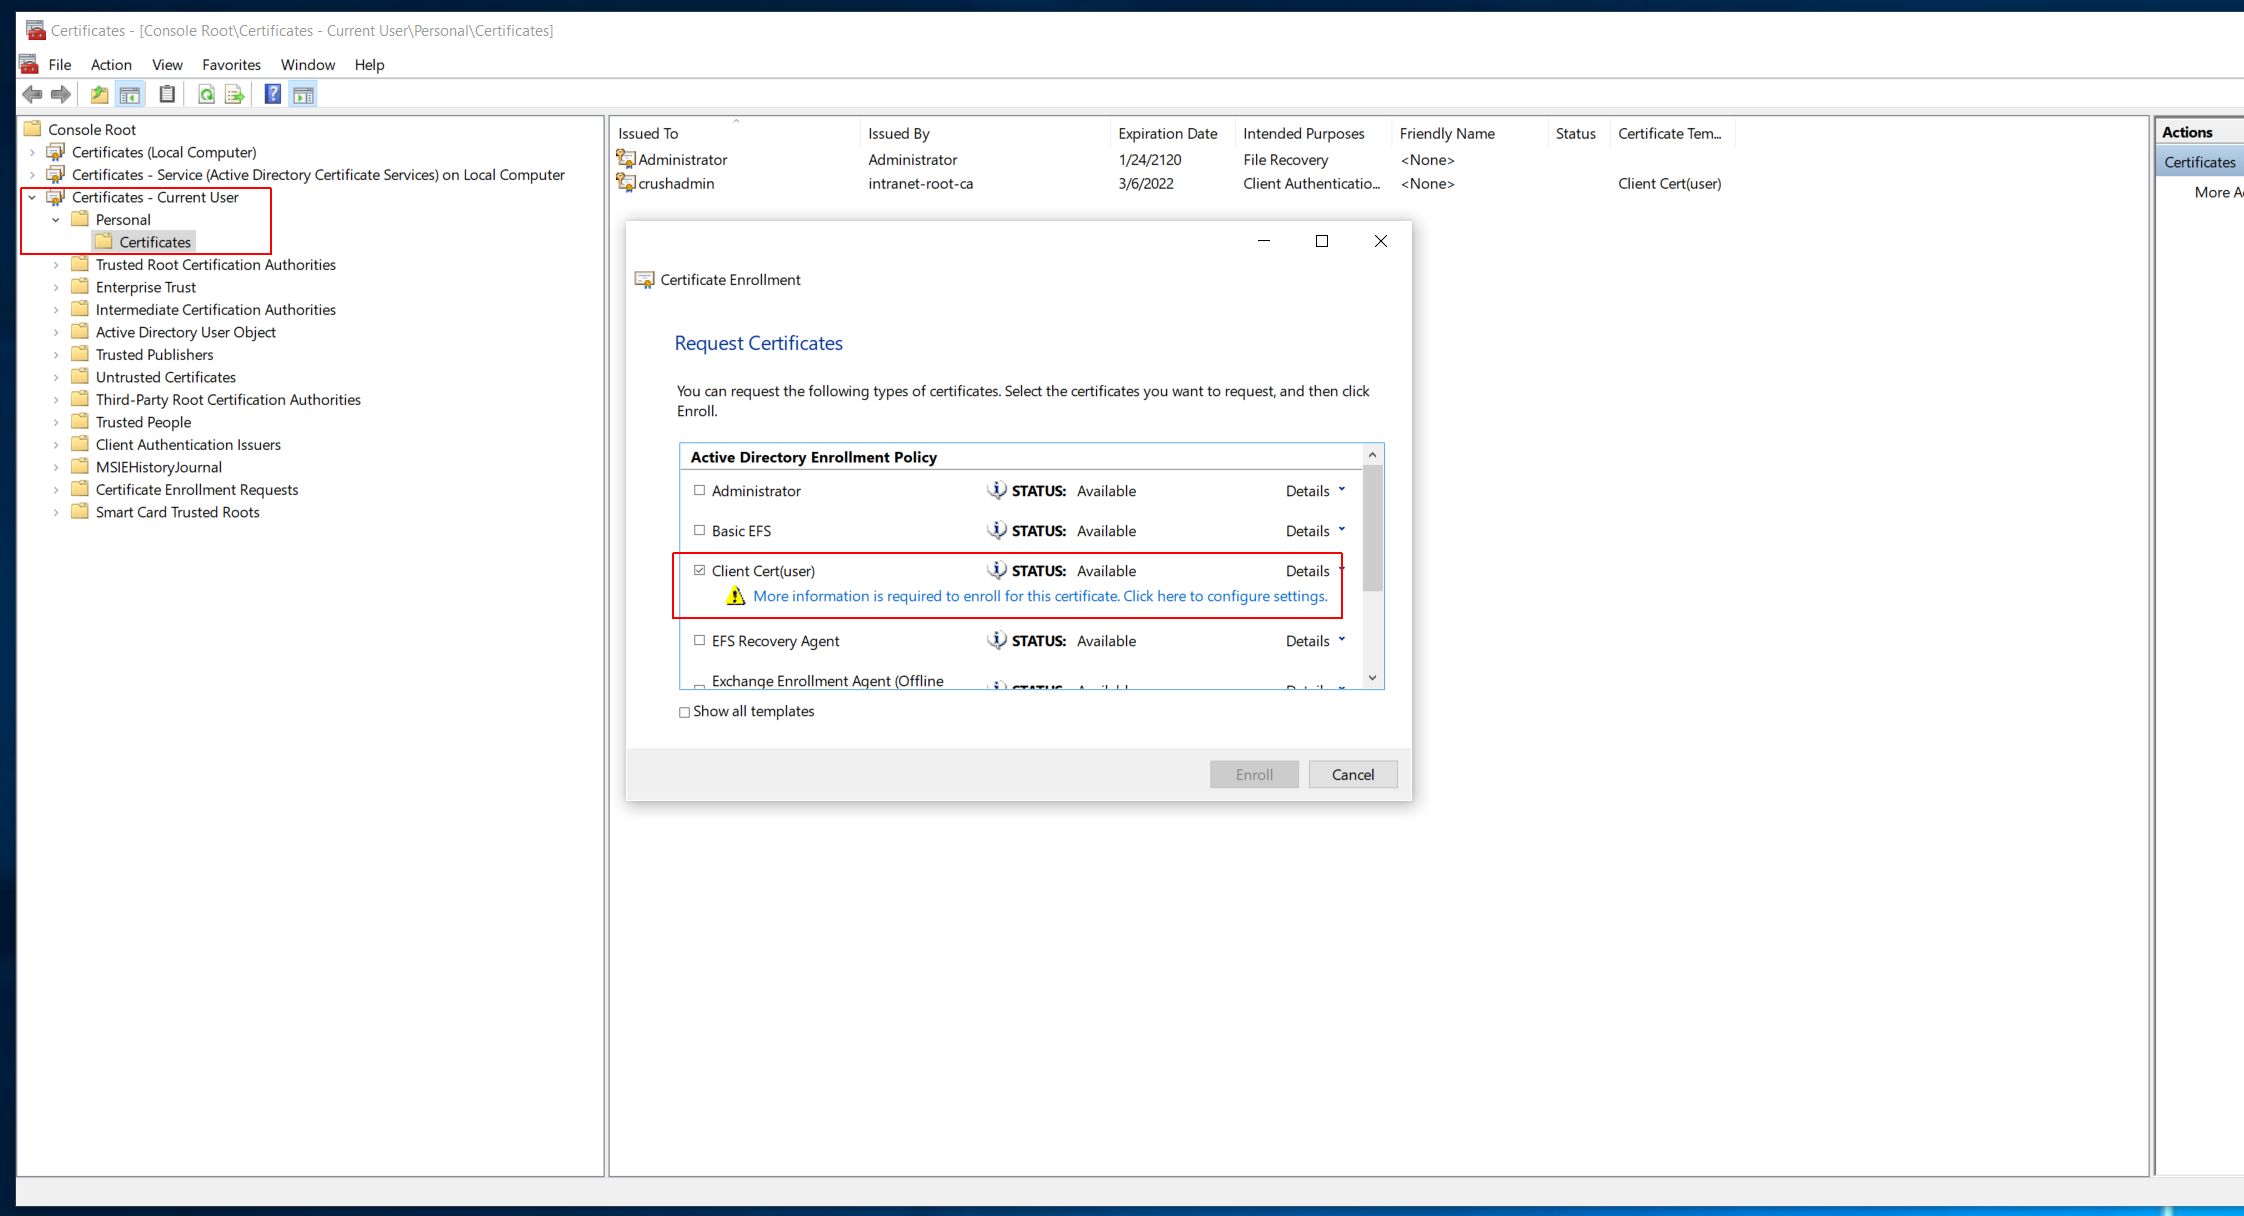
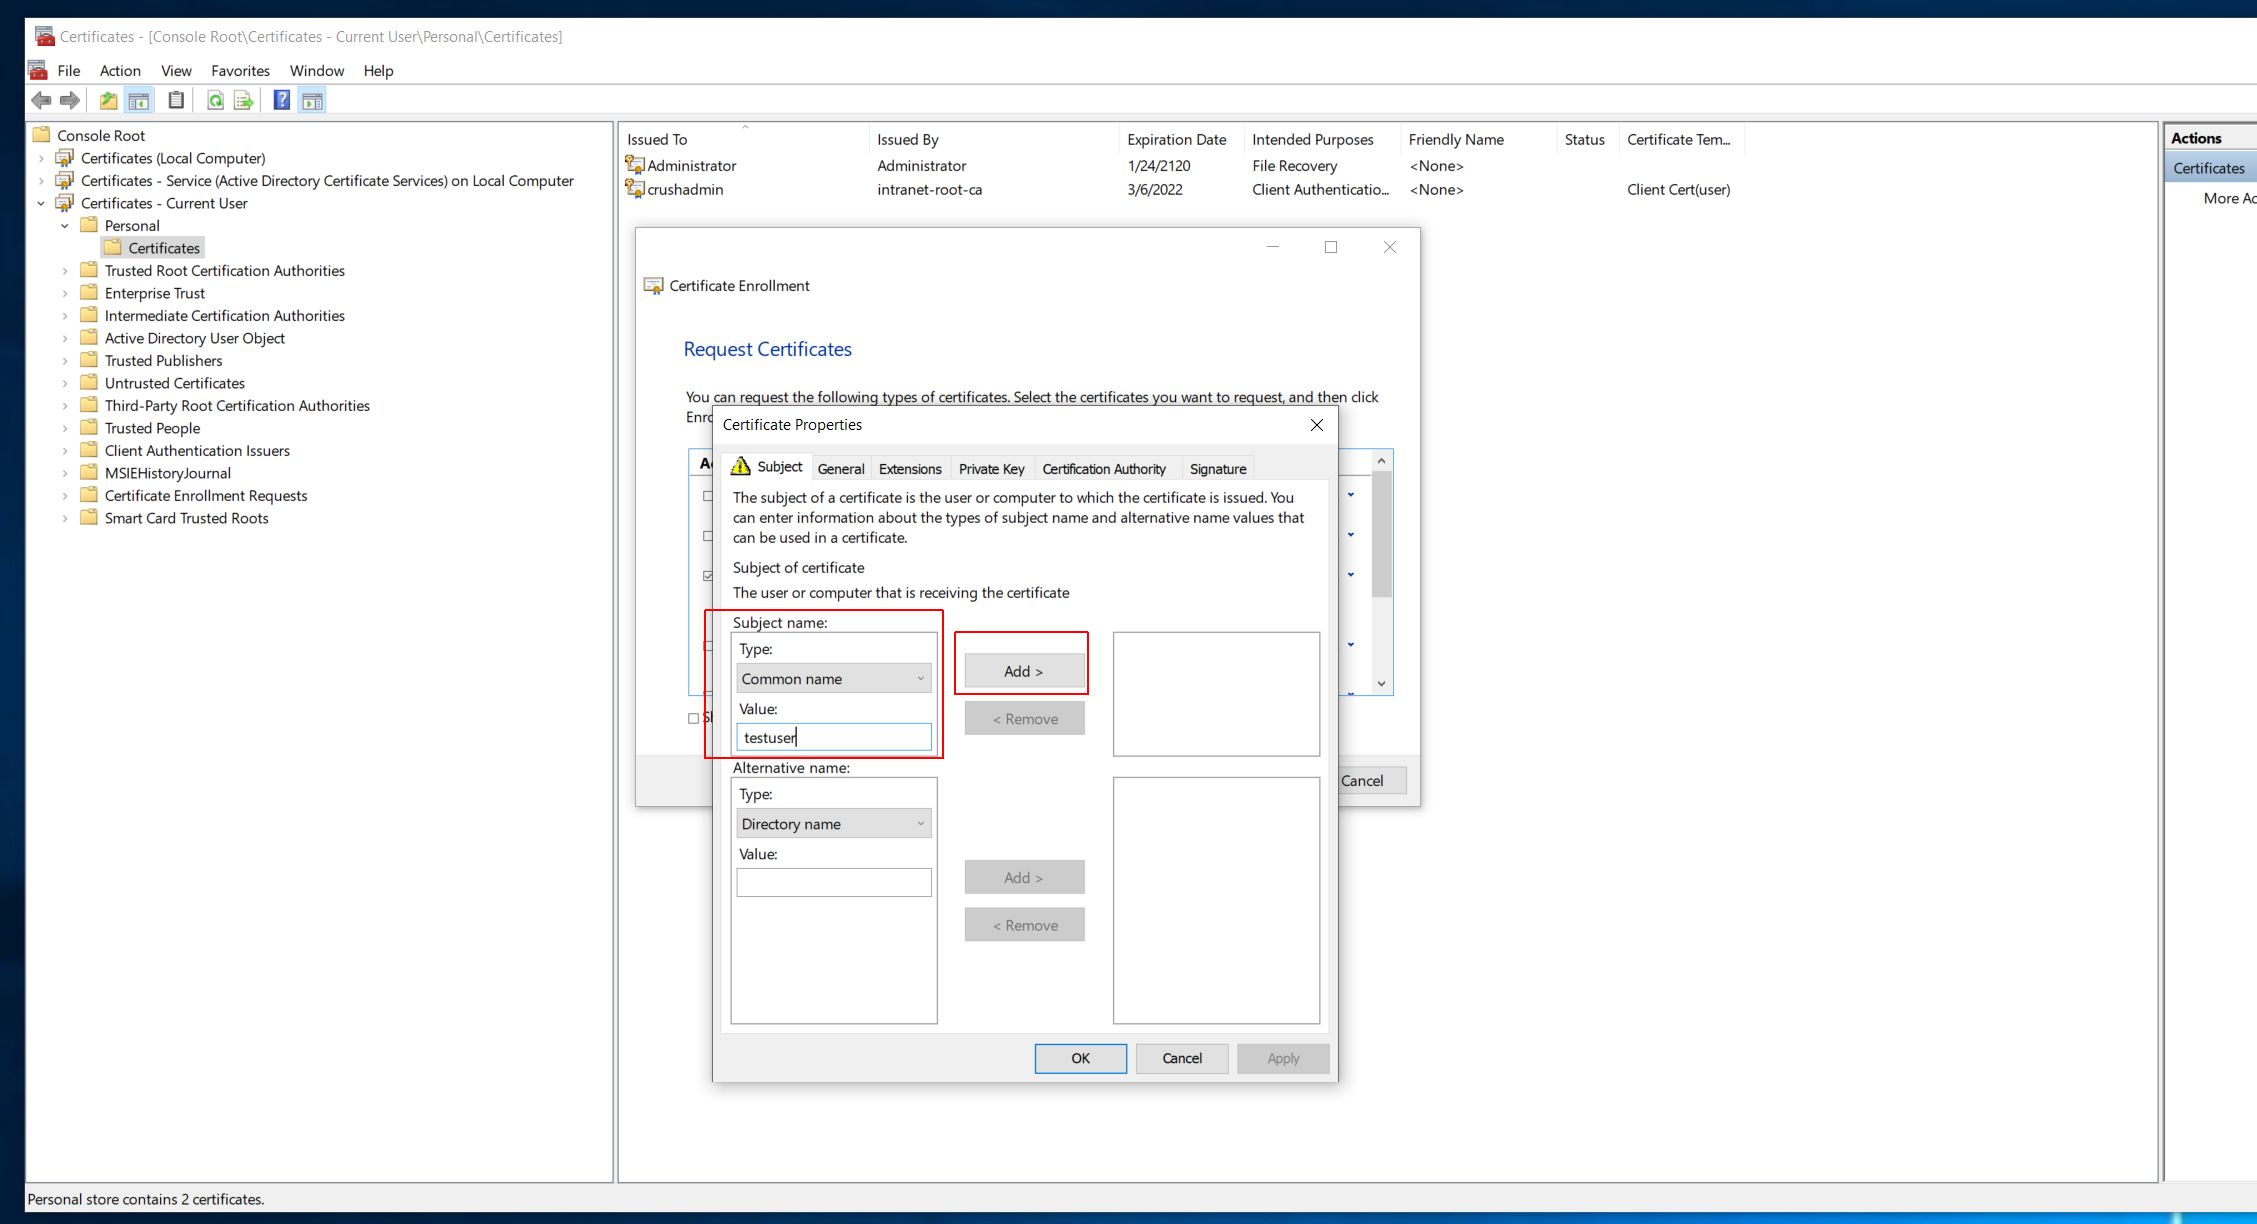
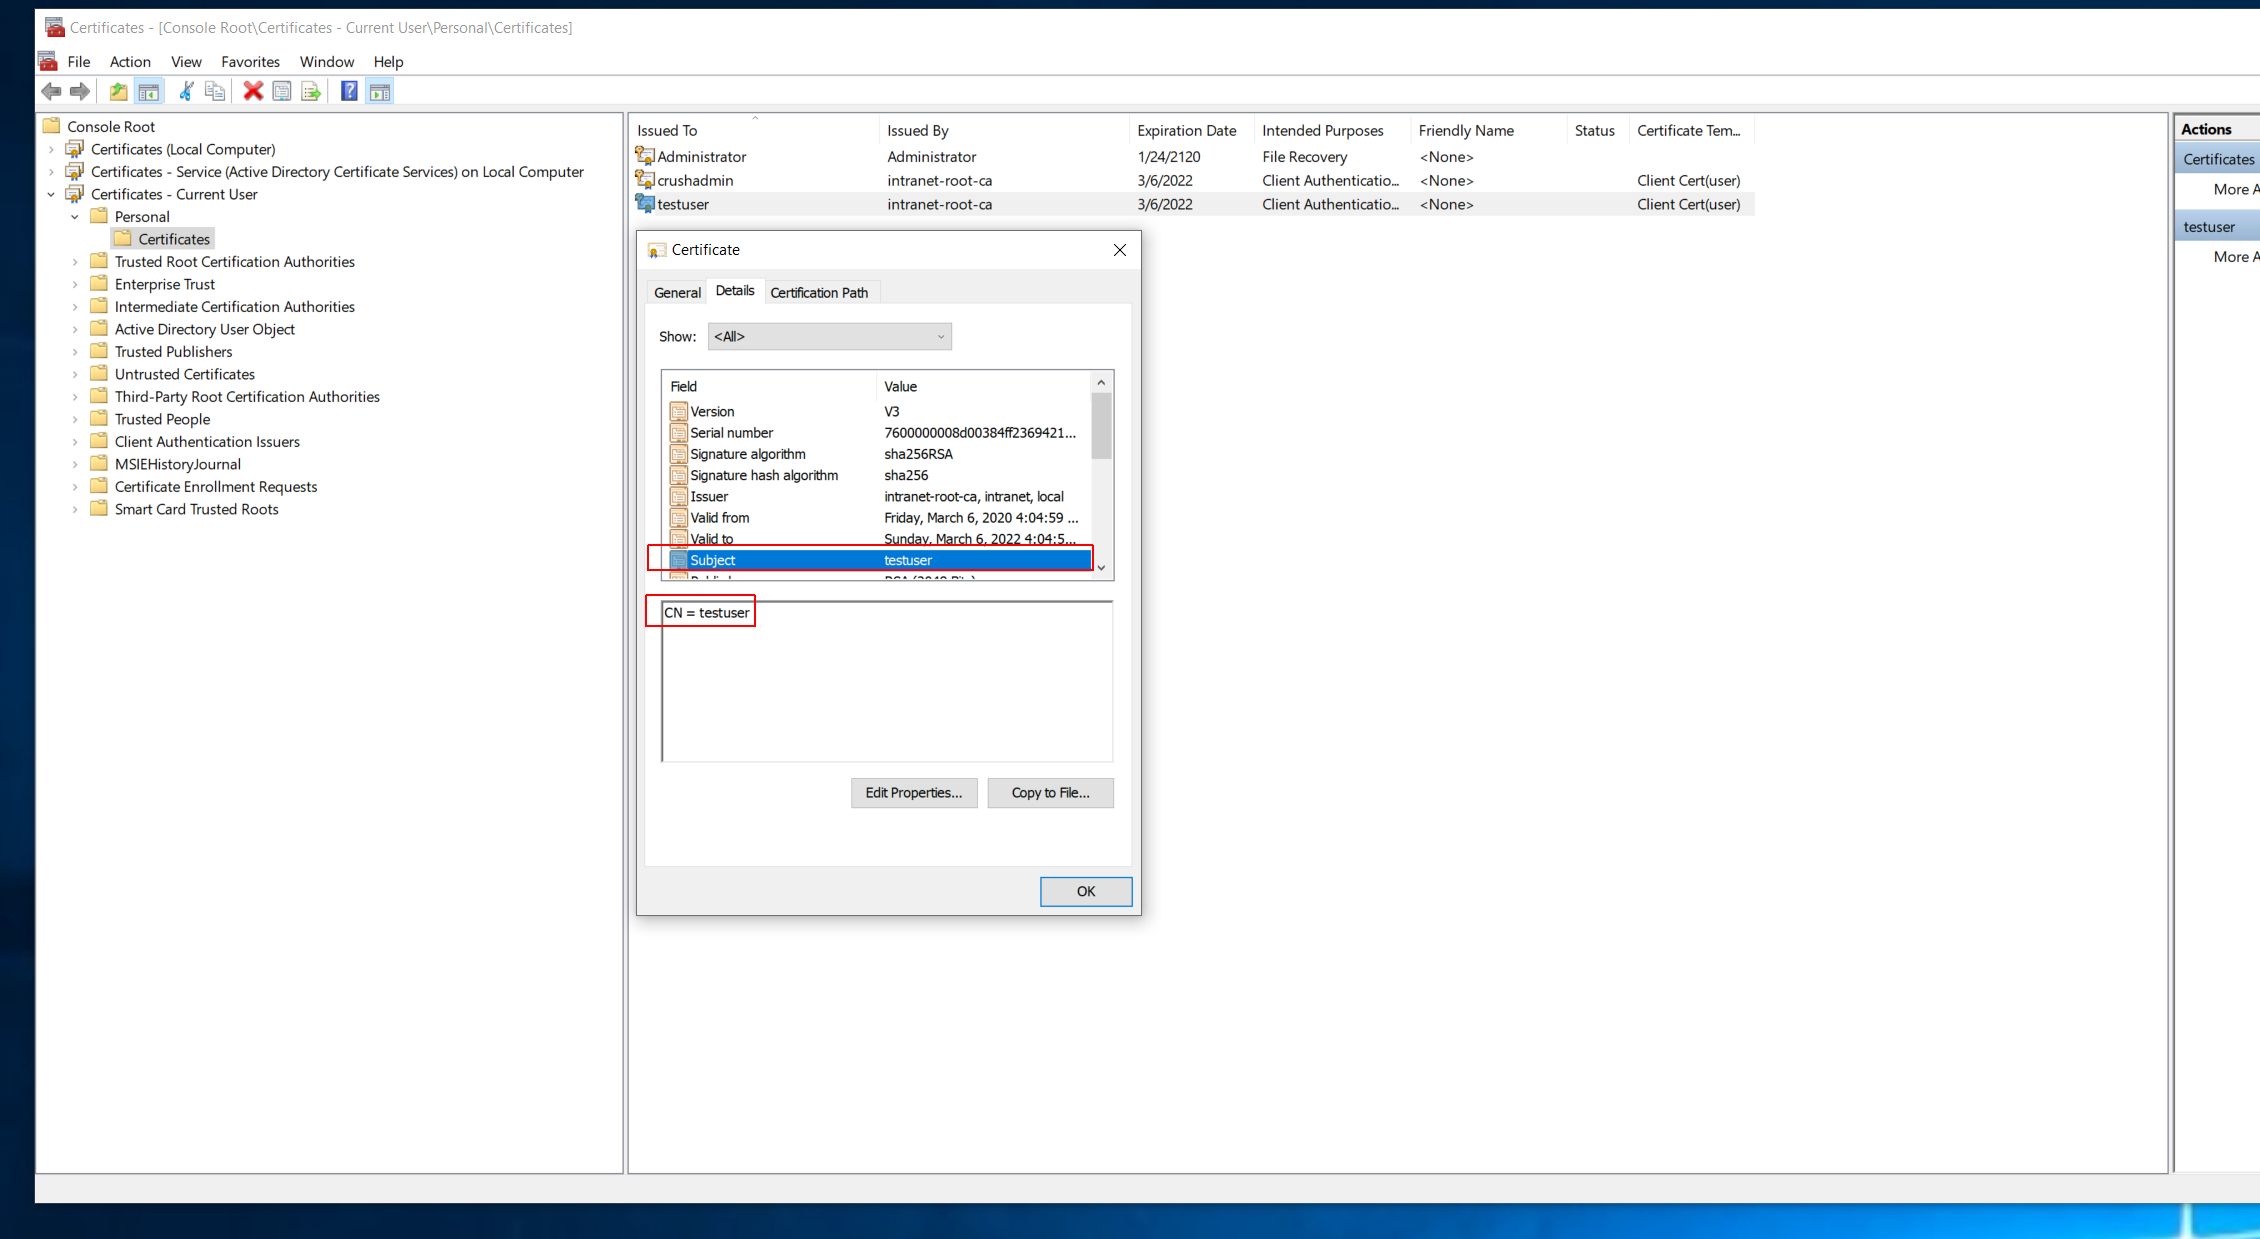
| Then issue the client cert based on this template, set the Common Name (CN) field in the Subject as the user login name, exact match. |
|
| [{Image src='Clipboard05.jpg' width='80%' height='60%' align='left|center|right' style='..' class='..' }] |
| [{Image src='Clipboard06.jpg' width='80%' height='60%' align='left|center|right' style='..' class='..' }] |
| [{Image src='Clipboard07.jpg' width='80%' height='60%' align='left|center|right' style='..' class='..' }] |
|
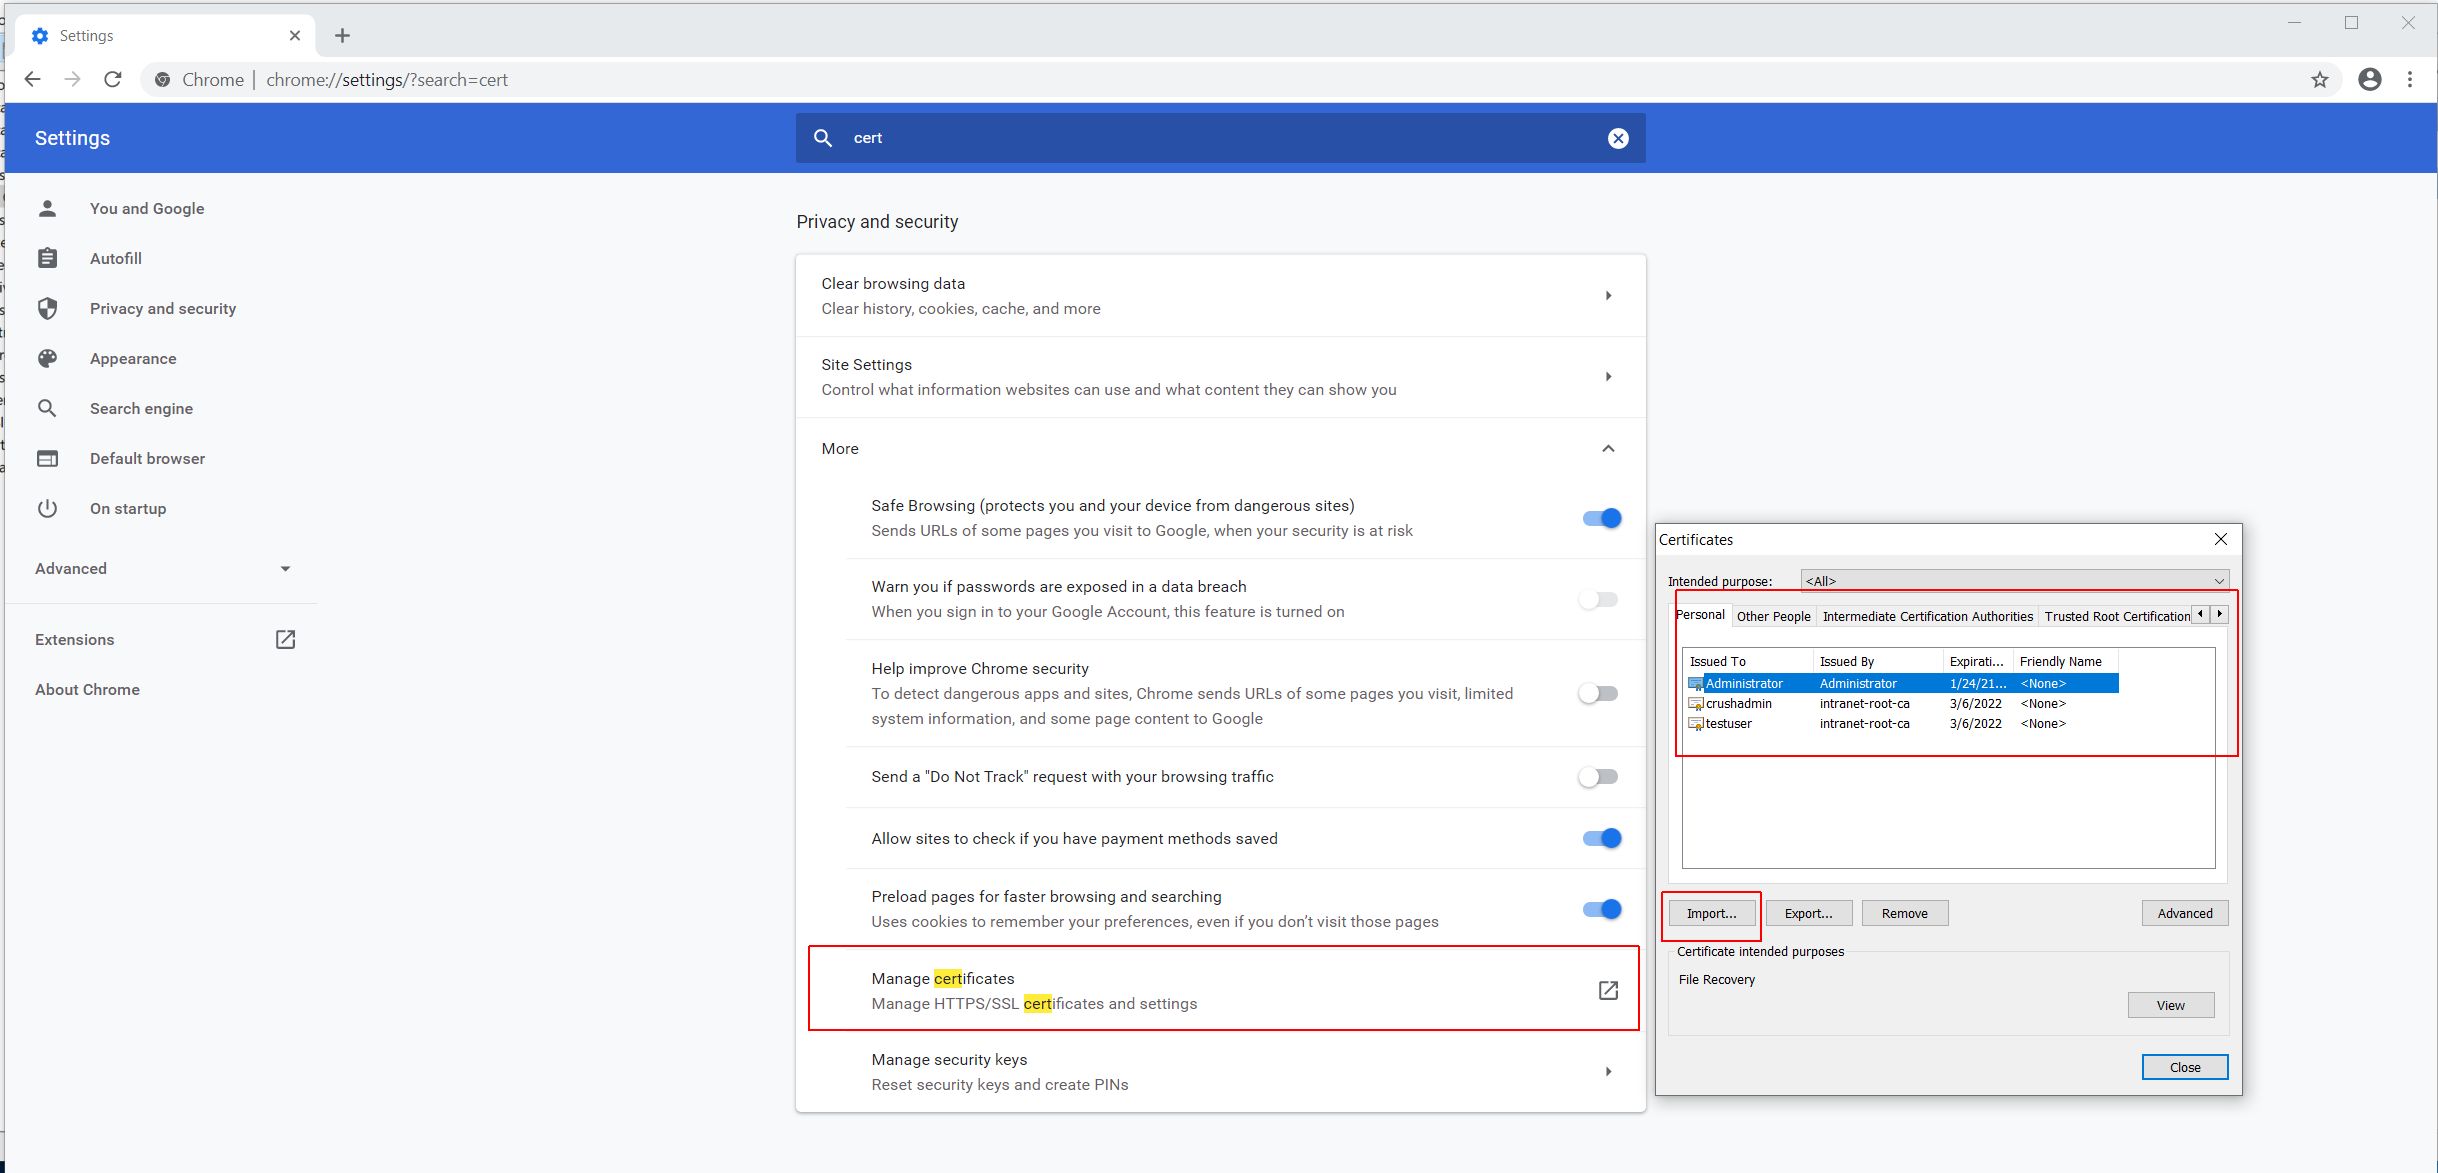
| Finally, export the client cert to p12/pfx format, import it into the web browser's certificate store as Personal certificate |
|
| [{Image src='Clipboard08.jpg' width='80%' height='60%' align='left|center|right' style='..' class='..' }] |
|
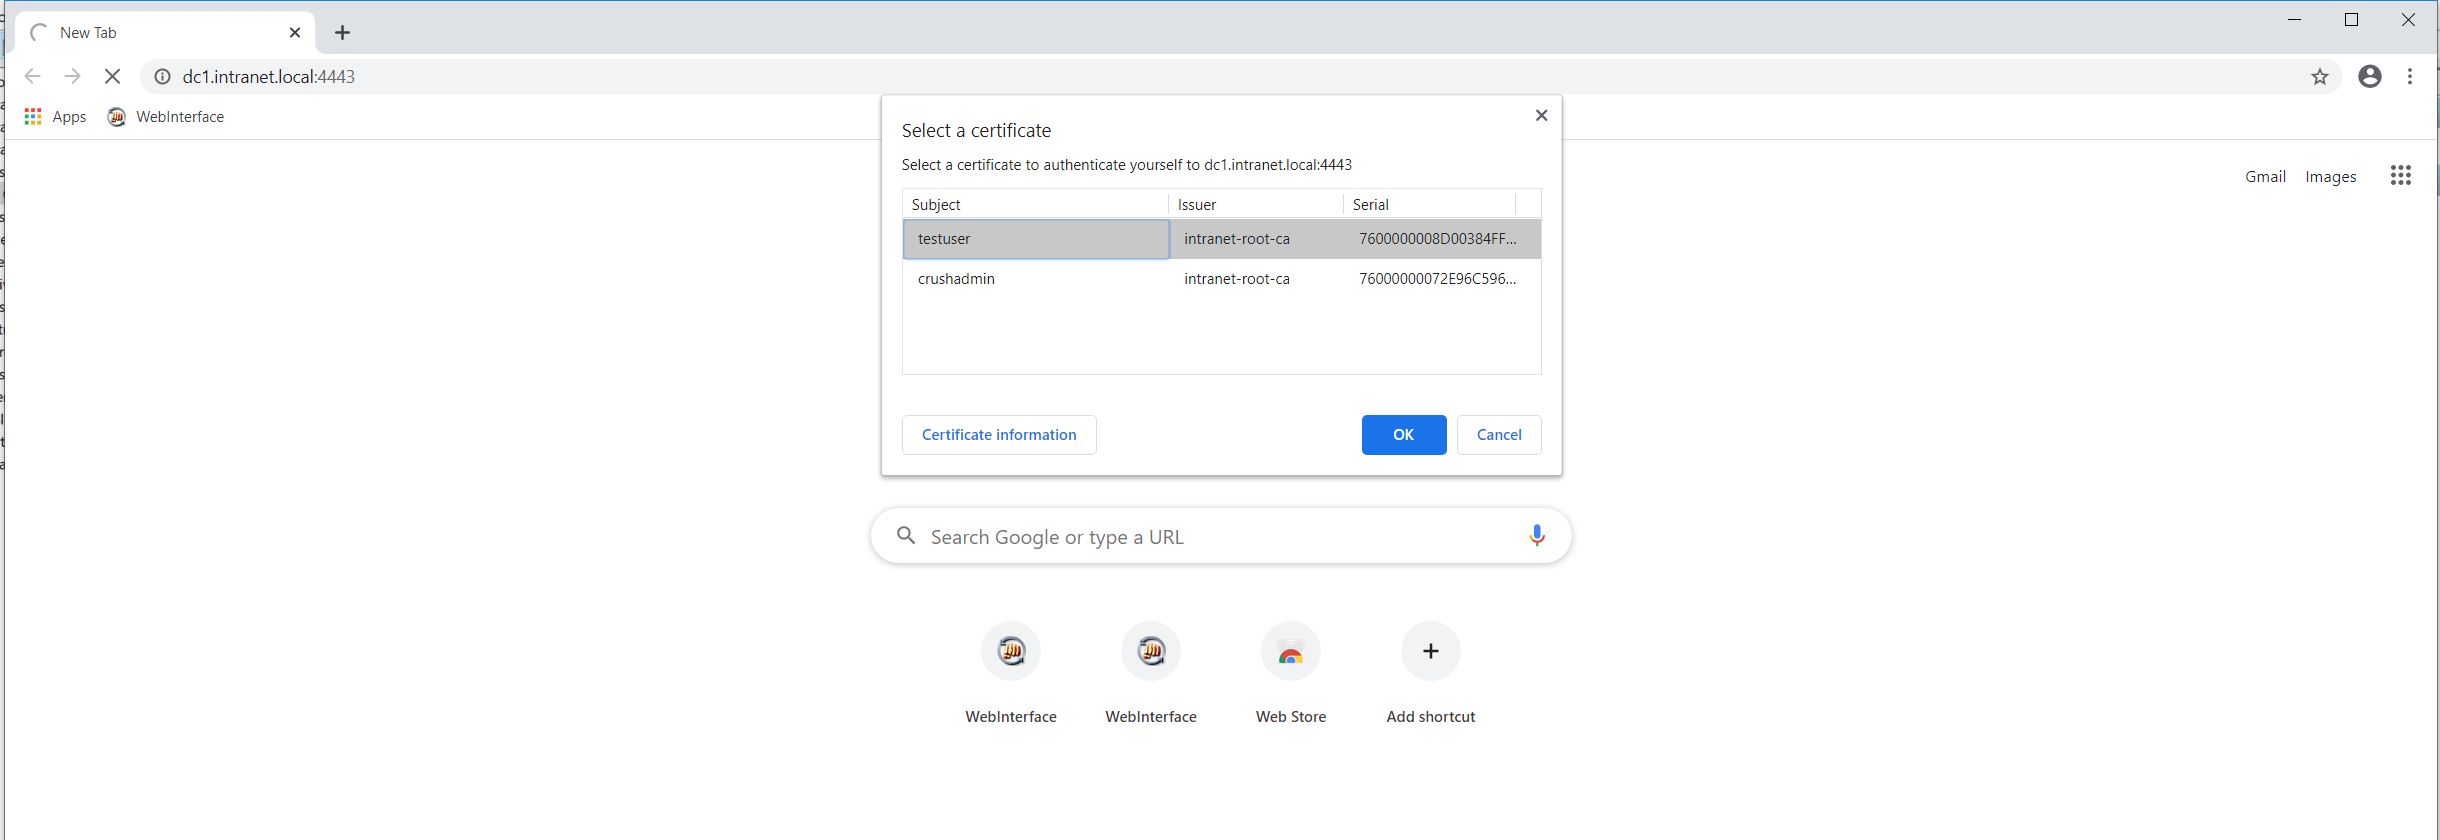
| When accessing the server with a web browser , the user is prompted to choose the appropriate client cert, then is logged in automatically (or prompted for the password as the second factor, if the CN was set to NOLOGIN_username ) |
|
| [{Image src='Clipboard09.jpg' width='80%' height='60%' align='left|center|right' style='..' class='..' }] |
