Google Drive REST API v3 based integration: Google Drive API Link
 Authentication is handled through OAuth 2.0 (OAuth Wikipedia Link), ensuring secure, user-consented access to Google Drive data.
!!! Proxy Configuration: If your server accesses the internet through a proxy, make sure to whitelist the following domains for Google Authentication and Drive access:
- oauth2.googleapis.com
- www.googleapis.com
1. Google OAuth 2.0 Configuration
#
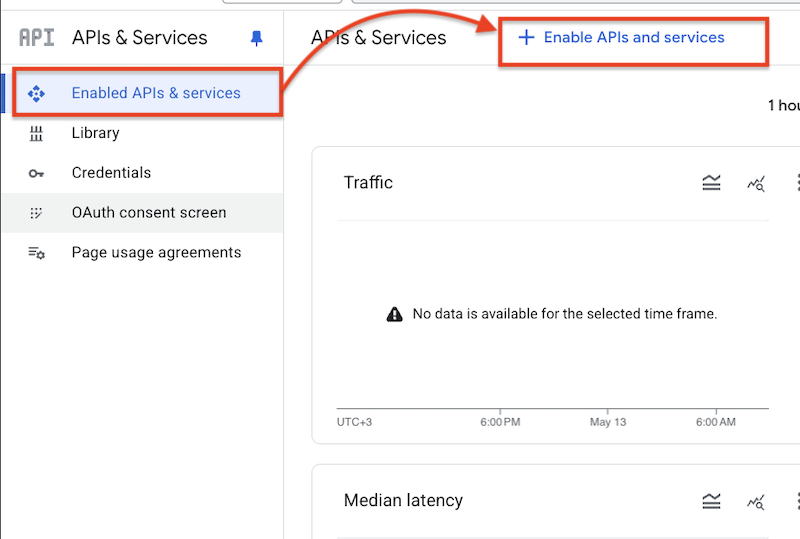
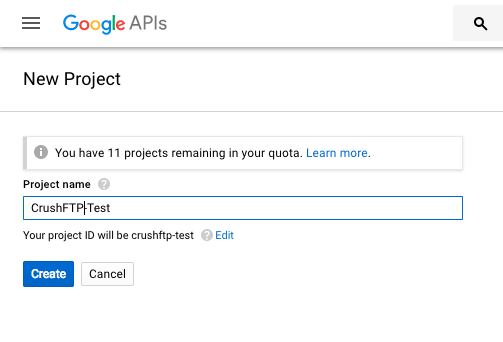
Start by navigating to Google APIs & Services: Google APIs & Services Link
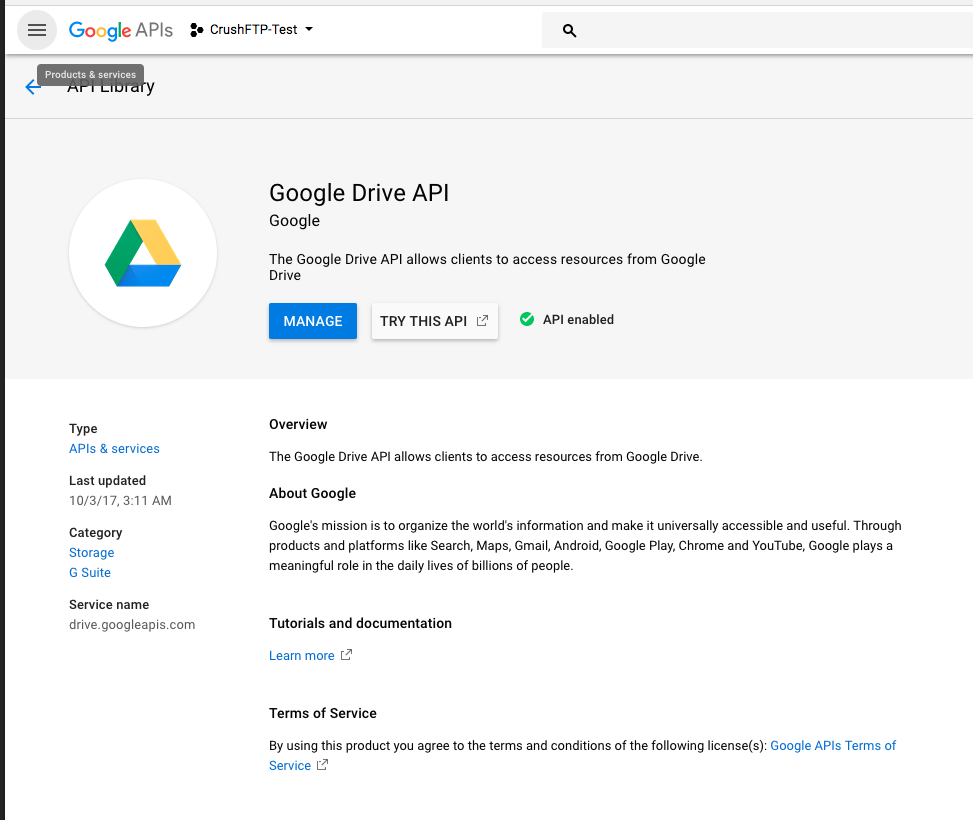
!!!Note: Ensure sure the Google Drive API is enabled at Enabled APIs & services. Google API Library Link
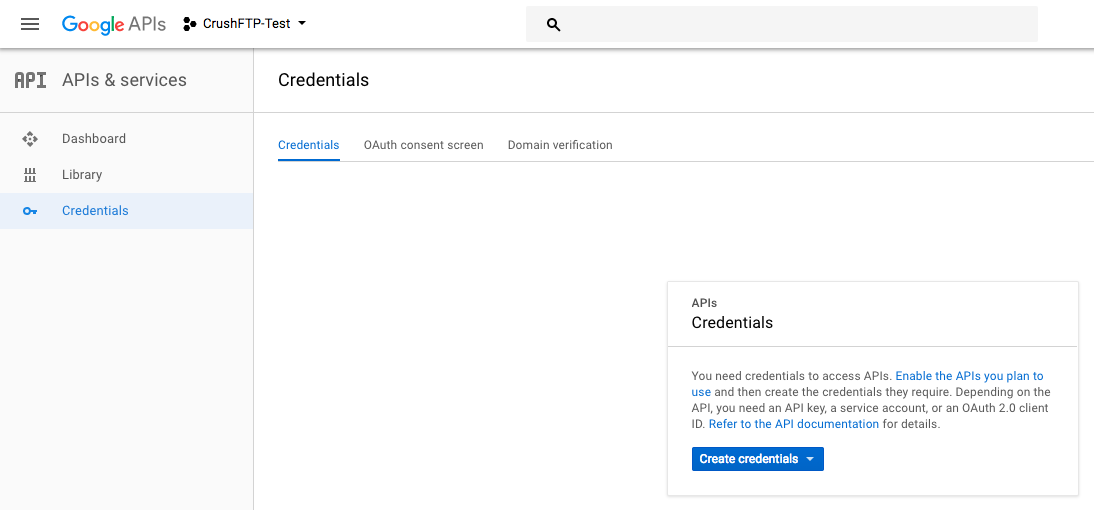
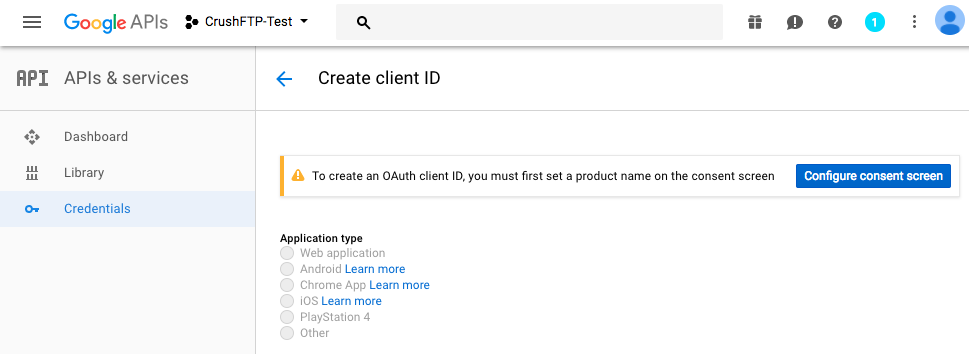
Go to the Credentials menu, click on Create Credentials, and select OAuth client ID:

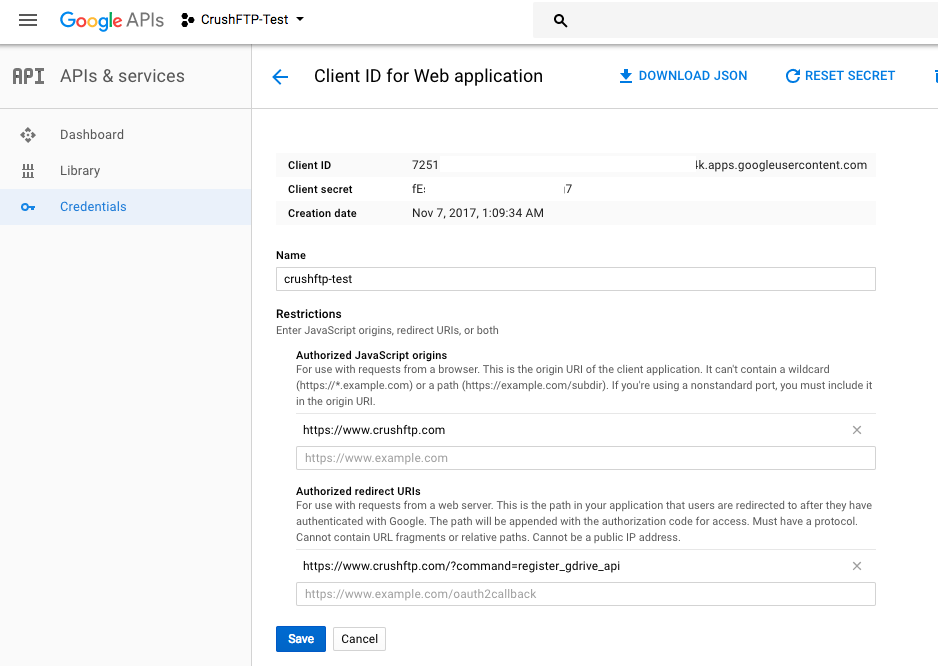
Select the application type: Web application. Provide a unique name. Then, configure the Authorized redirect URI—this is where Google will redirect you after authorization. The Redirect URL must end with ?command=register_gdrive_api.
http://127.0.0.1:9090/?command=register_gdrive_api
or
https://your.crushftp.domain.com/?command=register_gdrive_api
Finally, click the Create button.

After the credentials are created, copy the Client ID and Client Secret.
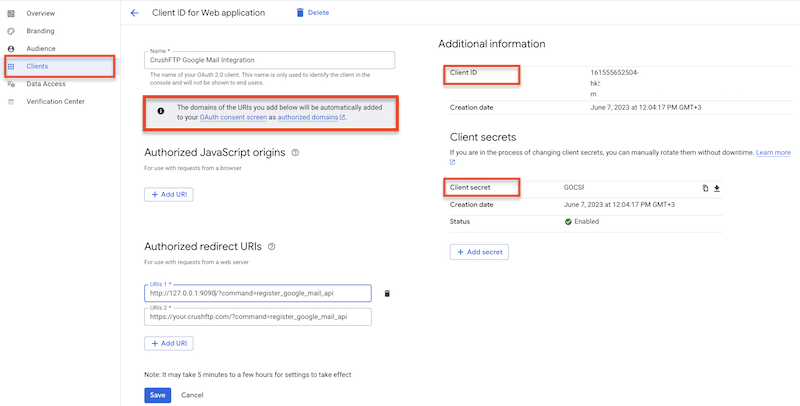
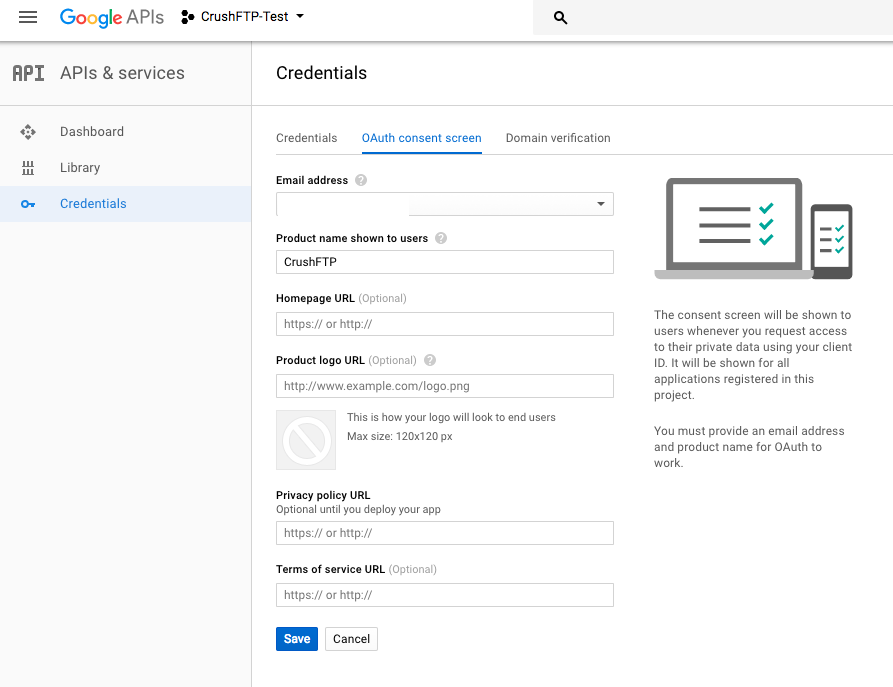
!Note: You can configure the OAuth consent screen. See at the info above the Authorized JavaScript origins: The domains of the URIs you add below will be automatically added to your OAuth consent screen as authorized domains. Click on the link to configure it.
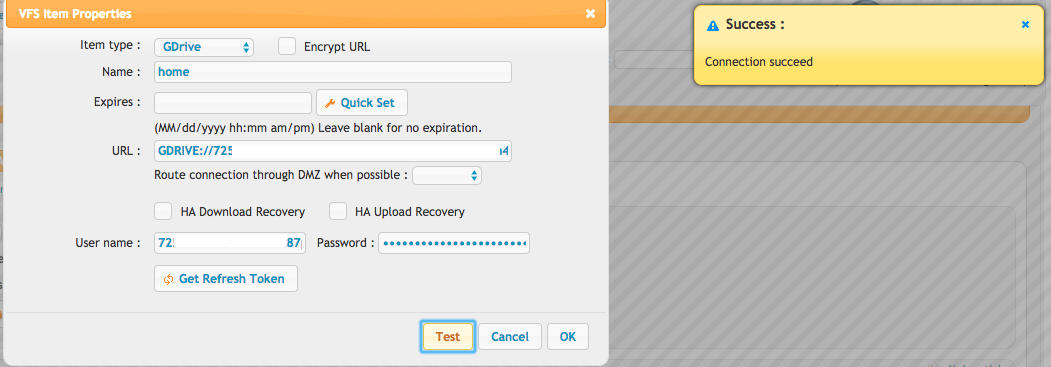
2. Gdrive Remote Item Settings:
#
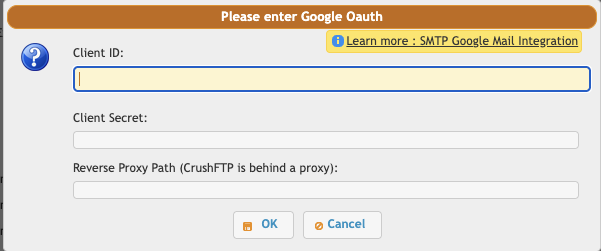
Select the GDrive item type and click the Get Refresh Token button.
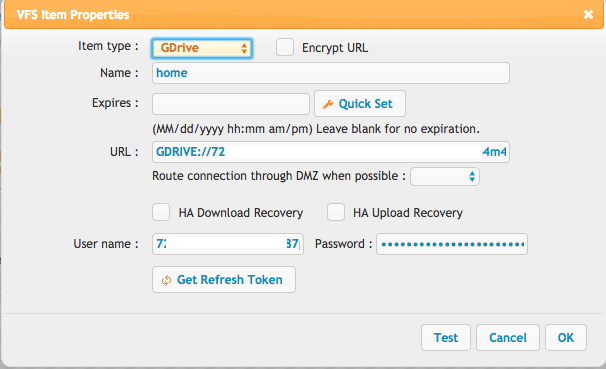
!!! Note: To obtain the Refresh Token, the CrushFTP WebInterface’s host and port must match the Redirect URL specified in the Google APIs & Services-> Credentials -> OAuth 2.0 Client IDs. In our example, it was: http://127.0.0.1:9090 or https://your.crushftp.domain.com/
Enter the Client ID , Client Secret. Proceed with the authentication and authorization process.
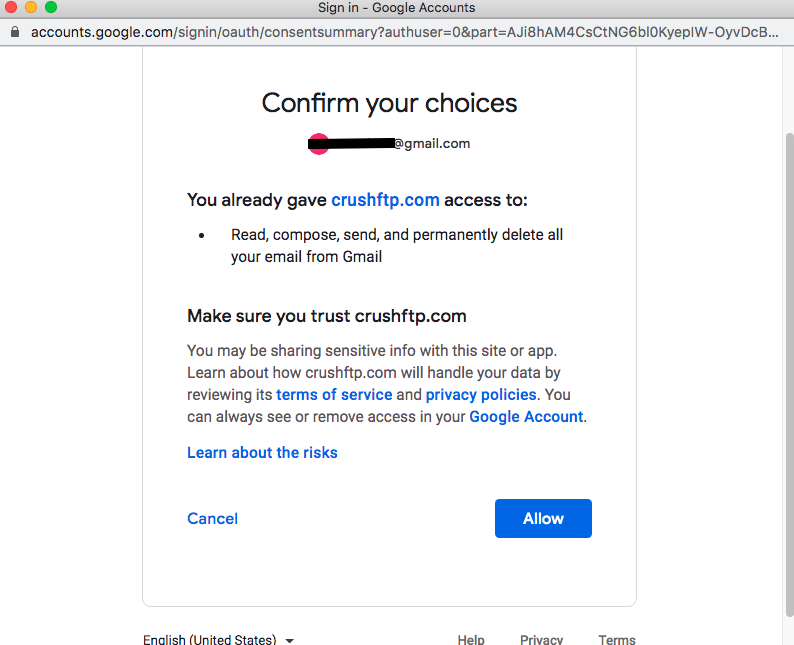
!!! Note: Be sure to sign in with the Google Account that has the necessary permissions, as configured in the Google APIs & Services-> Credentials -> OAuth 2.0 Client IDs. This will automatically configure the User name and Password.
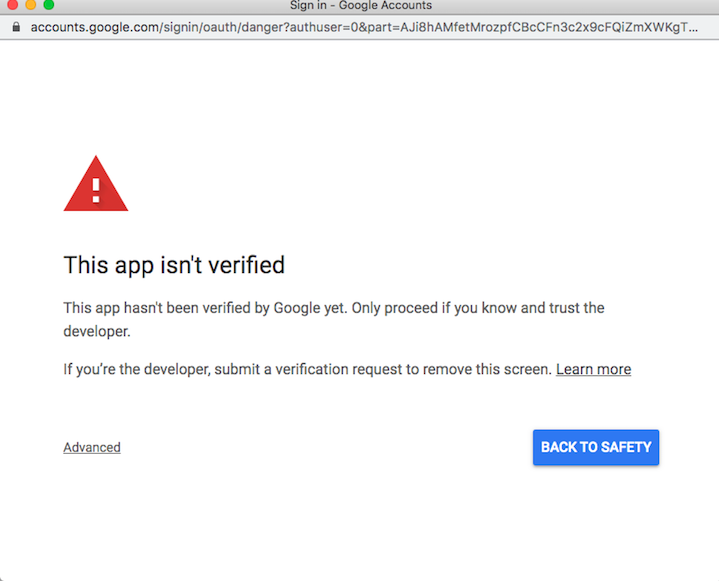
If the domain is unverified, a warning message may appear. Click Advanced and choose to proceed:
Click on the Allow button:
Add new attachment
Only authorized users are allowed to upload new attachments.
List of attachments
| Kind | Attachment Name | Size | Version | Date Modified | Author | Change note |
|---|---|---|---|---|---|---|
png |
consent_config.png | 86.3 kB | 1 | 05-Dec-2023 05:32 | Ben Spink | |
png |
create_credentials.png | 57.5 kB | 1 | 05-Dec-2023 05:32 | Ben Spink | |
png |
create_project.png | 25.9 kB | 1 | 05-Dec-2023 05:32 | Ben Spink | |
png |
credential_config.png | 95.2 kB | 1 | 05-Dec-2023 05:32 | Ben Spink | |
png |
enable_api.png | 107.2 kB | 1 | 05-Dec-2023 05:32 | Ben Spink | |
png |
gdrive_oauth_form.png | 26.7 kB | 1 | 15-May-2025 05:35 | krivacsz | |
png |
get_refresh_token.png | 88.9 kB | 2 | 15-May-2025 05:30 | krivacsz | |
png |
oauth_consent.png | 49.1 kB | 1 | 05-Dec-2023 05:32 | Ben Spink | |
png |
test_success.png | 115.0 kB | 2 | 15-May-2025 05:45 | krivacsz |
«
This particular version was published on 15-May-2025 06:28 by krivacsz.
G’day (anonymous guest)
Log in
CrushFTP11 | What's New
- WebInterface
- Server Admin
- User Manager
- Client Apps
- CrushBalance Load Balancer
- High Availability
- Self Registration
- Preferences
- Email Templates
- Restrictions
- Replication
- Banning
- Logging
- Encryption
- Alerts
- Folder Monitor
- Tunnels
- Syncs
- User Config
- Search Config
- Preview
- Misc
- Plugins
- Manage Shares
- PGP
- Telnet
- FAQ
- API
- Linux Install
- Virtual Linux Server
- Server Variables
- Google Authenticator and Microsoft Authenticator
- AS2 EDI
JSPWiki