1. Google Mail OAuth 2.0
#
Google Mail through SMTP/IMAP requires OAuth 2.0 (OAuth Wikipedia Link ) for authentication. This is part of Google’s effort to enhance security by deprecating less secure app access (basic authentication using just a username and password). OAuth 2.0 offers a more secure, token-based system that supports modern features like multi-factor authentication, granular permission scopes, and token expiration for better protection against credential theft. For technical implementation details, see Google’s documentation here : Google IMAP-SMTP Link.
!!! Proxy Configuration: If your server accesses the internet through a proxy, make sure to whitelist the following domains for Google Mail Authentication: oauth2.googleapis.com
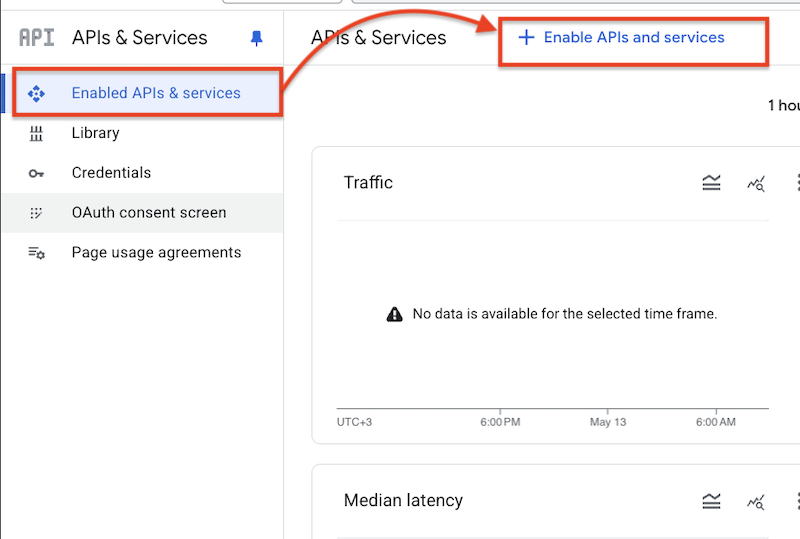
Start by navigating to Google APIs & Services: Google APIs & Services Link
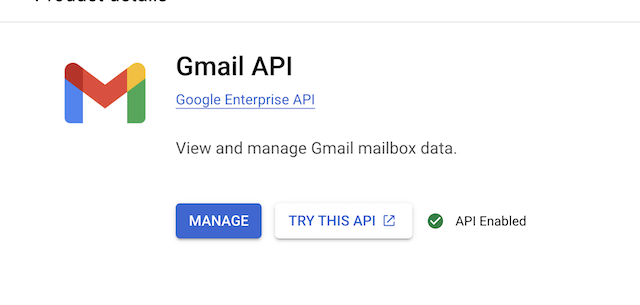
!!!Note: Ensure sure the GMAIL API is enabled at Enabled APIs & services. Google API Library Link
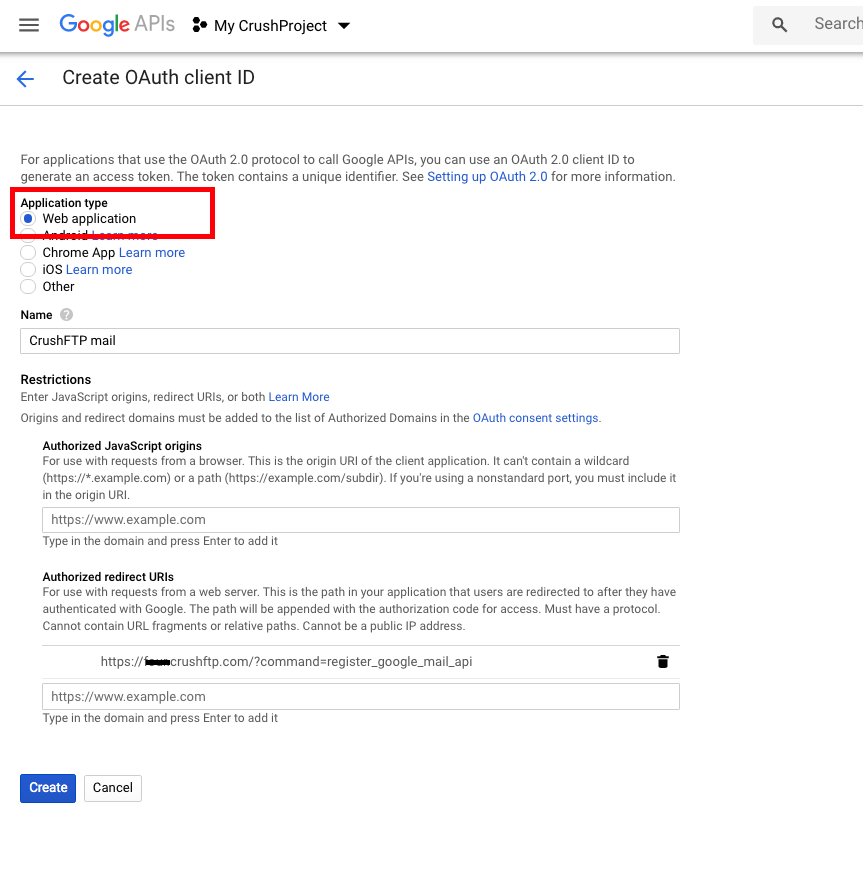
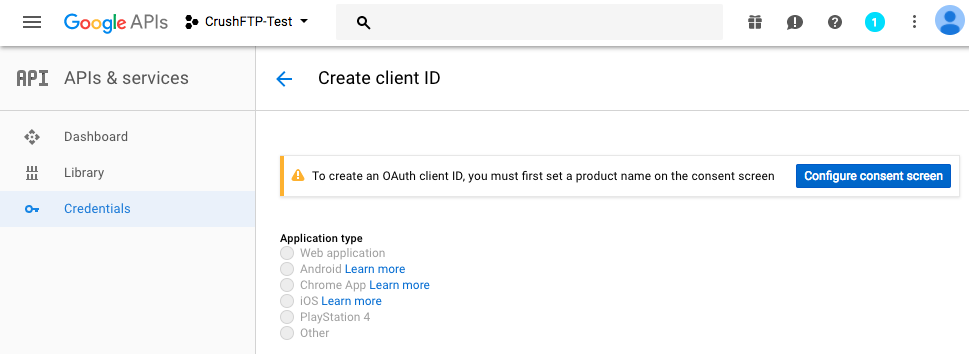
Go to the Credentials menu, click on Create Credentials, and select OAuth client ID:

Select the application type: Web application. Provide a unique name. Then, configure the Authorized redirect URI—this is where Google will redirect you after authorization. The Redirect URL must end with ?command=register_google_mail_api.
http://127.0.0.1:9090/?command=register_google_mail_api
or
https://your.crushftp.domain.com/?command=register_google_mail_api
Finally, click the Create button.
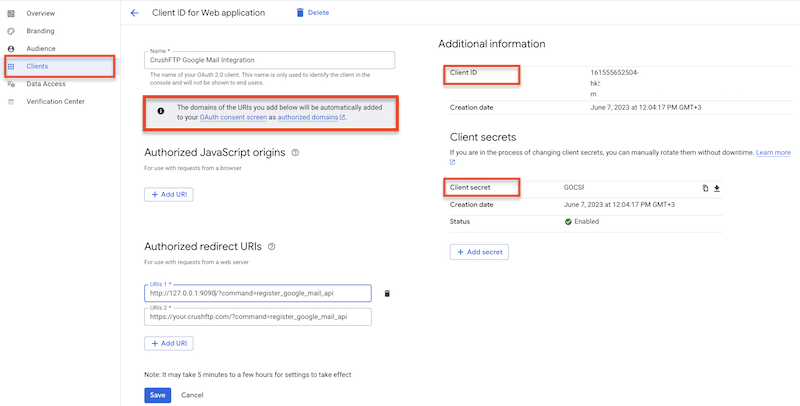
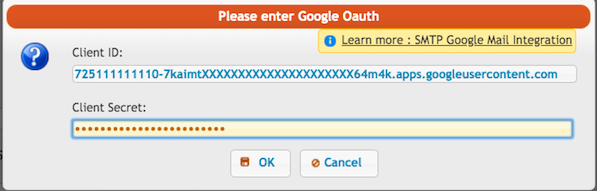
After the credentials are created, copy the Client ID and Client Secret.
2. SMTP Settings
#
Navigate to Server Admin -> Preferences -> General Settings -> SMTP Settings:
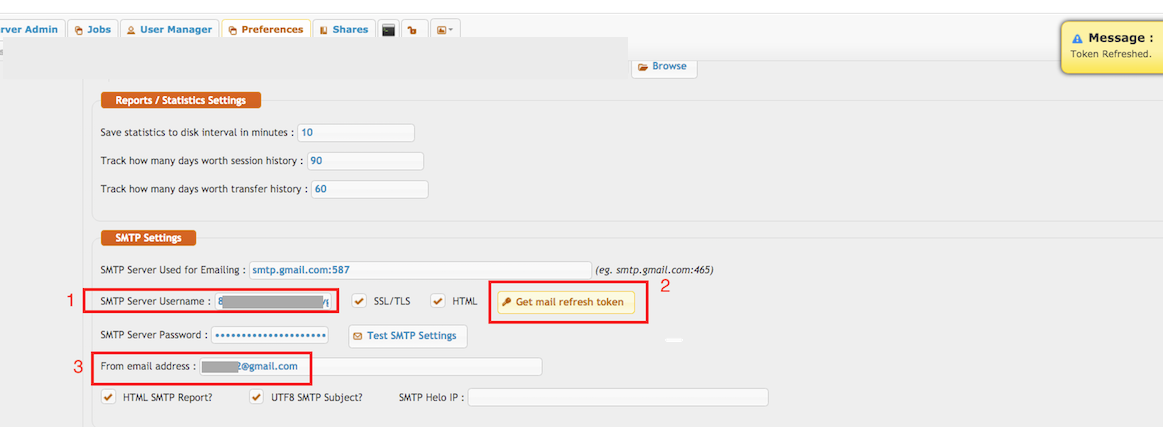
SMTP Server Used for Emailing: Enter the SMTP server address used for sending emails, such as smtp.gmail.com, using the default port 587.
smtp.gmail.com:587
SMTP Server Username, Password: If the SMTP server address ends with gmail.com, the corresponding Get Refresh Token button will appear. Click that button to proceed.
!!! Note: To obtain the Refresh Token, the CrushFTP WebInterface’s host and port must match the Redirect URL specified in the Google APIs & Services-> Credentials -> OAuth 2.0 Client IDs. In our example, it was: http://127.0.0.1:9090 or https://your.crushftp.domain.com/
Enter the Client ID , Client Secret. Proceed with the authentication and authorization process. !!! Note: Be sure to sign in with the Google Account that has the necessary permissions, as configured in the Google APIs & Services-> Credentials -> OAuth 2.0 Client IDs. This will automatically configure the SMTP Server Username and SMTP Server Password.
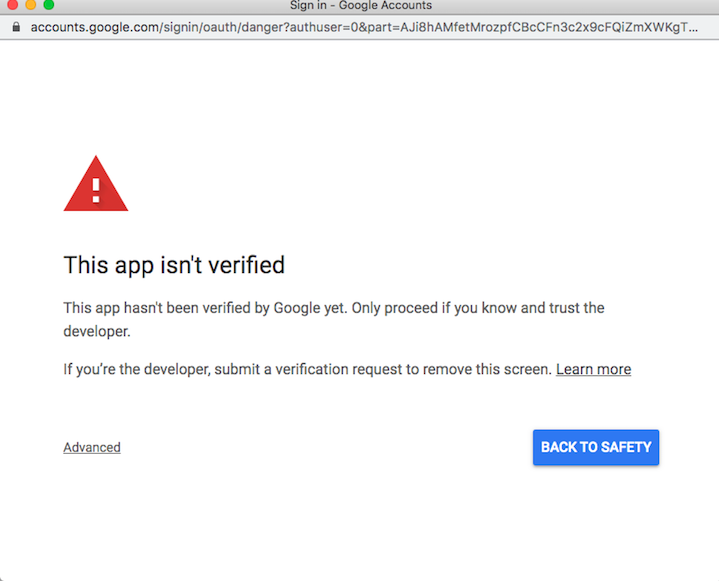
If the domain is unverified, a warning message may appear. Click Advanced and choose to proceed:
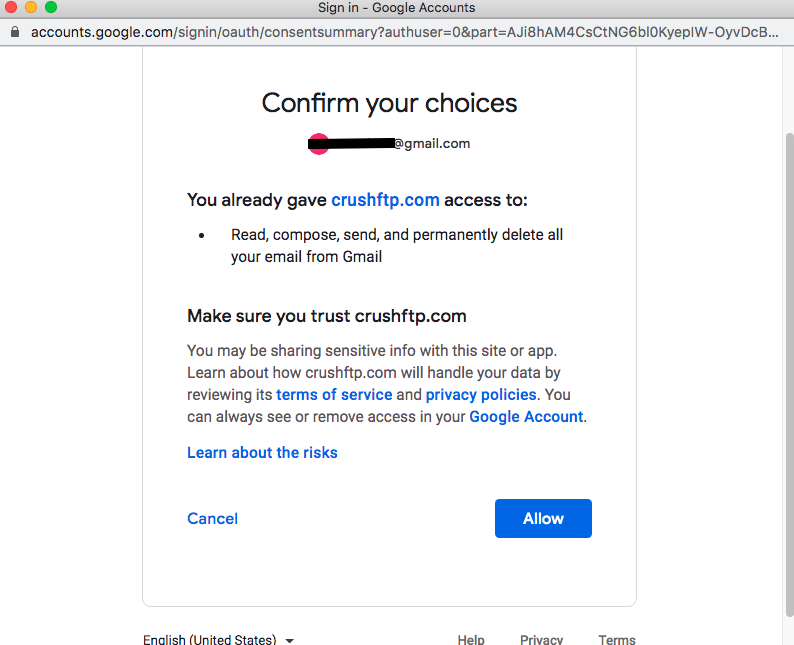
Click on the Allow button:
From email address: You must also specify the From email address. !!! Imnportant The From address must exactly match the signed-in Google user’s email address (i.e., the account used to obtain the refresh token). Otherwise, SMTP authentication will fail.
Make sure to enable the SSL/TLS flag to ensure a secure connection.
3. PopImapTask
#
Select the IMAPS protocol.
See the description: Google IMAP-SMTP Link
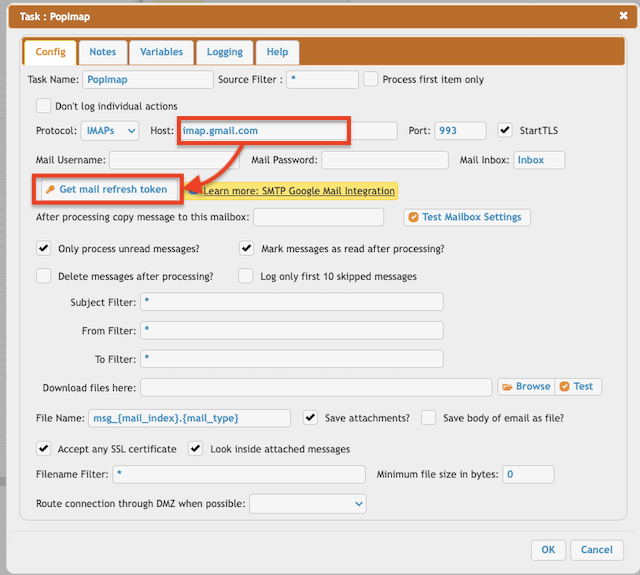
Host:
imap.gmail.com
Port: 993If the Host contains gmail.com, the corresponding Get Refresh Token button will appear.
Configure the 1. Google Mail OAuth 2.0 Link
!!! Note: To obtain the Refresh Token, the CrushFTP WebInterface’s host and port must match the Redirect URL specified in the Google APIs & Services-> Credentials -> OAuth 2.0 Client IDs. In our example, it was: http://127.0.0.1:9090 or https://your.crushftp.domain.com/
Enter the Client ID , Client Secret. Proceed with the authentication and authorization process. !!! Note: Be sure to sign in with the Google Account that has the necessary permissions, as configured in the Google APIs & Services-> Credentials -> OAuth 2.0 Client IDs. This will automatically configure the PopImapTask's Mail Username and Mail Password.
If the domain is unverified, a warning message may appear. Click Advanced and choose to proceed:
Click on the Allow button:
!!!Note: Since the email address is required after obtaining the refresh token, the Mail Username field must be adjusted.
Enter your email address followed by a tilde (~) at the beginning of the Mail Username field.
Mail Username : <<your email address>>~<<what was before>>
For more information, see the general POP/IMAP Task description: POP/IMAP Task – CrushFTP Documentation Link
Add new attachment
Only authorized users are allowed to upload new attachments.
List of attachments
| Kind | Attachment Name | Size | Version | Date Modified | Author | Change note |
|---|---|---|---|---|---|---|
png |
allow_form.png | 132.3 kB | 2 | 13-May-2025 04:28 | krivacsz | |
png |
client_id_secret.png | 96.8 kB | 3 | 15-May-2025 07:06 | krivacsz | |
png |
consent_settings_1.png | 128.9 kB | 1 | 05-Dec-2023 05:32 | krivacsz | |
png |
consent_settings_2.png | 42.5 kB | 1 | 05-Dec-2023 05:32 | krivacsz | |
png |
create_consent.png | 108.6 kB | 1 | 05-Dec-2023 05:32 | krivacsz | |
png |
create_credentials.png | 181.1 kB | 2 | 05-Dec-2023 05:32 | krivacsz | |
png |
create_project.png | 25.9 kB | 1 | 05-Dec-2023 05:32 | krivacsz | |
png |
credential_config.png | 160.4 kB | 4 | 06-Jun-2025 05:27 | krivacsz | |
png |
credential_config_gdrive.png | 166.7 kB | 2 | 06-Jun-2025 07:36 | krivacsz | |
png |
g_api_services.png | 95.9 kB | 1 | 13-May-2025 01:59 | krivacsz | |
png |
gmail_api_enabled.png | 42.1 kB | 1 | 23-Apr-2025 10:00 | krivacsz | |
png |
not_verified_domain.png | 111.6 kB | 1 | 05-Dec-2023 05:32 | krivacsz | |
png |
oauth_consent.png | 49.1 kB | 1 | 05-Dec-2023 05:32 | krivacsz | |
png |
oauth_form.png | 61.3 kB | 1 | 05-Dec-2023 05:32 | krivacsz | |
png |
pop_imap_task.png | 134.8 kB | 1 | 14-May-2025 02:22 | krivacsz | |
png |
smtp_config.png | 50.7 kB | 2 | 13-May-2025 04:54 | krivacsz |
«
This particular version was published on 15-May-2025 05:19 by krivacsz.
G’day (anonymous guest)
Log in
CrushFTP11 | What's New
- WebInterface
- Server Admin
- User Manager
- Client Apps
- CrushBalance Load Balancer
- High Availability
- Self Registration
- Preferences
- Email Templates
- Restrictions
- Replication
- Banning
- Logging
- Encryption
- Alerts
- Folder Monitor
- Tunnels
- Syncs
- User Config
- Search Config
- Preview
- Misc
- Plugins
- Manage Shares
- PGP
- Telnet
- FAQ
- API
- Linux Install
- Virtual Linux Server
- Server Variables
- Google Authenticator and Microsoft Authenticator
- AS2 EDI
JSPWiki