Backblaze supports external integration through an HTTP-based REST API (Documentation Link
 ).
).1. Access through B2 REST API
#
See the B2 Native API Documentation⚠️ General restrictions: Backblaze Storage is not a traditional file system but an object storage service. What appears to be a folder is actually just a prefix in the object’s name. As a result, renaming folders is not supported. To move a folder, you must copy all the objects to the new location and then delete them from the original one.
B2 REST API does not support resumes on upload and MDTM(File modification time) changes. You can use the S3 connection endpoint as a workaround. 2. Access Through S3 REST API Link
⚠️ Proxy Configuration: If your server accesses the internet through a proxy, make sure to whitelist the following domains for Backblaze Authentication and Drive access: api.backblazeb2.com
Create App Keys on Backblaze:
1.) Go to the Backblaze website: Link
2.) Log in to your Backblaze B2 Cloud Storage account.
3.) Navigate to the Buckets section (under B2 Cloud Storage).
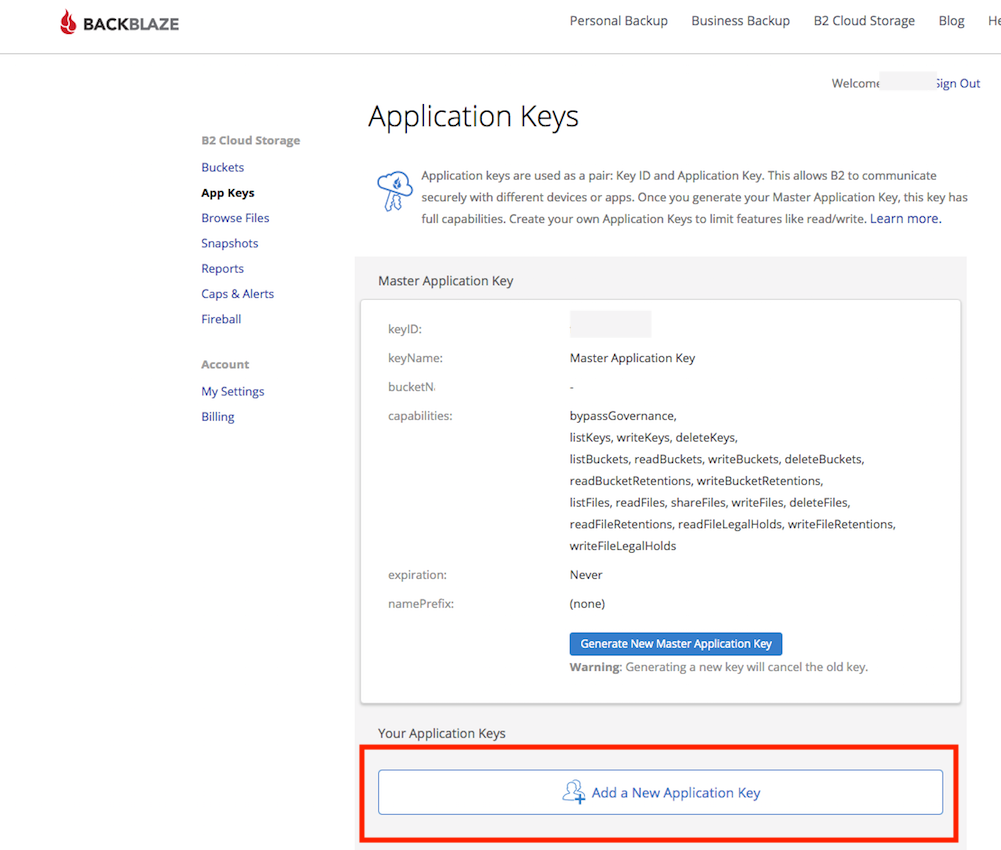
4.) Click on App Keys in the left-hand menu.
5.) Click Add a New Application Key.
6.) Configure the key:
• Name your key.
• Set permissions (read/write).
• (Optional) Restrict the key to a specific bucket or folder.
7.) Click Create New Key.
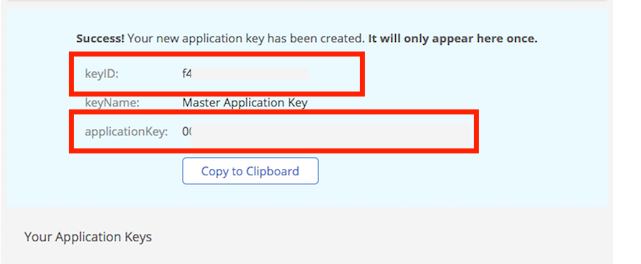
8.) Copy and securely store the Key ID and Application Key. ⚠️ The Application Key is shown only once after creation.
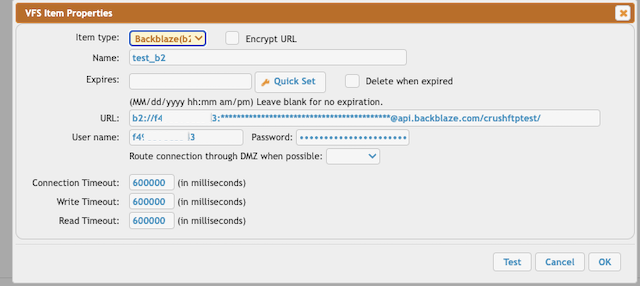
Use the KeyId as User name and the Application Key as Password. Also, make sure to provide the corresponding Bucket Name for access.
The URL pattern looks like this:
b2://<<KeyId>>:<<applicationKey>>@api.backblazeb2.com/<<Bucket Name>>/
2. Access through S3 REST API
#
See the BackBlaze S3-Compatible API Documentation
Create App Keys on Backblaze with S3 Permissions:
1.) Go to BlackBlaze Link
and sign in to your Backblaze B2 Cloud Storage account.2.) In the left-hand menu, go to Buckets, then click on App Keys.
3.) Click Add a New Application Key.
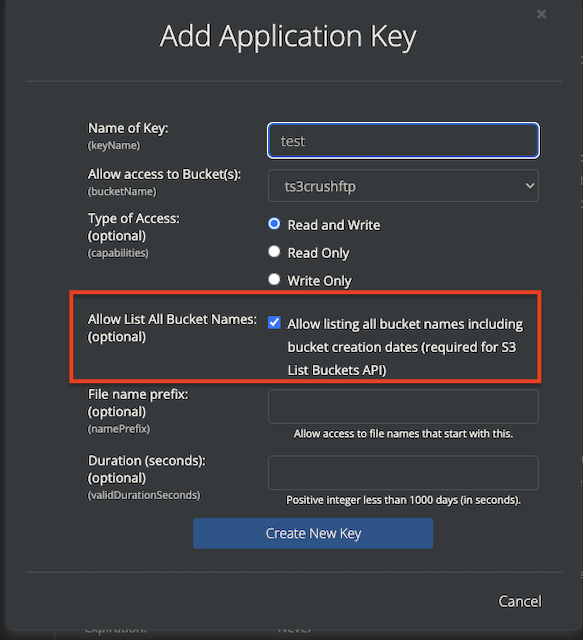
4.) In the key creation form:
• Name your key.
• Under Type of Access, select the appropriate permissions (e.g., read-only or read/write).
• ⚠️ Important: Enable the option for S3 Compatible API access by checking the “Allow access to S3-compatible API” checkbox.
• Optionally, restrict access to a specific bucket.
5. Click Create New Key.
6. Copy and securely store both the Key ID and Application Key. ⚠️ The Application Key is shown only once after creation.
Open the bucket settings and use the S3 Endpoint URL for S3 connection.
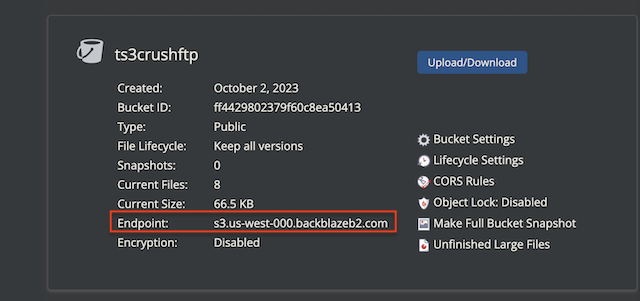
Use the KeyId as User name and the Application Key as Password. Also, make sure to provide the corresponding Bucket Name for access.
The URL Pattern looks like this (use the S3 Endpoint URL):
s3://<<KeyId>>:<<applicationKey>>@s3.us-west-000.backblazeb2.com//<<Bucket Name>>/
⚠️ Proxy Configuration: If your server accesses the internet through a proxy, make sure to whitelist the following domains for Backblaze Authentication and Drive access: s3.us-west-000.backblazeb2.com
Required flags:
SHA256 enabled on signing (Signing Version 4) and Include SHA256 to request headers (Signing Version 4 related) flags must be checked.
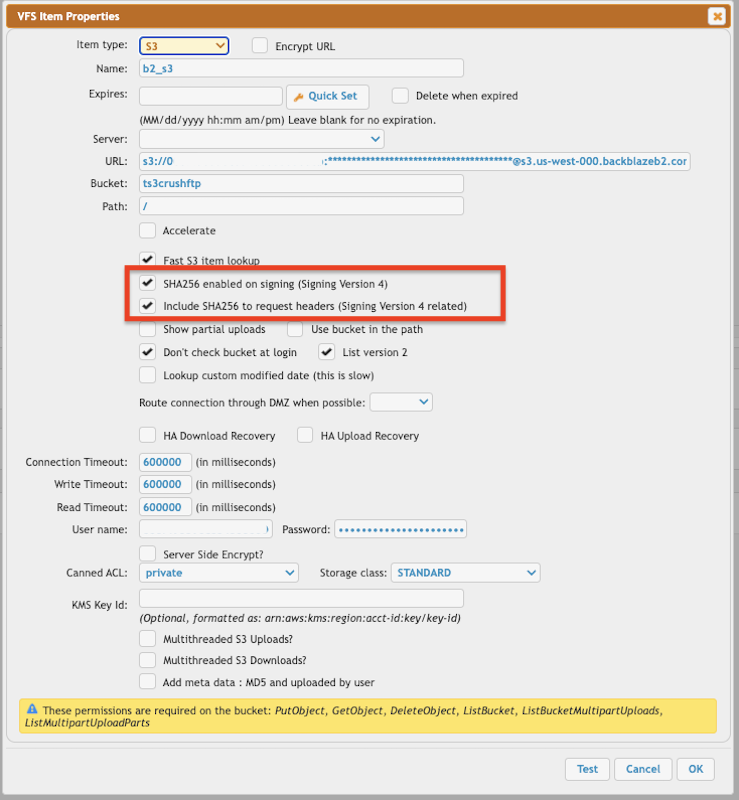
More info about s3 VFS configuration: S3 integration
Add new attachment
Only authorized users are allowed to upload new attachments.
List of attachments
| Kind | Attachment Name | Size | Version | Date Modified | Author | Change note |
|---|---|---|---|---|---|---|
png |
b2_app_key.png | 268.4 kB | 1 | 05-Dec-2023 05:32 | Halmágyi Árpád | |
png |
b2_application_key_s3_allow.pn... | 146.1 kB | 1 | 05-Dec-2023 05:32 | krivacsz | |
png |
b2_reg_result.png | 50.0 kB | 1 | 05-Dec-2023 05:32 | Halmágyi Árpád | |
png |
b2_s3_endpoint.png | 97.7 kB | 1 | 05-Dec-2023 05:32 | krivacsz | |
png |
b2_s3_vfs_settings.png | 169.9 kB | 1 | 05-Dec-2023 05:32 | krivacsz | |
png |
b2_vfs_settings.png | 70.5 kB | 1 | 05-Dec-2023 05:32 | krivacsz |
«
This page (revision-47) was last changed on 20-May-2025 08:27 by krivacsz
G’day (anonymous guest)
Log in
CrushFTP11 | What's New
- WebInterface
- Server Admin
- User Manager
- Client Apps
- CrushBalance Load Balancer
- High Availability
- Self Registration
- Preferences
- Email Templates
- Restrictions
- Replication
- Banning
- Logging
- Encryption
- Alerts
- Folder Monitor
- Tunnels
- Syncs
- User Config
- Search Config
- Preview
- Misc
- Plugins
- Manage Shares
- PGP
- Telnet
- FAQ
- API
- Linux Install
- Virtual Linux Server
- Server Variables
- Google Authenticator and Microsoft Authenticator
- AS2 EDI
JSPWiki