Add new attachment
Only authorized users are allowed to upload new attachments.
List of attachments
| Kind | Attachment Name | Size | Version | Date Modified | Author | Change note |
|---|---|---|---|---|---|---|
png |
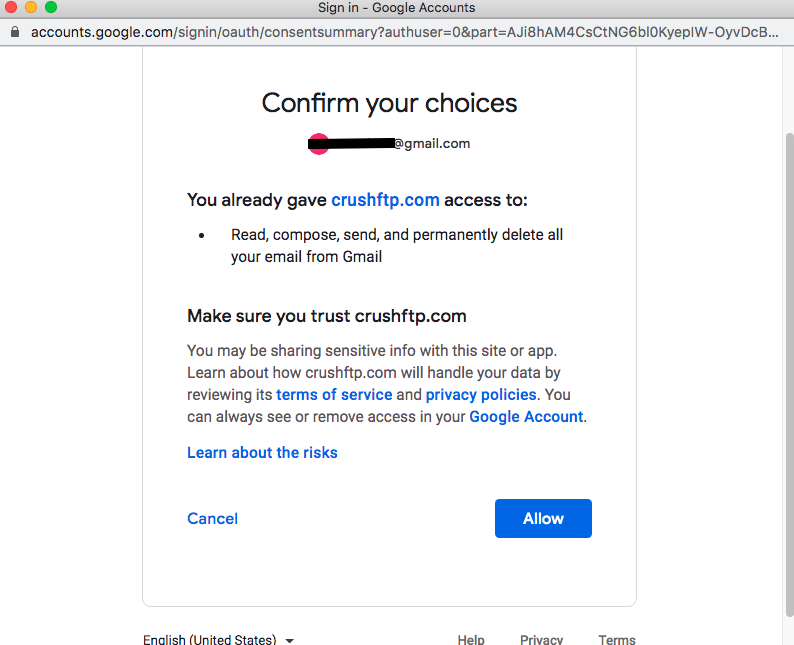
allow_form.png | 132.3 kB | 2 | 13-May-2025 04:28 | krivacsz | |
png |
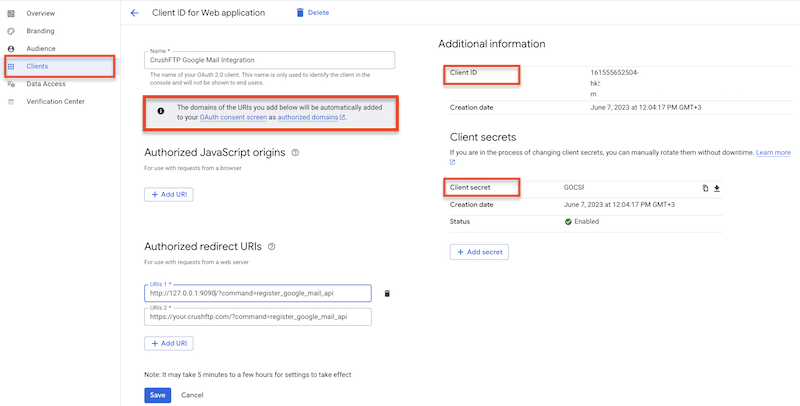
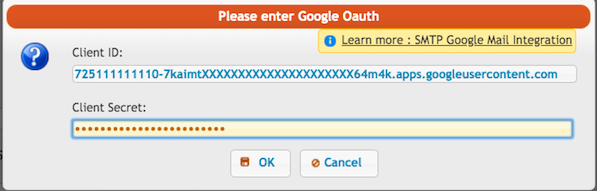
client_id_secret.png | 96.8 kB | 3 | 15-May-2025 07:06 | krivacsz | |
png |
consent_settings_1.png | 128.9 kB | 1 | 05-Dec-2023 05:32 | krivacsz | |
png |
consent_settings_2.png | 42.5 kB | 1 | 05-Dec-2023 05:32 | krivacsz | |
png |
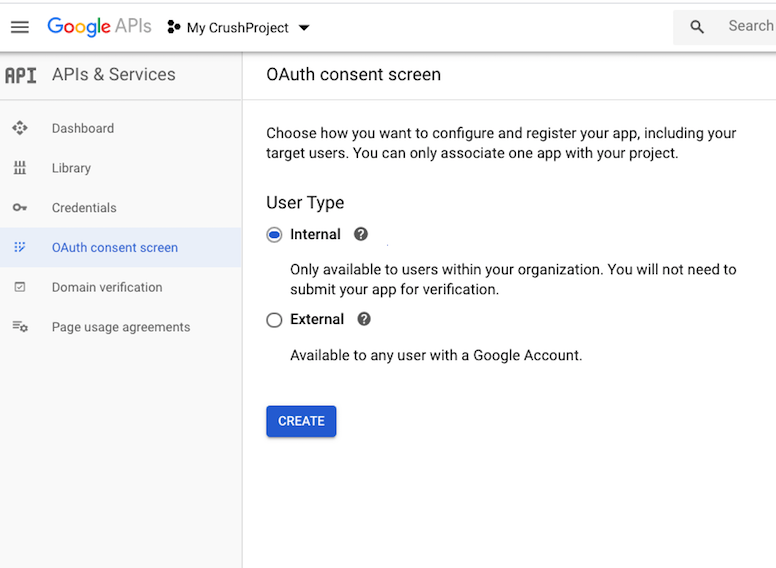
create_consent.png | 108.6 kB | 1 | 05-Dec-2023 05:32 | krivacsz | |
png |
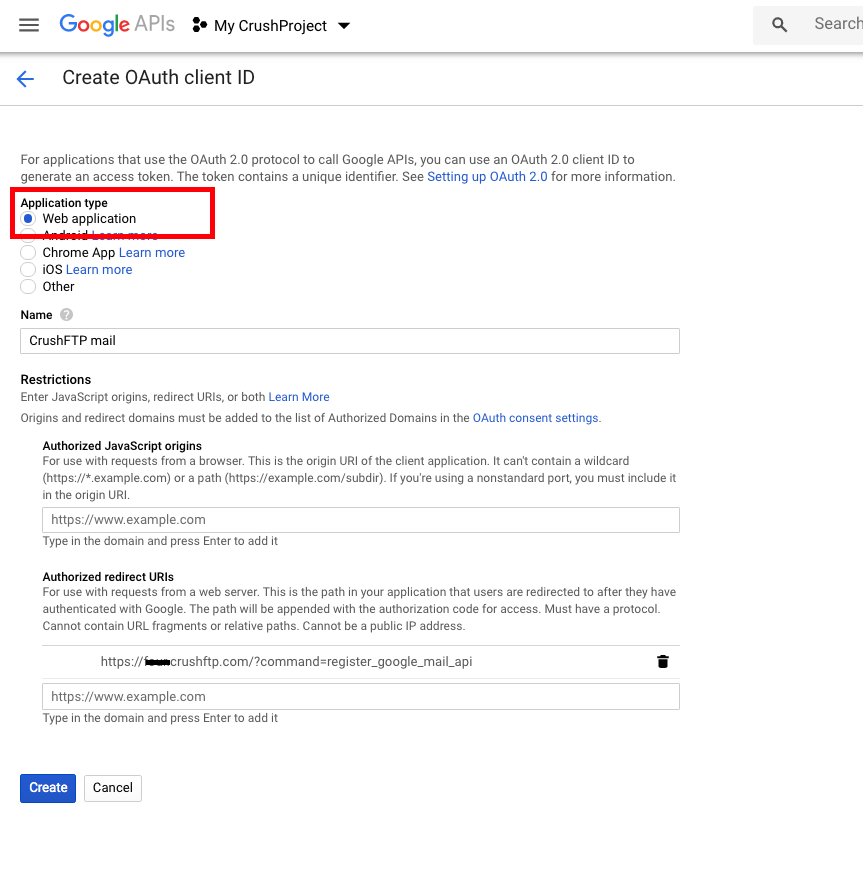
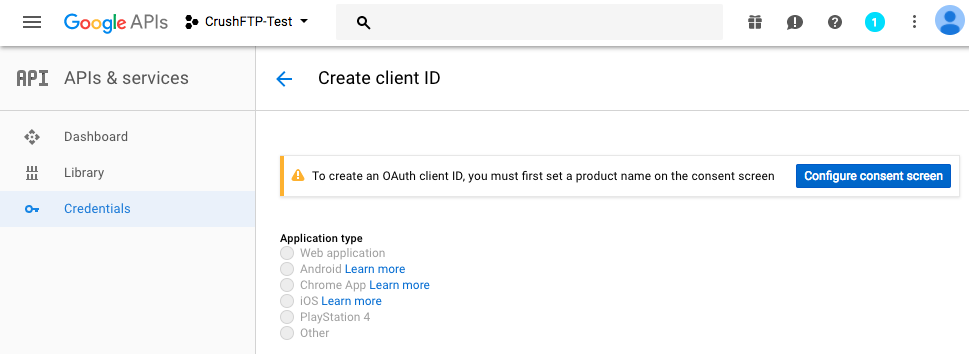
create_credentials.png | 181.1 kB | 2 | 05-Dec-2023 05:32 | krivacsz | |
png |
create_project.png | 25.9 kB | 1 | 05-Dec-2023 05:32 | krivacsz | |
png |
credential_config.png | 183.3 kB | 3 | 13-May-2025 03:01 | krivacsz | |
png |
credential_config_gdrive.png | 172.3 kB | 1 | 15-May-2025 05:00 | krivacsz | |
png |
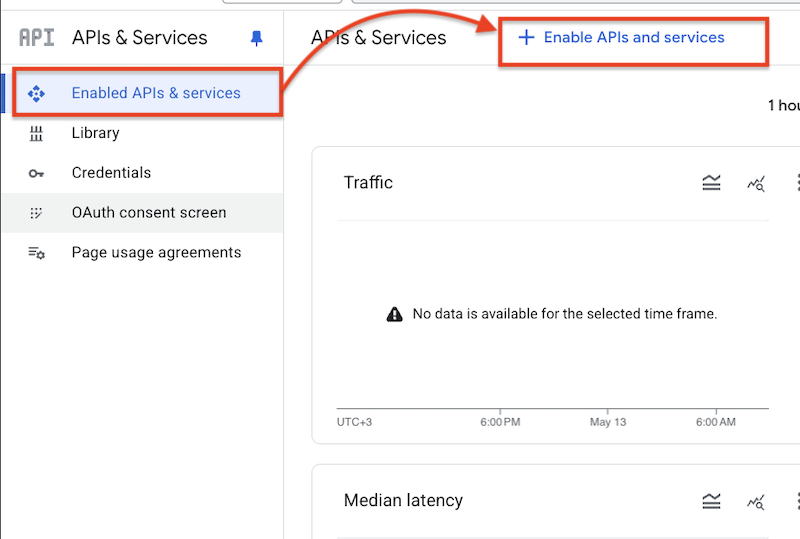
g_api_services.png | 95.9 kB | 1 | 13-May-2025 01:59 | krivacsz | |
png |
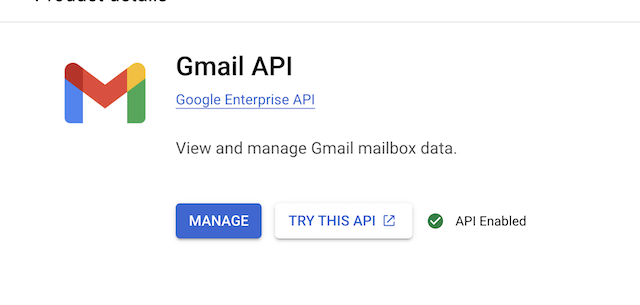
gmail_api_enabled.png | 42.1 kB | 1 | 23-Apr-2025 10:00 | krivacsz | |
png |
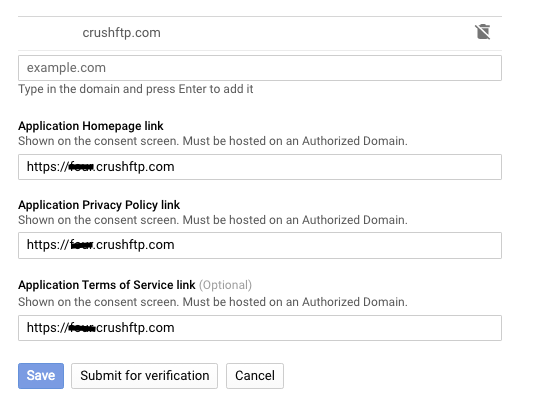
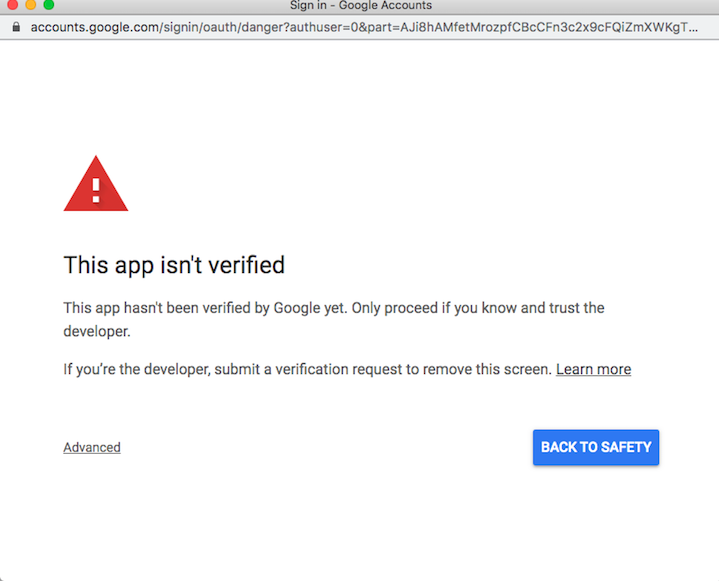
not_verified_domain.png | 111.6 kB | 1 | 05-Dec-2023 05:32 | krivacsz | |
png |
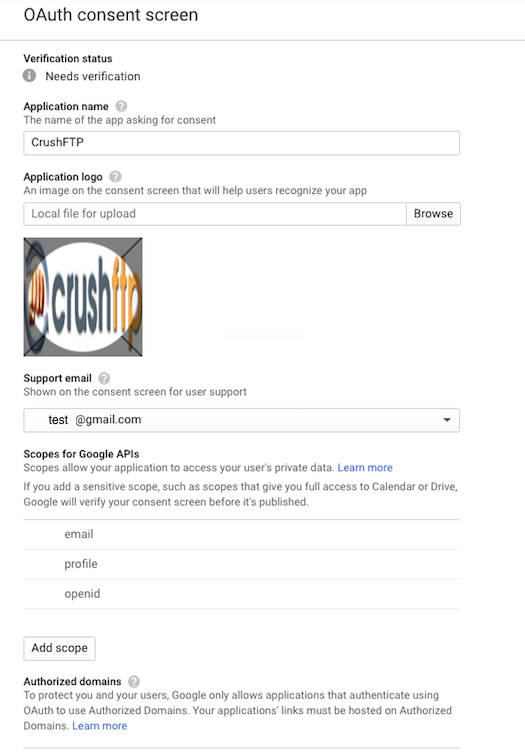
oauth_consent.png | 49.1 kB | 1 | 05-Dec-2023 05:32 | krivacsz | |
png |
oauth_form.png | 61.3 kB | 1 | 05-Dec-2023 05:32 | krivacsz | |
png |
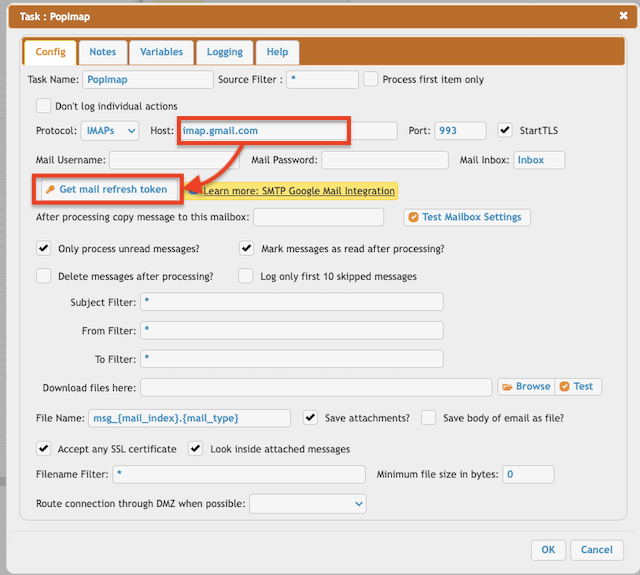
pop_imap_task.png | 134.8 kB | 1 | 14-May-2025 02:22 | krivacsz | |
png |
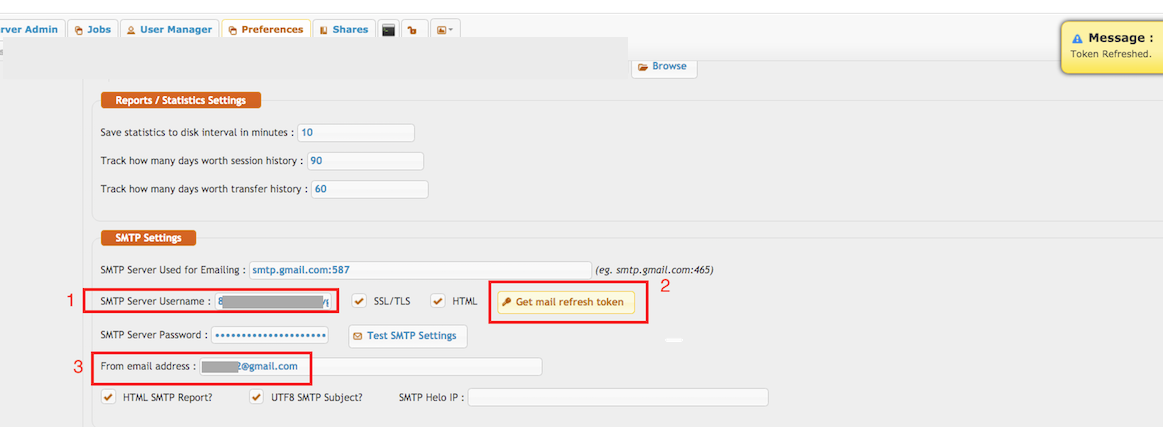
smtp_config.png | 50.7 kB | 2 | 13-May-2025 04:54 | krivacsz |
This page (revision-96) was last changed on 23-May-2025 04:06 by krivacsz
This page was created on 05-Dec-2023 05:32 by krivacsz
Only authorized users are allowed to rename pages.
Only authorized users are allowed to delete pages.
Outgoing links
SMTP Google Mail Integration
- General Settings
- SMTP Google Mail Integration/allow_form.png
- SMTP Google Mail Integration/client_id_secret.png
- SMTP Google Mail Integration/create_credentials.png
- SMTP Google Mail Integration/credential_config.png
- SMTP Google Mail Integration/g_api_services.png
- SMTP Google Mail Integration/gmail_api_enabled.png
- SMTP Google Mail Integration/not_verified_domain.png
- SMTP Google Mail Integration/oauth_form.png
- SMTP Google Mail Integration/pop_imap_task.png
- SMTP Google Mail Integration/smtp_config.png
| Version | Date Modified | Size | Author | Changes ... | Change note |
|---|---|---|---|---|---|
| 96 | 23-May-2025 04:06 | 6.606 kB | krivacsz | to previous | |
| 95 | 19-May-2025 09:58 | 6.594 kB | krivacsz | to previous | to last | |
| 94 | 19-May-2025 09:28 | 6.597 kB | krivacsz | to previous | to last | |
| 93 | 19-May-2025 09:28 | 6.594 kB | krivacsz | to previous | to last | |
| 92 | 15-May-2025 07:13 | 6.61 kB | krivacsz | to previous | to last | |
| 91 | 15-May-2025 05:19 | 6.204 kB | krivacsz | to previous | to last | |
| 90 | 14-May-2025 02:35 | 6.2 kB | krivacsz | to previous | to last | |
| 89 | 14-May-2025 02:29 | 6.107 kB | krivacsz | to previous | to last | |
| 88 | 14-May-2025 02:23 | 6.109 kB | krivacsz | to previous | to last | |
| 87 | 14-May-2025 02:15 | 6.058 kB | krivacsz | to previous | to last | |
| 86 | 14-May-2025 02:10 | 5.646 kB | krivacsz | to previous | to last | |
| 85 | 14-May-2025 02:08 | 5.641 kB | krivacsz | to previous | to last | |
| 84 | 14-May-2025 02:05 | 4.943 kB | krivacsz | to previous | to last | |
| 83 | 14-May-2025 02:02 | 5.535 kB | krivacsz | to previous | to last | |
| 82 | 14-May-2025 02:00 | 5.308 kB | krivacsz | to previous | to last | |
| 81 | 14-May-2025 01:58 | 5.514 kB | krivacsz | to previous | to last |
«
This page (revision-96) was last changed on 23-May-2025 04:06 by krivacsz
G’day (anonymous guest)
Log in
CrushFTP11 | What's New

- WebInterface
- Server Admin
- User Manager
- Client Apps
- CrushBalance Load Balancer
- High Availability
- Self Registration
- Preferences
- Email Templates
- Restrictions
- Replication
- Banning
- Logging
- Encryption
- Alerts
- Folder Monitor
- Tunnels
- Syncs
- User Config
- Search Config
- Preview
- Misc
- Plugins
- Manage Shares
- PGP
- Telnet
- FAQ
- API
- Linux Install
- Virtual Linux Server
- Server Variables
- Google Authenticator and Microsoft Authenticator
- AS2 EDI
JSPWiki