CrushSync is an enterprise only feature. It provides real time file synchronizations through CrushFTP. The client runs on the local machine monitoring the specified folders. When a change is detected, the change is propagated to the CrushFTP server, and any other clients subscribed to that folder now get those same changes. Only the changed parts of large files are sent, and bandwidth acceleration can be used as well. Client configurations can be branded, localized, and pre-configured for deployment. The client is launched as an automatically updating application over a web connection. You as the server administrator control when you want to update the application for end users.
CrushSync Comparison with some other similar products.
Setup Guide: Synching and Revision Tracking#
First you need to configure a folder in the user manager that has synchronization tracking enabled on it. Then on a folder item, give it full permissions.
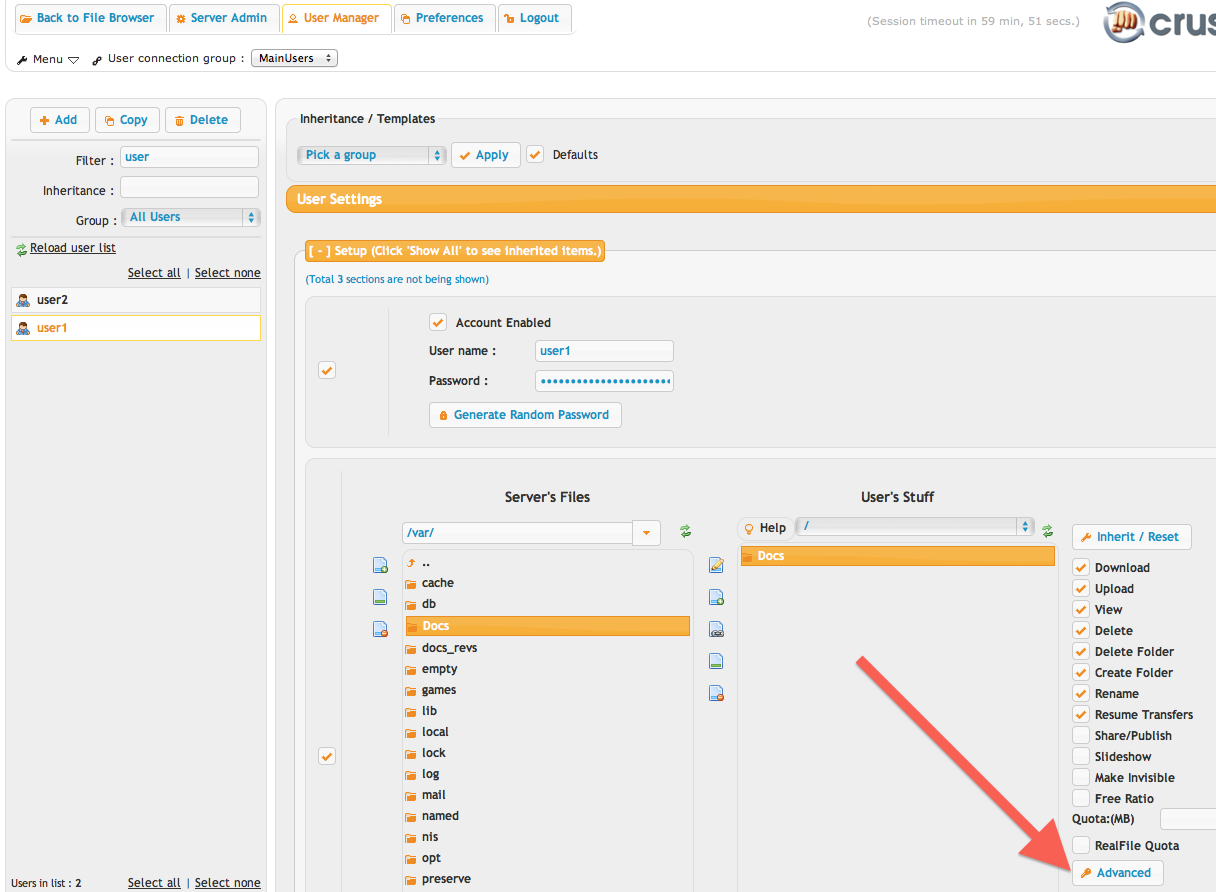
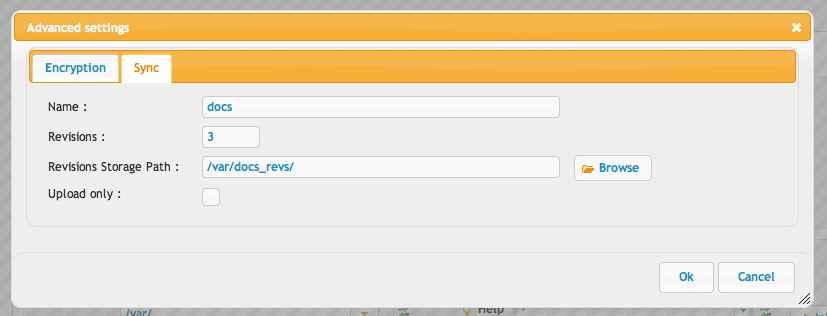
Then click the Advanced button to open the panel to configure the sync options. Its recommended to do at least 3 revisions. If a conflicting edit was done on the same file by two people, it uses the revisions to pull back prior versions so that the users can self resolve the issue.
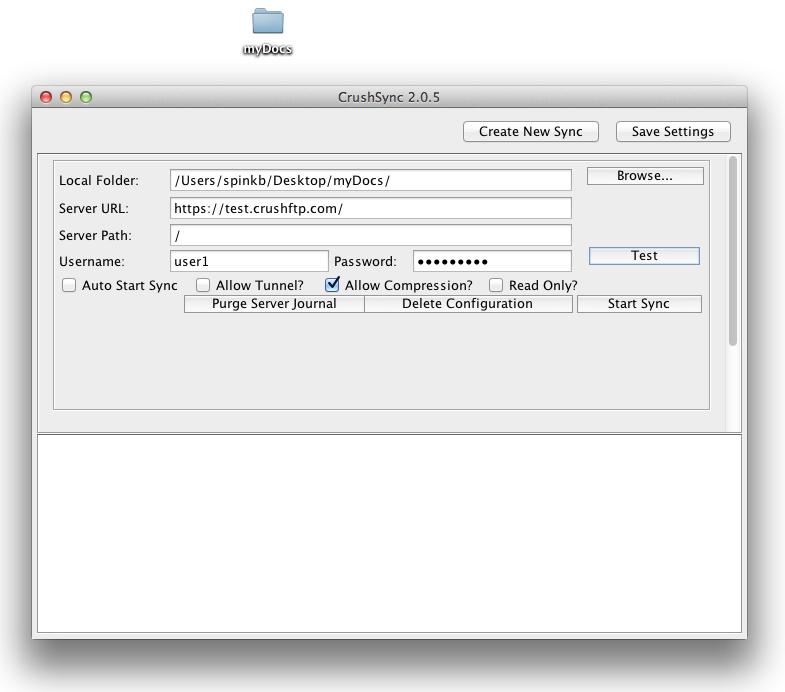
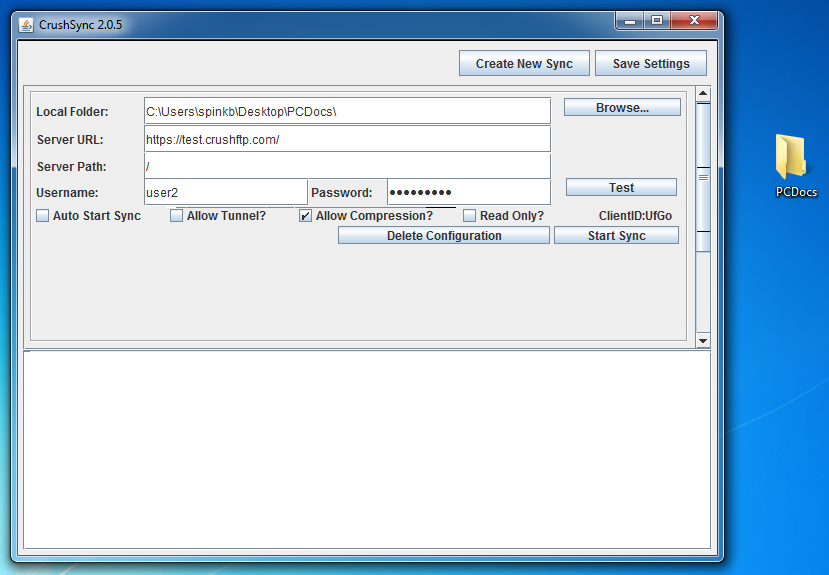
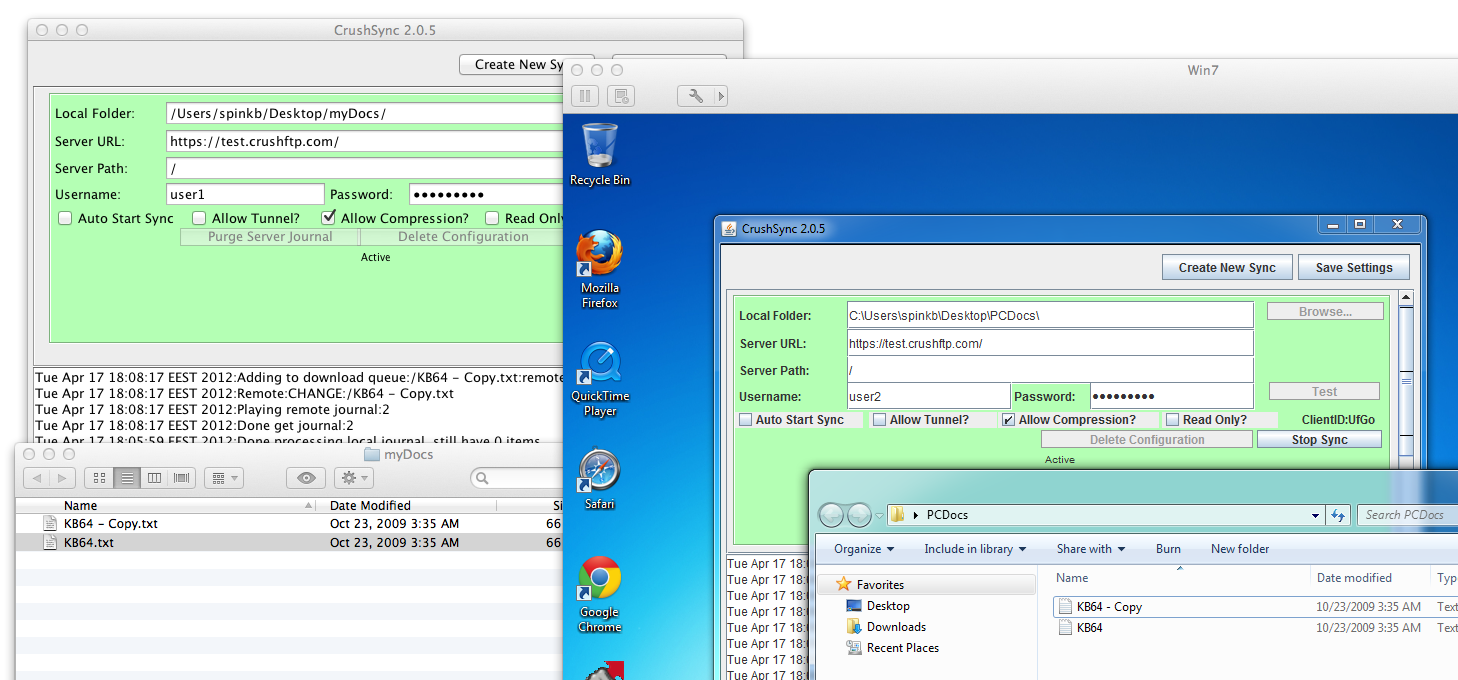
This configuration is the same on both user1 and user2 in the example.
Giving Access to the Client#
Before users will be able to download and run CrushSync, you need to go into the user manager, WebInterface section, Buttons section and add the two new buttons for 'Download CrushSync', and 'Manage Syncs'.
Starting the Client#
When a user is logged into the WebInterface, you will see an icon next to the folders and files that are being synched.
Then you can click the button to download the sync client if it has been added onto your user in the User Manager. (Prior step.)
You will be asked for two passwords. The first is your current account password for the WebInterface. The second is the password for managing the sync agent. Use something secure, this password will be needed every time you open the 'Sync Manager' to control your sync agent(s).
On windows, you will have an icon in your system tray for the sync agent and on OS X you will have an icon in your menubar. There is no management UI on the machine, you do all of that through the WebInterface in the 'Sync Manager'.
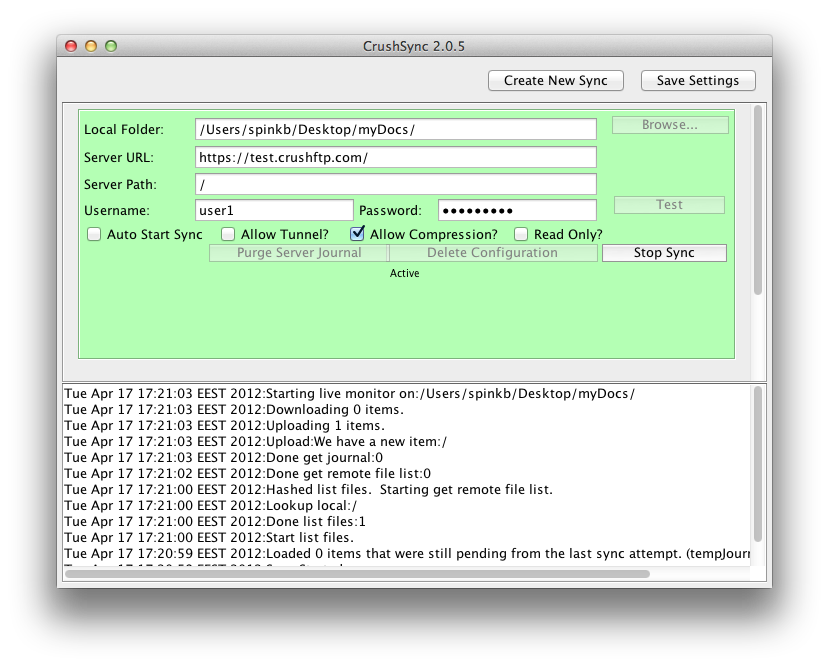
Configuring the Client#
You can configure everything in the client.
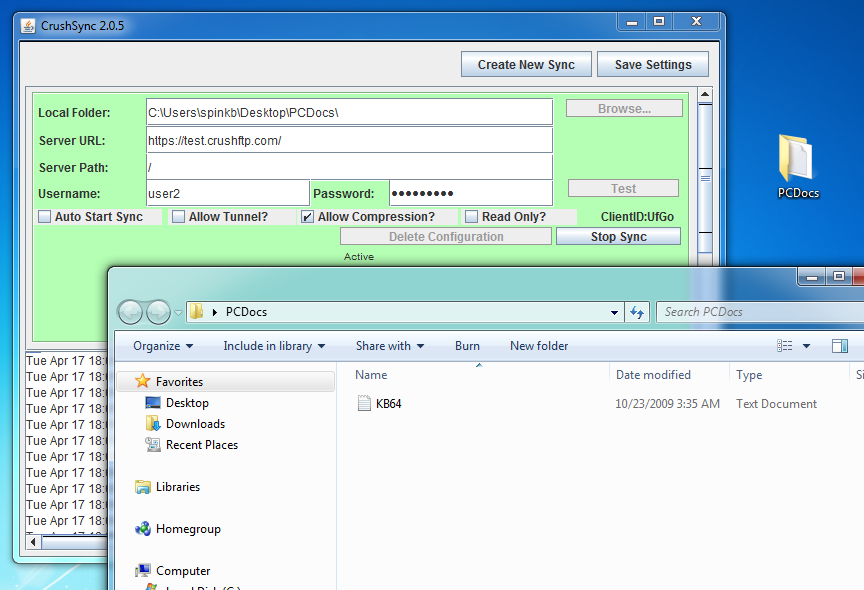
There needs to be a local folder configured for synchronization, as well as the server path. Typically this is going to just be a single slash unless you are only synching to a sub directory of a user.
The path to the server location must always be the same across multiple accounts. So user1 can't have a server path of /myfiles/ and user2 have a path of /mydocuments/. They both must be the same.
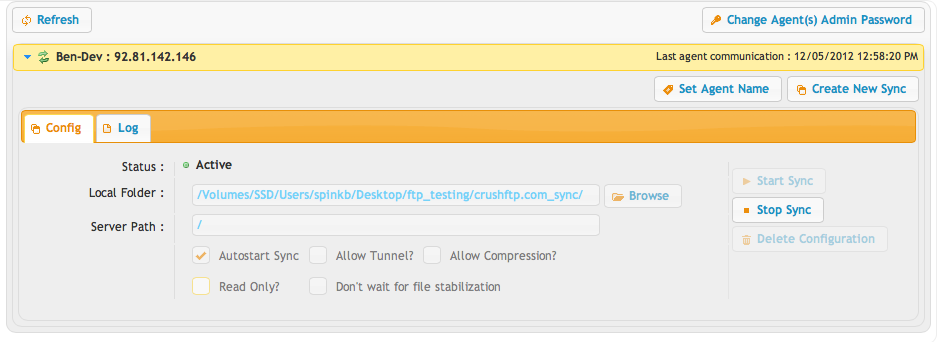
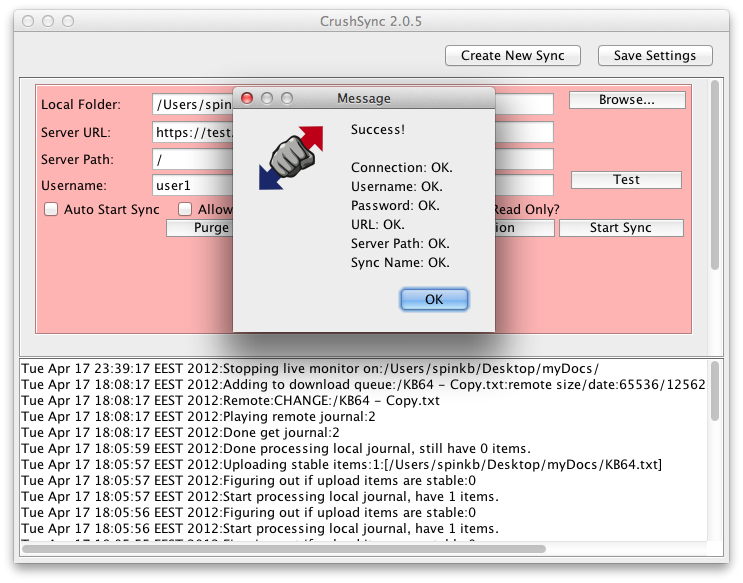
Starting the Sync#
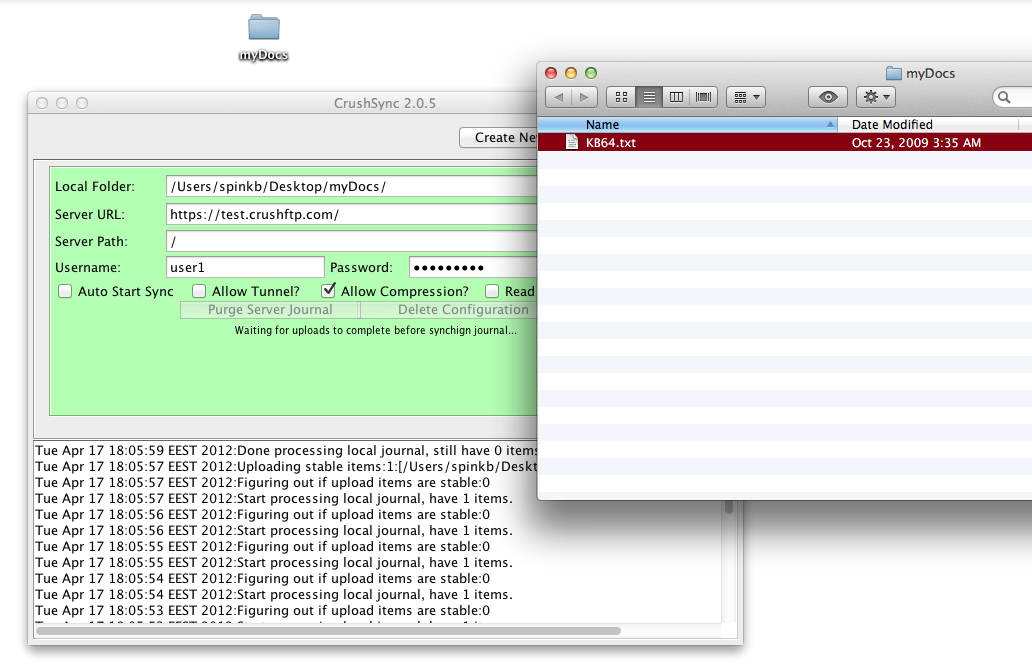
Now you can click 'Start Sync' to starting things off. It will compare your current files with the server, and look for any changes that have occurred while you were offline.
Once all comparisons are done, it will sit idle in an 'Active' green window state. The realtime file monitor is watching for any changes occurring in the folder you have configured. Any changes, renames, deletes, etc will then be propagated to the CrushFTP server so that other CrushSync clients can replicate them locally.
Customizing the Sync#
NOTE!! You will need CrushFTP 6.4.0_81 and above for the below instructions to work correctly.
You can give the client a custom name, so it doesn't have to be called CrushSync
When you add the download Sync client button in the UserManager, UserName, WebInterface, Buttons section, you can specify a name for it, and the given name will be used instead of the CrushSync name.
Customizations are made in the User Manager, WebInterface, custom javascript section. Add these example lines in there. CrushSync localizations.syncAppName = 'MySyncName';
It can't run as a service, but it can run at startup when you login to the user account. There is a menu option in the systray to help with that part.
That is it. All references in what it downloads, the service name, the window titles, etc will be MySyncName.
The manageSyncs interface is generic that it just labels itself as Manage Syncs and not CrushSync. So no changes are needed there. When you add the buttons, you can label the buttons however you like. But don't change their action values.
You can install CrushSync as a service to have an unattended machine running the sync. Use a copy of the "service" folder from an installed CrushFTP machine. Modify the wrapper.conf file to the below:
wrapper.java.command=java
wrapper.working.dir=C:\\Users\\Username\\CrushSync\\
wrapper.java.app.mainclass=com.crushftp.Daemon
wrapper.console.visible=false
wrapper.console.title=CrushSync

wrapper.ntservice.name=CrushSync
wrapper.ntservice.displayname=CrushSync
wrapper.ntservice.description=CrushSync

wrapper.tray=false

wrapper.logfile.format=LPNTM\r\n
wrapper.logfile=wrapper.log
wrapper.logfile.maxsize=10m
wrapper.logfile.maxfiles=10

wrapper.on_exit.0=SHUTDOWN
wrapper.on_exit.default=RESTART

wrapper.java.classpath.1=CrushSync.jar
wrapper.java.additional.1=-Xmx512m
Then install the service with:
java -jar wrapper.jar -i wrapper.conf
This assumes a CrushSync folder already exist from running the CrushSync.jnlp file one time.
Running on Linux#
Running via the command line is possible too.
You need the prefs.xml file from a Windows/OSX machine first that you have launched CrushSync at least one time on.
Copy this to the OS home folder for the user, then a subdirectory called 'CrushSync'.
~/CrushSync/prefs.XML
This is VERY important...you must modify this prefs.XML file changing the "clientid" in it to something unique. Every agent must have a unique client ID.
Then copy over CrushSync.jar file too from a crush install to this same location. You will find it in your WebInterface folder, CrushSync folder.
Now launch the daemon with:
java -cp ~/CrushSync/CrushSync.jar com.crushftp.DaemonIt will read in its prefs and connect to the server. Now you configure everything from the sync manager.
Add new attachment
List of attachments
| Kind | Attachment Name | Size | Version | Date Modified | Author | Change note |
|---|---|---|---|---|---|---|
png |
config_user1_osx.png | 52.2 kB | 1 | 09-Oct-2016 18:14 | Ben Spink | |
png |
config_user2_win.png | 109.5 kB | 1 | 09-Oct-2016 18:14 | Ben Spink | |
png |
crushsync-download_osx.png | 49.6 kB | 1 | 09-Oct-2016 18:14 | Ben Spink | |
png |
crushsync-download_win.png | 37.0 kB | 1 | 09-Oct-2016 18:14 | Ben Spink | |
png |
crushsync.png | 56.0 kB | 3 | 09-Oct-2016 18:14 | Ben Spink | |
png |
crushsync_active.png | 99.9 kB | 1 | 09-Oct-2016 18:14 | Ben Spink | |
png |
crushsync_osx_win.png | 312.7 kB | 1 | 09-Oct-2016 18:14 | Ben Spink | |
png |
file_upload_osx.png | 124.0 kB | 1 | 09-Oct-2016 18:14 | Ben Spink | |
png |
saving_shortcut_app_osx.png | 33.2 kB | 1 | 09-Oct-2016 18:14 | Ben Spink | |
png |
sync_webinterface.png | 47.0 kB | 1 | 09-Oct-2016 18:14 | Ben Spink | |
png |
test_sync.png | 133.2 kB | 1 | 09-Oct-2016 18:14 | Ben Spink | |
png |
usermanager_vfs_sync.png | 132.0 kB | 2 | 09-Oct-2016 18:14 | Ben Spink | |
png |
vfs_sync.png | 32.7 kB | 1 | 09-Oct-2016 18:14 | Ben Spink | |
png |
windows_synched_file.png | 133.1 kB | 1 | 09-Oct-2016 18:14 | Ben Spink |
OLD WIKI!!!#
New: CrushFTPv9 #
#
OLD WIKI!!!#
CrushFTP8 | What's New
- WebInterface
- Server Admin
- User Manager
- Temp Accounts
- CrushSync
- CrushFTPDrive
- High Availability
- Self Registration
- Preferences
- IP Servers
- General Settings
- Email Attachment Redirector
- WebInterface
- Email Templates
- Restrictions
- Replication
- Banning
- Logging
- Encryption
- Alerts
- Folder Monitor
- Tunnels
- Syncs
- User Config
- Search Config
- Preview
- Misc
- Plugins
- FAQ
- API
- Linux Install
- Virtual Linux Server
- Server Variables